In my last blog I talked about the drudgery of doing work on a production basis. For the life of me I could never understand why the junior high school shop curriculum suggested we incorporate a mass production project in our classes. With my classes limited to a semester in length I never included a mass production unit in my curriculum. I always thought it was better to challenge my kids to be creative and explore what the tools could do rather than limit them to being the second sander on the third shift --- boring!
That being said, to produce the required number of shelves needed for our craft fair display, mass production was the only way to go. Here's the start of the process:
 |
| Parts is Parts |
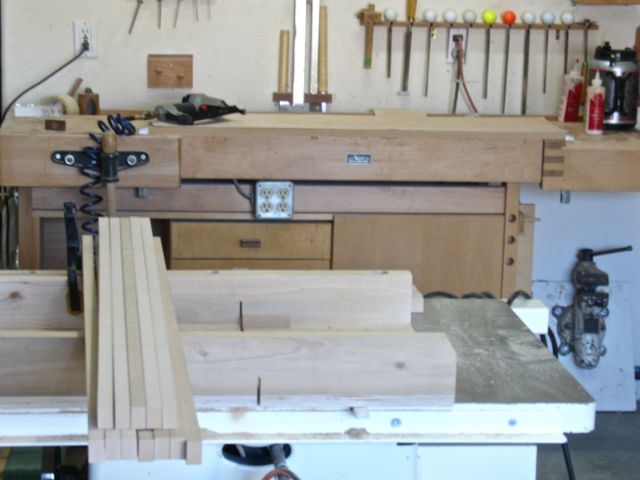
These are the required pieces to make two displays that will be 4' wide and 5' tall. The Baltic Birch pieces on the right side and top are for the hinged ladder assemblies that will hold the unit together but more on that in another blog. For this blog we'll concentrate on making 8 shelves, 11" wide and 47" long. They'll be made of the MDF you see on the left side. A number of years ago, Larry of
A. G. Yule and Sons Custom Woodworking here in Las Vegas gave a demonstration at one of our monthly meetings on how to make a torsion box. These are great ways to make light weight and stable shelves or table tops. The process is similar to how wings for airplanes are constructed. You'll see some pictures of my assembly tables which I made after his demonstration. This was the perfect solution for what we needed; fairly quick, fairly cheap, light in weight, and stable.

Here's the process to make one shelf, many people are always curious to know how long a process takes. I didn't bother keeping track of the time required to cut all of the pieces to size but a couple of hours would be a good guess. To assemble and clamp one shelf took less than 10 minutes so it's not bad at all. First up was to glue/nail one long piece to the edge of the shelf skin. It helps to secure that piece between bench dogs, you know how slippery the glue can be.
After that, the end pieces were glued/nailed on one at a time. It helps to have the back of the skin supported, I used the other long rib you can see at the lower left.
Part of the initial preparation was to layout the locations of the crosspieces (inner ribs) on the outer edge of the long pieces. Those lines are drawn on the face of the shelf:
The next problem was how to hold everything in alignment while gluing and nailing those inside ribs to the shelf skin. I solved that by drawing the center line for those pieces on the underside of the shelf skin.
Then glue was applied to the rib and "eyeballed" to center on that line.

This is probably not OSHA approved but by putting pressure on the inner rib against the long rib already attached to the shelf skin and positioning the gun as shown I was able to set that first nail.
Once the first nail was shot in, the whole assembly is laid flat on the bench and the remaining nails are shot in. This process was repeated until all three of the inner ribs were attached.
Next up was adding the final long rib to this assembly. Again, it helps to clamp that between the bench dogs. Once the glue is applied things get pretty slippery!
Finally, the entire piece is flipped over and the lines locating the inner ribs are drawn on the face of the second skin.
Glue is applied to every rib. I tried to keep the glue line closest to the inside of the structure to (hopefully) control some of the squeeze out. Thankfully, it just got into the low 90's this morning so I had plenty of time to nail things down before the heat caused the glue to skin over. As insurance though I decided it would be prudent to clamp every one of the shelves together as soon as they were nailed up. This meant removing the clamps as each new shelf was complete but I believe this will help everything stay glued. It was good to see fresh glue ooze out of the seams as the clamps were applied.
 |
| It Is Finished! |
Here you can see my assembly table also made torsion box style. The beauty of having two of them is not only that they're lighter but mainly having the flexibility to separate them as needed for clamping is great. This also comes in handy when you're clamping a face frame to a cabinet box. No nails in my work!
Well, hope this helps you should you ever need to make light weight shelves. These are going to be paint grade so MDF was a good choice for the skins. You could use the MDF and veneer them if able to do that technique. Another option would be to use a good grade of cabinet quality plywood to make these. To clean up the edges these will be run on the tablesaw, that way I can true them all to the exact, same size.