Wednesday, December 29, 2010

Got a Haunch, not a Hunch!

I spent this morning fine tuning the mortise and tenon joints for the sides of the tool chest.  The way I work is to use the table saw and mortiser for the beginning stages and then hand tools and quiet work to do the final fitting.  Sometimes you luck out on cutting the tenon cheeks but usually you have to pare them down for that perfect fit.  Through the years though I've learned that perfection and woodworking rarely go hand in hand.  In the past, I've used a chisel or rabbet plane to work on the tenon cheeks and it was okay.  Recently I learned of another method:


This is by using a Stanley #71 Router plane.  That's right, this is one router you don't have to plug in!  This model dates somewhere in the 40's and I really enjoy working with it.  The trick was to take a scrap piece of wood that is the same thickness as what you're working on to support both sides of the plane.  This method insures that the cheek will be even, sometimes a chisel will cut a slight angle so this gives more control.  This also gives a good view of the haunch cut on the end of the tenon.  Here's another view of it:


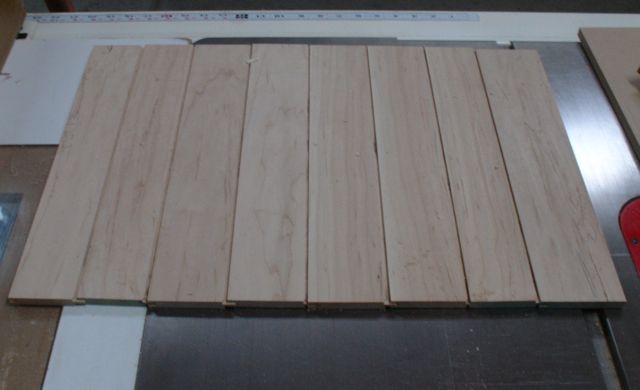
The purpose of a haunch is to prevent the piece from twisting.  I created the groove on the inside of these pieces with a dado head on the tablesaw.  This is where the Maple panel will float in.  You can see how the tenon was notched so that only a small portion of it goes to the top of the piece.  It's a pretty common method of making a frame and panel piece.  In retrospect, I probably should have made two tenons as they are pretty wide but I think it'll work out fine.
Another thing I realized today is that Alder, although classified as a hardwood, is pretty soft.  Trimming with chisels proved that so I'll have to hone them well before starting the dovetails for the drawers.  It's funny that a soft wood is harder to cut than a hardwood -- seems kind of backwards!  In practice chisel work on softer woods like Alder or Pine is more difficult because the wood fibers will "smush" rather than cut cleanly unless the chisel is extremely sharp.  Anxious to see how the Bloodwood works, that's where the half blind dovetail pins come in, the tails will be the Alder and sides of the drawers.
Keep learning and keep your chisel sharp!!

Monday, December 27, 2010

Progress on the Tool Chest

As I mentioned in my last blog I'm starting to build a chest for my carving chisels.  I do need a safe place to store them as they sometimes fall out of the leather tool rolls I'm currently using.  Since the economy has slowed down with paying jobs being scarce, this will keep me in the shop, allow me to utilize odd pieces of material, and most importantly, give me a chance to work on new skills and hone the ones I have.
In many traditionally built pieces the back is made of solid wood, contemporary design has us making backs from plywood where you don't have to worry about contraction and expansion of the wood across the grain with changes in the humidity.  I had a short length of 8/4 Maple which I re-sawed and turned into several pieces measuring 3/8" thick and about 3" wide.  Here's the pictorial sequence of how I formed tongue and groove joints on these to turn them into my floating panel for the back of the chest.

First step was to clamp a piece of MDF to the table saw, run a rip blade through it and cut a 1/8" groove in the center of one edge of each board.  This was cut 1/4" deep.  The piece of MDF is there so the piece won't fall into the slot for the blade on the insert -- much safer this way.


Next I set up a 3/8" rabbet bit and cut the opposite side of each board to create the tongue.  I used that new fence I mentioned in a previous blog and am happy to report it sucked up about 90% of the sawdust -- nice improvement!


Here are the boards when they're assembled.  More than enough to span the panel that will make up the back of the chest.
Although I have made a general sketch of this chest, much of it is being designed "on the fly".  If this were a commission I wouldn't have so much leeway.  Also, since I'm using leftover lumber that dictates my sizes too.  Tomorrow will be spent making the side panels.  They will be made out of the only wood I purchased, Alder, and have maple panels.

Wednesday, December 22, 2010

Rainy Las Vegas

Rain and Las Vegas are not found in the same sentence except during our monsoon season but boy, it's been a steady rain for several days.  That means that fitting joints can become problematic due to the unusually high humidity.  I remember at San Francisco State people would fit a dovetail or tenon in the evening and then if they tried to assemble the next morning the fog/humidity made the wood swell up and no longer fit!  You almost had to fit and glue during the same time period.  Currently I'm working on making a chest for my carving chisels out of various pieces of wood I have left in the shop.  It's also going to be a practice piece where I can improve my dovetail cutting abilities. I know that I could use jigs, routers, tablesaws, etc. to do the joinery but there's just something about doing it the old ways.  At this point I'm preparing the stock.  The framework will be made of Alder which I had to buy.  The drawer fronts and lid will be made of Bloodwood that I had from another project.  The materials I have on hand dictated the size of the chest.  I also resawed a piece of Cherry which I plan to carve and use for the panel on the lid of this chest.  As soon as I get something that's worth photographing I'll share the progress on the blog.  Looking forward (with trepidation) to seeing how the Bloodwood will take to half blind dovetails!
In the meantime,here is a shot of the last series of picture frames that are now hung in the dining room:


They are the series of threes that Diane is currently working.  The upper set is called "Elegance" and she used classic ladies hats, pearls, and gloves of the time.  I particularly like the upper left painting that shows a cover shot on a magazine with the ladies eyes peeking out.  The lower series is unnamed as of now but maybe "Cafe auLait"  would be appropriate -- it's waiting on the center painting to be completed.
From a woodworking point of view I like the way the textures and details show on the wood.  The upper series were made of Beech and then dyed, French polished, and waxed. The lower series were made of Poplar, gessoed, textured, and sprayed with a red undercoat followed with a satin oil-bronze finish.  Although different the goal was to have the light pick up the textures and details of the frame without drawing attention away from the paintings.  I think we succeeded! 
Well, time to get out to the shop.  It's late enough where the neighbors should be awake and up by now, if not the planer will be their alarm clock.

Thursday, December 9, 2010

New Shop Aide & Frame Progress

One of the things that happen as you pursue this craft is that you learn about methods others have come up with to make life easier.  I just found one in Fine Woodworking magazine and decided to see how it worked.  For the picture frames I need to cut flutes in the panel with my router mounted in my homemade router table.  The biggest hassle here is the fine dust it creates while cutting.  Here's a good solution:


This is essentially a hollow box with a hardwood cleat (between fence and box) that has holes in it so that the clamps attach it to the tablesaw fence.  I drilled a hole to at the end to attach the shop vacs hose.  As we woodworkers tend to do I modified it somewhat by cutting a semi-circle in both the top and bottom pieces for the bit.  The purpose is so that I can use this on either side of the fence and still keep the vacuum hose at the rear.  Depending on the bit and my feed direction, the auxiliary  fence may need to placed on either side of the tablesaw fence.  I also added a baffle inside to hep channel the dust into the hose -- worked well, even when cutting all of the flutes on the panel faces!

Things are going nicely on the picture frames.  Many, many steps are required to make the 12 sides that are needed to create the 3 frames.  I'm making two extra pieces just in case. It's funny how that works, if I make extra parts I never seem to need them but if I don't, then I screw something up -- cheap insurance I guess!  Anyway, here's how things are looking now:


The pieces on the left are the panels.  Besides cutting to correct size each one needed to have the outer edge shaped and the tongue cut on the opposite edge, this was done on the shaper.  Then each needed their 3 flutes cut with the router table that I mentioned above.  The pieces on the right will become the sight edge. These had the bead formed on the shaper, a groove for the tongue of the panel, and finally the rabbet was cut for the painting to sit into.  Next up is sanding the flutes, planing the faces and then gluing them together as shown in the middle. Let's see, miter, biscuit, glue, clamp, dye, shellac ......... hmm, should be done in a week or two.

Saturday, December 4, 2010

Another Black Frame

Diane's been working on her Square Foot of Art concept where she will paint a series of three related paintings on a 12" x 12" piece of board.  One of the series is coffee related and since the painting have lots of texture, she felt the frame should mimic that.  Painting it black really isolates the subject.  Here's an image of one in that series:

The way I made this frame was to start with a piece of 5/4 Poplar.  After shaping the sight edge, the frame was cut at a 10 degree angle.  The panel was simply dadoed out to make a shallow groove about an inch plus wide.  After mitering and joining the pieces I applied 4 coats of traditional gesso to fill in and obscure the grain of the wood.  The final step was to thicken the gesso with more whiting after the last coat, apply that to the panel only and use a comb to give it the texture.  It gives the frame movement and life which compliments the pictures nicely.  Here's a close up of the frame:


The next set of three will be the steamed Beech, dyed black that I showed a couple of posts ago.  Have the material but haven't started cutting into it yet.  Good news though, this afternoon I'm off to give a private lesson on using the wood lathe to a man who found me on the internet.  Looking forward to it, he just bought a beautiful lathe.  I've always thought that I too would like to have a lathe but -- no room and I really want to continue working towards mastering flat work and carving.  So much to learn, so little time!