Tuesday, May 29, 2012

Boxes, Lids, and More -- Oh my!

Ready for .......?


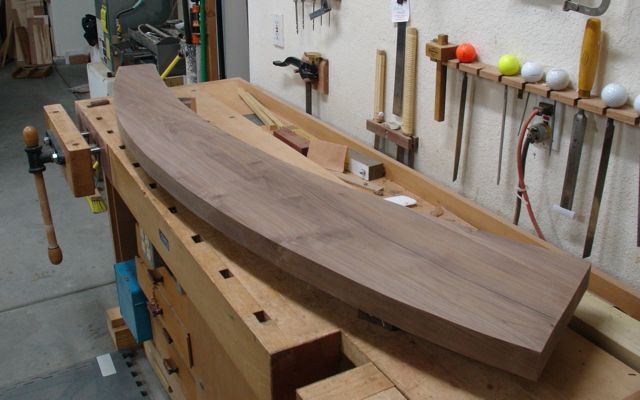
     I've mentioned that I'm gearing up for a show this September which will feature various small boxes that are currently under construction and in the design stages.  I'm playing around with several different and unique styles and hope they will appeal enough to the public so they'll vote with their wallets!  Another advantage is that these will be an easier item to ship than furniture is.
     Just because they're small really doesn't make them any easier to build, if anything, the smaller sizes add the challenge of how to hold them, especially if there's machine work involved.  I sure am fortunate to have Diane as my style guide, she has an eye for the way things go together and work out style wise.  As an example, the two toned lid in the upper left was designed to go with the box that has the extended and pegged finger joints.  She suggested that there was too much going on, either the box should be the star or else the lid should be the star.  I took that into consideration and it makes perfect sense to me but not until she pointed it out did I truly see it.  That lid will go on the box in the right of the picture which features some  curly Maple and mitered corners with Cherry splines as a contrast.  The lid that currently has the clamp on it will be for the finger jointed box.  I created a different pull for it that mimics the joinery on the box.  This box was tricky to assemble and finish:

Extended & Pegged Finger Joints

     The tricky part comes in after you figure out how to clamp and glue this box together.  You have to be careful not to get glue on the part of the joint that extends and once that's accomplished the area between the two joints (short side) is hard to get to.  Time consuming process but I'm thinking that the final design is worth it but.....is it a money maker?  Probably not but I really just need enough profit to feed my wood addiction!
     See the big, blue brush?  That's something I just purchased which seems like such a good idea but fell short.  It's made by Rockler and the bristles are silicon so glue will not stick to it.  The advantage is that you can let it go and once the glue is cured it will peel right off.  Good concept right?  However, it is so big and awkward I couldn't get it between the joints without making a mess all over the place.  I'm going to stick to the little acid brushes, they're washable and last for 4-5 projects before the bristles come out.  Check this out:

Gorilla Glue

     I had used it the night before to laminate two pieces together for a lid.  For that I prefer a polyurethane glue (Gorilla Glue) so I used this brush for it.  Large and cumbersome but did the job.  The next morning I attempted to clear away the dried glue but it hadn't cured completely which resulted in my fingers getting permanently stained!  When I use Gorilla Glue it's about the only time I ever wear gloves, you can't get the stains off of your skin easily so it's just there until a new layer grows in.  Once the glue cured completely it did pull off of the bristles with some effort.  Like I said, it's a good idea but I'm not a fan.

Saturday, May 26, 2012

Another Box Design

     So this blog will be backwards!  I started it last night after figuring out how to design and make the top for what I'm calling my Elliptical Box.  Wanted to get that down on paper (so to speak) before those senior moments could erase them.  The process worked and here's the lid for the new box concept.  This is somewhat backwards too since now I'm building the box to fit the lid!

It Worked


     Now that the Slanted Dovetail box is complete and I know the basic design and construction is what I was hoping for there's another design that's been floating around in my head.  Rather than make a series of the Slanted Dovetail box (4 boxes total) I'd rather work on this new design.  I think I'll name it the Elliptical Box since the main design theme will be an ellipse of sorts.  Years ago I did an experiment where two different species of wood were cut out together and then re-joined.  If you're familiar with intarsia this is a very elementary form of it for lack of a better term.  My goal is to combine two pieces of curly Maple with a piece of Cherry, both of which have some interesting grain, for the lid to this box.

Sketching in the Arc

     The Cherry will be the center of the lid so I needed to establish an arc.  This can be done by clamping the piece to the bench with the bench dogs, they are at the same distance from the center.  The thumb of my right hand is pushing this slat towards a mark I'd made to show the top of the arc.  All that's left was to draw the line.  Here are the two pieces of Maple I want to use for the lid:

Marked for Grain Direction

     Whenever you laminate boards together you want the grain direction to be the same on all of them for when you plane the board.  This holds true whether you're using a power plane or the nice, quiet work of a hand plane.  You can see the basic design on the Cherry.  Next was joining the pieces together.

Temporarily Hot Glued Together

     In the picture you can see how I laid this out, marks were made on the Maple pieces that corresponded with the end of the design on the Cherry.  Using a hot glue gun, they were temporarily held together and then cut out on the bandsaw.  Once they were pried apart with a dull screwdriver and a mallet they separated without any problem for reassembly.  What you see on top below the clamp is a piece of 1/4" thick polyethylene.  I use these whenever I glue up because nothing sticks to them and there is no possibility of the clamp bar reacting to the glue and causing stains.
Together Again!

     Now it's just a waiting game to see how they will turn out.  For laminating panels together I prefer to use Gorilla Glue because it has never failed me and is easy to clean up.  It was a little tricky aligning the three pieces and I guess we'll see once it's dry how well things went.  Another new thing I'm using is the glue brush, the large black and blue thing next to the glue.  It's made from silicon and glue will not stick to it, at least that's the claim!  This brush is available from Rockler Hardware and after using it a few times my only complaint is that it's rather large but glue does peel right off of the bristles as advertised!

P.S.  The brush isn't quite what I expected.  It is extremely large and with the polyurethane glue it still hasn't fully cured in between the silicon bristles.  Matter of fact, my fingers are now permenantly stained!  Gorilla glue is about the only thing I used disposable gloves for because of that.  Anyway, not a fan of the brush; I'll probably stick with the little acid brushes. 


Thursday, May 24, 2012

Dowels with a Lie-Nielsen Dowel Plate

End of the Day

     I've done a blog before on making dowels with the dowel plate sold by Lie-Nielsen but thought it was worth repeating now that I think I have my system down.  When I taught the class on plane making my students weren't all that enamored about forming their own dowels.  It's a process and from everything I've read, you can't expect to get perfectly smooth and round dowels but you will get accurately sized ones out of pretty much any species of wood you want.  In this picture is everything I used to make them other than the planer to get the wood down in size, in this instance 3/16".  I plan to use them to peg large finger joints for the box series I'm currently working on.
     When researching on the web much of what I found indicated that riving your wood and finding straight grained pieces was the way to go.  Riving is similar to how you would split firewood.  Well, I tried that but not too successfully -- ended up with quite a lot of wildly splintered pieces of wood!  Since I don't have an unlimited supply of material I chose to make squared pieces with the planer instead.  In the photo you can see that Cherry, Walnut, White Oak, and Purple Heart are the species used.
     The dowel sled is made from some MDF and has a V-groove running down the center.  With the stop on the bottom it functions just like a bench hook.  As you start to take the four sided blank and make it an octagon it wants to start moving all over the place.  The first edge is easy enough but as you take the corners off of the blank it gets a bit squirrely!  You have to keep in mind that you're not going to end up with a perfectly shaped dowel like you'd be able to buy.  Here's what I did; first of all I would place the blank in the V-groove:

Beginning of the Cut

     You hold the front of the blank in the groove while you start to skew the block plane towards the front.  It takes a bit of practice but you can get a rhythm going where the hand in the front slides forward while you move the plane to cut.  Then the trick is to move your hand to the back of the blank and plane until you reach the end.

Shifting Hand Position

     You can actually develop a rhythm to this, I found that 6 passes on each squared corner seemed to get me a good size.  Once the blank looks pretty decent the next thing I did was to use an old pencil sharpener:

Tapering the End

     This made it much easier to get it started in the dowel plate which is the next step.  I cut the blanks to roughly 5" or so and found that some would drive fine while others shattered.  Surprisingly, the White Oak was the easiest to drive through the plate, probably because it's a hard wood to begin with.

Driving them Through

     Through experience I've learned that a finish hammer works better than a rubber mallet.  When you have driven the dowel almost through the plate you use the next one to drive the first one out.  If you're interested in seeing how I made the holder for the dowel plate here's a link to that blog.  It's my second version and I'm pleased with how well it works.

Tuesday, May 22, 2012

Dovetails with a Slant

     In previous posts I've mentioned a plan to create a line of boxes to hone my skills and to market as well.  You know, have to make some money to feed my wood addiction.  In any case, here is an almost completed box I've been working on the past couple of days:

Design by:  Seat of the Pants!

     It still needs a handle of some sort, a sliding tray for the inside, and final planing, sanding, and finish.  I've been intrigued by cutting dovetails and then putting them into a piece that has some angles to it.  The dovetails themselves are in line with the side piece but by placing them in an angled block they appear to be slanted -- interesting optical illusion.
     The size of the box was determined by what I had laying around the shop:

Material Used & Practice Piece

     I had a small amount of Spalted Maple left from a stand up desk I built years ago which is what's used for the sides.  The Walnut is some of the scrap from the elliptical shelf project last month.  For starters, the 8/4 piece of Walnut was cut at a 15 degree angle with the panel raising jig.  I didn't realize it at the time but it's important to keep the off cut from that process, it's behind the practice piece.  The box is approximately 3" tall and 6" x 12".  The first step is to cut the tails for the dovetail joints.
     There is a technique called the 140 trick.  It's named that because a Stanley #140 skewed rabbet plane was used to cut a slight shoulder on the inside of the piece.  Not having one of those or the funds to purchase a pair of them from Lie-Nielsen I use this technique which I'm sure isn't OSHA approved:

Pay Attention = Very Doable

     I set the height of the blade on the tablesaw to the length of the dovetail.  Usually that's less than 1/2" or so and then it doesn't look quite as scary.  Because of this design the tails needed to be an inch and a half long.  This is cut on the inside of the board.  It'll help when you transfer the markings to the tail board and also hides any discrepancy you may have cutting them out.  My preference is to cut both sides at the same time:

Cutting Tails

 
     Even here you can see how the shoulder you created with the 140 trick gives you a definite stopping point.  Once the saw cuts were made it was on to the chisel work.

Removing Waste Between the Tails
  
     I was really surprised to find how hard the Spalted Maple is!  I figured that since the word spalt means diseased it would be fairly easy to chisel but not so!  Actually created a burr on the back of this chisel that needed to be honed away.  Once the tails were cut on all the sides it was time to transfer them to the sides and lay out the pins.

Transferring Tails

     Here's where keeping the off cut is important.  Since the piece now has one side flat and the other comes to a point you won't be able to secure it in the vise.  I've put chalk on the off cut piece to illustrate why it's important to keep.  Same goes for when you chop out the wood, that cut off piece is crucial for securing it to the bench while you work the chisels.
     Another thing I found to be helpful is to make a series of cuts in the waste part between the pins:

Extra Cuts Between Pins

     This made it a bit easier to remove the Walnut.  That's a lot of end grain to chop away!  Once the dovetails fit a groove was made in the sides to hold the plywood bottom and the box was assembled with Liquid Hide Glue.  The top is fairly complicated with several different levels rabbeted out.  So far, so good.  I used to always tell my students that you learn from your mistakes and I'm a bit smarter now!  The next one should go easier.  Here's another photo of this box with the lid removed so you can see all of the rabbeting required.  They were roughed out with a dado head then fine tuned with a block plane.

Parting Shot


Wednesday, May 16, 2012

The Last Jig

Panel Raising Jig

     Well, here it is; the last of the jigs I need to make.  This is the panel raising jig that's set at the angle of 15 degrees.  Nothing overly complicated so fairly straight forward to build.  I suppose it could have been adjustable to set the bevel for any angle but I really didn't want to get into that much detail.  Fifteen degrees seem to be the acceptable angle for raising panels.  If I ever need a lesser angle I could tilt the blade to change that pre-set 15 degrees.  For box lid that needs a small angle I'd just as soon use a block plane to do that.
     With every solution there comes another problem -- where the heck will I store all of these jigs I finished making?

Tuesday, May 15, 2012

There's an App, er; JIG for that!

Getting' Jiggy With It!

     Well, there it is; a workbench with some of the jigs I've spent the past couple of day's making.  Once when Adam and I were working in the shop and we needed sandpaper I pulled out my handy dandy sandpaper sizing jig.  Adam chuckled and said: "you've got a jig for everything!".  And you know, when you've been working with wood as long as I have it's pretty much true.  There's no sense in making a jig for something you do once or twice but if you plan on doing it more often a jig or fixture is the way to go.  That sandpaper jig?, you'd be surprised at how many students had detention with me at school and sized hundreds of sheets of that sandpaper!
     I've mentioned that the prospect of marketing my pistol cases is pretty good, I'll make the final determination when I go to the gun show this weekend.  In the process of doing that I decided to work on box making techniques and make some smaller, easier to sell projects.  Since the parts you work with making boxes are fairly small in size it's important to have ways to handle them in a safe manner.  As a prototype project I'm making a box that's about 4" x 6" and under 3" tall.  Trying to safely work pieces that small around a 10" tablesaw is not the way to go!
     What you see in the picture above, from left to right are:

  1. Slot Miter Jig --- used to cut a slot in the corner of a mitered box
  2. Large Bench Hook --- used to hold small pieces of material for planing
  3. Shooting Board --- used to trim and square small pieces of wood, also made a 45 degree holder for truing up miters
  4. Bench Hook --- an old standby that's definitely over built with dovetails!
  5. Small Router Table --- clamps into the end vise, uses my small trim router
     I have one more jig in the plans, one to cut a raised panel or lid in this case.  Rather than tilt the blade on the tablesaw it's safer to make a jig that rides on the rip fence and angles the work instead.  That way you don't have to mess around with tilting and and re-adjusting the blade angle.
   
     The first step in the process was to cut the pieces at a 45 degree angle.  This was done with a miter saw, then the pieces were trued up on the shooting board:

Shooting Board -- Truing the Edge
     By setting up the stop block each piece is guaranteed to be the same width. I'm using some quarter sawn White Oak for this prototype.  Not shown is the fixture which holds the material at a 45 degree angle, that cleans up any tear out the miter saw may have left.  After this step, a groove was cut into the inside bottom of each piece on the new router table.  I didn't take a picture of that but I was able to clamp the crevice tool of the shopvac to it and capture most of the sawdust.
     A technique I've always wanted to try is where you use tape to assemble and hold mitered joints tight.  Clamping can be tricky with a small project like this.  The first step was to lay them face down and apply a piece of tape to the backs:

Packaging Tape aka Clamps!

     Next, the whole assembly is flipped over, glue is applied to the inside of the miters, and bottom is inserted into the groove and you simply align and tape it all up.  Know what?  it works!  After time for drying the tape was removed and, voila; you have an assembled box!

Removing Tape from Assembled Box

     As a decorative item the edges will have a slot cut into them.  Then a piece of contrasting wood, Walnut in this case, will be glued into that slot.  This serves as a decorative element and also reinforces the corner.  Miter joints are not the strongest since you're gluing end grain but they rarely fail.  There is a series of picture frames I used to do for Diane's water colors where I used this technique with Maple frames.  These were only an inch thick or so and required just a small fixture to hold them while cutting the slot.
   
Miter Slot Jig


The boxes are bigger than a picture frame so that calls for yet another jig.  If you can picture it, this sled rides on a couple of pieces of Poplar that are cut at a 45 degree angle.  Attached to them are two pieces of 3/4" MDF that forms a trough for the box to sit in.  By setting the rip fence at 3" (just a random number) and using a blade with a flat bottomed cut, as the sled is passed over the blade a nice slot is cut.  The piece of Walnut and the clamp is a simple stop to ensure the same location on all sides.  See the slots already cut on the top of the box?


     Once the slots were completed it was finally time to get back to that wonderfully quiet world of hand tools.  A piece of Walnut was selected that just need a bit of planing to be the correct thickness to fill the slot, it's about an eighth of an inch thick.  That's were the large bench hook and block plane came into play:

Sizing the Miter Keys

     This bench hook has a very thin stop at the end of it which holds the piece while taking a light cut.  I found that it was just as easy to hold the plane and basically pull the piece under it.  Once the thickness was correct each slot was cut at 45 degrees with the other bench hook and a Japanese style saw.  This bench hook has one side with a 45 degree guide (shown) and the opposite side is 90 degrees.  At this point, the splines are in the slots waiting for me to cut and plane them even with the box sides.  That's for tomorrow.


Saturday, May 12, 2012

Finger Joint Jig -- Final Version?

     I've spent the last two days working on making a permanent, easy to adjust and set up, finger joint jig.  This will used on the tablesaw with an 8" Freud box joint cutter set.  Usually, if you just have one project to do it's no problem screwing a temporary fence to your miter gauge, banging it with a hammer to get the right fit, and cut the joints.  That's always worked in the past but I'm about 75% committed to making a small run of pistol cases and renting a table at a gun show coming to Las Vegas in September.  
      Not sure if I've ever talked about the pistol cases on the blog so here's a link to the website:    http://www.contemporarypistolcases.com/

    These cases will be assembled with box joints or finger joints.  The name of the joint is pretty much interchangeable since the corners have the appearance of interlaced fingers.  This design exposes a lot of face grain for gluing and is incredibly strong.  The trick is to consistently cut them and maintain the spacing.  A thirty-second of an inch one way or the other can make them too tight or too loose.  Before buying the Freud set I would use the dado blades but the width of the cut was apt to change each time depending on the positioning of the blades.  Hopefully, with the Freud cutter set, they will always be either 1/4" or 3/8" without any variation every time it's set up.  Time will tell on that one!
     Here's a shot of the jig I've spent careful time on:

Finger or Box Joint Jig for Tablesaw

     As you can tell, it rides in both miter gauge slots which will keep the cuts square and consistent.  The piece in the front is referred to as the carriage and it "carries" the material being cut.  The piece of MDF directly in line with the blade is a sacrificial piece to prevent blow out on the back side of the piece being cut. The MDF to the right of it is a mistake on my part!  Since the Freud set only cuts 1/4" and 3/8" wide joints I needed to make a carriage for each size.  The 3/8" one is off to the left side.
     The plans for this jig came from ShopNotes Tablesaw issue that I believe, was published in 2007.  The original plan called for using 3/4" plywood as runners in the miter slots with a platform between them that held the carriage.  This worked but I found that the plywood changed in thickness due to weather conditions and one time it would slide freely and the next it would bind.  I chose to re-engineer their design and use the ultra high molecular weight  polyethylene available from suppliers like Lee Valley.  I've used this for many sleds, fixtures, and jigs and love it!  It can be drilled and tapped and is stable and slick.  For this application it was tapped for 1/4" x 20 tpi machine screws.  Here's a better picture of the jig:

Side View of Jig

     The carriage is attached to the sled portion through slotted holes which allow me to adjust it to get the proper fit.  There are a two knobs and fender washers on the backside which tighten the carriage bolts used to keep it all together.  That's some 5/16" thick Walnut I used for the test set-up.
     As far as the pistol cases go, I was commissioned to make six of them a year or so ago for a neighbor.  He is an avid gun collector and used the cases for presentation, storage, and transportation.  Since the case will be built for a specific pistol it's important that I can accomplish that -- obviously!  I had a friend of mine make a tracing of one of his pistols and made this mock up for it:

Alder Pistol Panel

     For the final fitting all that's required is for the pistol owner to first place the pistol in the leather covered, foam recess.  You would then put the strap onto the snap, put a slight bit of pressure down on the pistol and mark the other end of the strap.  Once a pilot hole is drilled at the location the strap can be secured.  Repeat the process for the other strap and you know have an attractive and secure way to transport your pistol.  In time, the foam will conform to the ins and outs of the gun for a perfect, custom fit.
     Next weekend there will be a gun show at the South Point Casino here in Las Vegas and I plan to go and see what it's like.  I've visited a few other gun shows, scouting expeditions if you will, and think there is a market for the serious gun collector for pistol cases like mine.  I'll keep you posted -- wish me luck!

Thursday, May 10, 2012

Mortise & Tenon -- Hybrid Tutorial

     The project I was working on for my wife was a fairly straight forward frame for a bulletin board she needed in her studio.  For bulletin boards I like to use those 3/4" thick styrofoam sheets you can buy at the local big box store.  They're also great for packing materials but that's another story.  So, what we have is 5/4 Poplar for an approximate 30" square board.  Adding a dowel to go across the bottom for ribbons she uses in her doll crafting plus pegs to hang scissors, french curves, and other pattern making devices she likes to have closes at hand.
     There would be any number of ways to construct this frame but I'm really partial to the tried and true mortise and tenon.  Yes, biscuits would work quicker, Kreg pocket hole joinery is another option, and now Festool has come out with their Domino machine but I'll stick to traditional work.  I'll go through my process and explain why I'm calling it a hybrid.
     First off, in our local woodworking group I'm known as one of the hand tool guys.  My philosophy though is to let machines I have perform the grunt work, similar to what an apprentice would do in a woodshop.  After running the material through the planer to make sure each piece is the same thickness I'll cut the pieces to rough length.  Next would be jointing an edge with a #7 Stanley and ripping each piece to the required width.  Once that's accomplished I use a hollow chisel mortiser to cut the mortises.

Cutting the Haunched Mortise

     As you can see there are stops set up so once that's done on one piece the other is guaranteed to be the same.  I used to cut mortises completely by hand but when I had a commission that needed about 24 of them I figured it was time to open my wallet!
     The next logical step is to cut the shoulders, this is done on the table saw using a sled and of course, another stop block.

Cutting Shoulders

     In this case I clamped a one inch spacer to the rip fence and used that as a stop block to assure the same distance for each.  Since this will be a haunched tenon I cut both of the faces and one edge.  I use an old Delta tenoning jig and make a shallow trial cut first.  Usually I'd have some scrape material to do trial cuts but this is all the Poplar I had!

Tenoning Jig

     After making a shallow cut, the sides are cut off with a dovetail saw and bench hook:

Trial Cut to Fit Tenon

     This is then checked to see how it fits the mortise:

Checking Tenon Fit
 
     Any adjustment can be made to the tenoning jig, I prefer to leave them very slightly oversized and then use a rabbet block plane from Lie-Nielsen to get that perfect fit.

Trimming Tenon Cheeks 

     Through the years I've tried many ways to trim tenons and this is by far, the best method for me.  Chisels and shoulder planes have been tried in the past but for me, the plane allows me to get an even trim on the tenon.  It's wide enough to cover most tenons in one pass and there's enough surface area to make that cut even.  Shoulder planes are narrow and just didn't fit my style.  Notice a good old fashioned bench hook -- went a little crazy with that and used it as an excuse to practice my dovetails.
     Once the tenons fit that way I'd like them to all that's left is to cut the haunch:

Final Step

     Since the haunch location could be slightly different on each mortise (eye-balled to the line) it's important to lay them out by transferring the  measurements from the exact mortise it will be joined to.  As a rule, I'll stamp a letter on each tenon face and mortise with metal working stamps.  Naturally this is put in an area where it won't be seen once the parts are together and it really helps when it's time to glue up.  The final step is to use a chisel to put a slight chamfer on the ends of the tenon.
     So there you have it, what I call my Hybrid Method.  In our woodworking group we've had discussions on using power tools versus hand work.  Many of the members take the position that if the cabinet and furniture makers of old had access to table saws, jointer, planers, etc. they would have surely used them and I'd tend to agree with that position.  Personally, when I first started taking on part time jobs while I was a teacher all I had were the hand tools. If a jobs came up that required a lot of mortises I bought the mortiser,  when I had a lot of book matched panels to make I upgraded the bandsaw, and so on.
     There's a balance all of us woodworkers need to find where we're comfortable doing the work we do.  I strongly favor hand cut dovetails, planed surfaces, hand beaded details, and oil finishes rubbed in by hand.  Once the grunt work is done there's nothing quite as satisfying to me than to finish the project with the quiet work of hand tools.  You know, ask a group of five woodworkers how to do a certain aspect of woodworking and you're liable to get five different  answers!

Wednesday, May 9, 2012

Walnut Shelf Installed


Walnut Shelf Installed

     I was hoping that my client would come through with getting me a picture of the shelf installed in the custom home they're working on and here it is!  Not sure how they will finish it, my option would be oil and at least 3 coats of my hand rubbed top coats but with a philosophy of time = money that probably won't happen.  I just hope he was pulling my leg when he said they may stain it black :-/.  A couple of coats of lacquer would be a possible option.  Not sure what will be done to finish off the edges by the wall but if possible I'll see if I can get a picture of the completed project as well.

Sunday, May 6, 2012

Spokeshave + Cabinet Scraper = Ready for Pick Up

Ready for Pick Up

     Here is the finished shelf waiting for the client to pick it up.  From what I understand this will be installed on a curved wall that will be covered with those long, thin glass tiles.  The ones that remind me of ledge stone you might find on a fireplace or exterior wall but on a much smaller and glitzier scale.  I was told they would take a picture of the installation so I can have it for my portfolio.
     As I talked about in my last blog, the edges needed to be cleaned up and finished since the router bit wasn't long enough to cover the entire thickness.  Here's what it looked like:

Edge and Spokeshaves

     The thing that makes a cut edge appear so much better than one that has been abraded by sandpaper is the clarity.  I guess in political speak that would be "transparency!"  The upper portion of the edge is where the router bit didn't reach.  Notice how much clearer the left side is compared to the right; that's been cut with the spokeshave.  Primarily I used the black, Stanley #151 except on the concave sections of the back that required the bronze, Lie-Nielsen with the radiused sole.  This picture shows the quality of the cut better:


Outer Edge
When it comes to hand tools like spokeshaves and scrapers there's a difference of opinion on whether they should be pushed or pulled.  For me, it really depends on the project and grain direction of the wood.  In this case, pushing the spokeshave seemed the best.  It's easy to spot the difference in the grain color that indicates where it's been cut and which area is still low.  With a large, free-form curve like this you have to let your eye and fingers tell you when it's a fair curve.  Luckily the grain direction was easy to read and there were only two small knots that gave me some difficulty.


     Once the edges were done it was time to work on the faces.  The client wanted to keep a sharp edge on the piece but personally, I hope he cuts it ever so slightly.  Even though I've scraped the board I'm guessing they'll hit it with some sandpaper before the finish the piece.  I started out with a cabinet scraper:

Cabinet Scraper

     This is a tool I always push.  You can see the shavings that are curling out that indicates a well defined burr.  On this tool I use a blade that's been ground at 45 degrees and then add a burr for cutting.  That allows a pretty aggressive cut which was needed to remove the glue and level the surface when the two pieces were laminated together.  Before beginning this step, the board looked like this:

Chatter Marks from the Planer
 
     I tried to capture this but not sure how well it shows.  The chalked in arrow which was my triangular marks for laminating the piece, almost point to an area of those visible chatter marks.  They're caused by the planer as the board is surfaced.  I didn't run this board through my planer but even it, with a helix head, leaves a bit of chatter marks.  I wanted to give them as good of a surface as possible so once the board was done with the cabinet scraper I went to the card scraper for the finish:

Card Scraper


    These will put a blister on your fingers real quick!  I always pull these, to me pushing feels awkward.  Although I've purchased a holder for this from Veritas (upper left on bench) I haven't been able to master that yet -- guess I'm destined to have burned finger tips when it comes to using a card scraper.  I do need to work on my technique with that because I'm giving a demonstration to the Sin City Woodworkers group in June on sharpening and using card and cabinet scrapers.
     Well, now that this is done I can get back to work on the bulletin board for Diane.  Pretty straight forward project with mortise and tenoned construction and a rack to hold ribbons she needs for her Rag Dolls Rising work so I'll blog that as it goes.

No More Noise !!

     Those of you that know my method of working will understand the title of this post.  My philosophy towards the craft is to let the power equipment do the "grunt work" and then, when that phase of work is  complete, switch over to the quieter process of letting my hands and tools do the finish work.  This project is no different.
     Once the glue had cured over-night the pattern was traced onto the Walnut.  I used the bandsaw to get that roughed out.  That was interesting, although I have a pretty large table on the bandsaw maneuvering a 6' long piece of 8/4 Walnut around and sawing to the line was challenging.  This is where the stackable torsion boxes came into play.  By stacking them together they match the hight of the bandsaw table.  Then, with Diane supporting the cut off piece the shape was cut out.
     Routing, ah yes, let's see now; eye protection -- check; ear protection -- check; dust protection -- check.  Okay, I'm ready to do this now:

Ready for Pattern Routing

     The plan is to shape the inside edge first, somewhat of a trial to see how the OSB (oriented strand board) would work as a pattern for the router.  Once the inside pattern matched the template I would re-attach it, line it up exactly to the routed curve, and then proceed to cut the outside curve on the bandsaw.

Two Passes on the Template

     Here you can see how pattern routing works.  There is a bit in the router that has a bearing mounted above the cutter.  This bearing follows the template to trim the piece below it and make it a copy.  Only problem here is that the Walnut is about 1 3/4" thick and then add the 1/2" thickness of the OSB template you'll need a really long bit to cut the entire part.  Don't have one of those and figure why make that investment, a spokeshave will cut cleaner and give a much better finish.
     Along the way I learned why not to use OSB for a template.  It is full of voids which I didn't realize on the back of the shelf but became evident on the front.  Because of the voids the bearing would go into the template a bit which gave me some discrepancies as I routed.  Soon as I saw that I knew it was time to stop and repair the edge.

Template Repair

     I used some putty to build up and reinforce the voided areas.  Once it was dry the areas were sanded smooth to give the bearing a better surface to ride on.  The material I prefer to make patterns from is MDF (medium density fiberboard)  which cuts, files, and sands easily.  Another advantage is that it's very smooth so the router can glide over it easily, OSB has a rough surface that the router base would catch on.  Basically, MDF is a higher grade of particle board that has no grain direction and, most important of all, no voids.  When you do this operation, and your bit isn't long enough to cut the entire thickness, it's done in small passes.  Because the spinning bit can tear the wood out as the grain direction changes it's best to take very light cuts.  Once you're down a quarter of an or so it's best to remove the template and use the area previously cut as your guide.
     Now that all of the noisy machine work is complete it's time to refine the edge with spokeshaves and a block plane.  That's on tap for tomorrow.

Friday, May 4, 2012

New Commission

     Today, as I was starting on a project for Diane I got a commission for an elliptical shaped, hanging shelf.  This should be an interesting project and since it's a paying one I'm sure Diane won't mind if I put her bulletin board on the back burner, so to speak.  This is a job for a custom house and what makes it nice is I didn't have to go and select the material which is 8/4 Walnut.  Here's the material that was delivered to me along with a template made of OSB material:

25 1/2 Board Feet of Walnut


     What you're looking at is about 25.5 board feet of Walnut.  At the price of it these days I better not make a wrong cut or this job will cost me!  I'm hoping that they will let me keep the "scrap" which would make some nice boxes or even a lid panel for a pistol case.  From what I understand, this will be suspended on a curved wall which will be covered with glass tile.  I should be able to get a picture of it once the piece is installed and finished.


     The first step was to figure out the best way to utilize these two pieces to make the required shelf.  I thought it was pretty nice the way the grain matched up but then when I removed the template found a big knot!  After some more trial and error and establishing an even edge I was able to make this configuration:

Edges Jointed, Ready for Glue
     This is where an independent, custom shop like mine can take the time to select exactly how we think the piece will look the best.  You can make out the chalk outline of the shelf, notice the center of the shelf is pretty much the center of the swirl pattern of the Walnut.  This is a small detail that many people won't pick up on but they'll realize it's pleasing to the eye even if they don't know why.  I used my old Stanley jointer plane to prepare the edges for assembly.  My glue of choice for this type of work is Gorilla Glue.  It allows me a pretty good open time and has never failed me yet -- let's keep it that way.
     One of the pieces was laminated around 6pm with the clamps I like to use that create a flat panel.  Around 9pm or so I'll replace them with regular bar clamps and attach the other end.  Once they're set overnight they'll be good to go in the morning.  It'll be a pretty heavy piece of wood to run on the bandsaw.