


 |
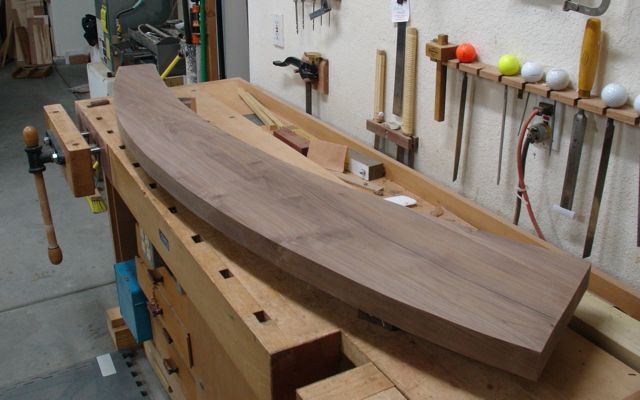
| Ready for Pick Up |
Here is the finished shelf waiting for the client to pick it up. From what I understand this will be installed on a curved wall that will be covered with those long, thin glass tiles. The ones that remind me of ledge stone you might find on a fireplace or exterior wall but on a much smaller and glitzier scale. I was told they would take a picture of the installation so I can have it for my portfolio.
As I talked about in my last blog, the edges needed to be cleaned up and finished since the router bit wasn't long enough to cover the entire thickness. Here's what it looked like:
 |
| Edge and Spokeshaves |
The thing that makes a cut edge appear so much better than one that has been abraded by sandpaper is the clarity. I guess in political speak that would be "transparency!" The upper portion of the edge is where the router bit didn't reach. Notice how much clearer the left side is compared to the right; that's been cut with the spokeshave. Primarily I used the black, Stanley #151 except on the concave sections of the back that required the bronze, Lie-Nielsen with the radiused sole. This picture shows the quality of the cut better:
 |
| Outer Edge |
Once the edges were done it was time to work on the faces. The client wanted to keep a sharp edge on the piece but personally, I hope he cuts it ever so slightly. Even though I've scraped the board I'm guessing they'll hit it with some sandpaper before the finish the piece. I started out with a cabinet scraper:
 |
| Cabinet Scraper |
This is a tool I always push. You can see the shavings that are curling out that indicates a well defined burr. On this tool I use a blade that's been ground at 45 degrees and then add a burr for cutting. That allows a pretty aggressive cut which was needed to remove the glue and level the surface when the two pieces were laminated together. Before beginning this step, the board looked like this:
 |
| Chatter Marks from the Planer |
I tried to capture this but not sure how well it shows. The chalked in arrow which was my triangular marks for laminating the piece, almost point to an area of those visible chatter marks. They're caused by the planer as the board is surfaced. I didn't run this board through my planer but even it, with a helix head, leaves a bit of chatter marks. I wanted to give them as good of a surface as possible so once the board was done with the cabinet scraper I went to the card scraper for the finish:
 |
| Card Scraper |
These will put a blister on your fingers real quick! I always pull these, to me pushing feels awkward. Although I've purchased a holder for this from Veritas (upper left on bench) I haven't been able to master that yet -- guess I'm destined to have burned finger tips when it comes to using a card scraper. I do need to work on my technique with that because I'm giving a demonstration to the Sin City Woodworkers group in June on sharpening and using card and cabinet scrapers.
Well, now that this is done I can get back to work on the bulletin board for Diane. Pretty straight forward project with mortise and tenoned construction and a rack to hold ribbons she needs for her Rag Dolls Rising work so I'll blog that as it goes.
I hope you put the picture on your blog. I'd love to see the finished shelf.
ReplyDeleteGREAT JOB!!