Wednesday, October 31, 2012

What Really Matters IMHO

   
 Those of you that follow my blog will recall the series of them that dealt with this custom project:

Pandemic Game Box

    It was a total internet communication process to design and create this for my client who wanted it for an anniversary present.  Being able to be creative and design things for others brings me lots of joy and satisfaction.  It's the process that excites me and then when I get a response like this:


I got the box today! I absolutely love it. It's better than I even imagined. The board and petri dishes fit perfectly! We are going to Mammoth Caves in Kentucky for our 1st anniversary, I don't think I'm going to be able to wait till the actual day to give it to him. I want to take the game to Kentucky in the new box.

Thank you.
Danielle


Well, that's just the icing on the cake!!


Monday, October 29, 2012

Re-Handling a Marples Chisel


Top or Bottom -- What's Your Choice?

     Several blogs back I mentioned that I've sold some of my Marples carving chisels for the simple reason I just don't care for the blue, plastic handles.  Not only does it cheapen them (IMHO) but they just don't feel good when you work with them.  The 2 chisels that didn't sell were a double bevel, angled skew and also an #8 gouge.  Decided to keep them and once I figured out how to remove the handles it was on to the next phase.

Carving Chisels
     From the outer appearance I assumed these were socket type chisels and handles but as you can see, that's not the case.  The chisels have a large, tapered tang that has a squared section for the first 1/2" or so from the handle. To remove the handles I placed the chisel between a couple of scraps of wood in a vise.  A pair of vise grips firmly locked on the plastic handle combined with some twisting and pulling got the off.  The first one I did a hacksaw was used to cut off some of the plastic but don't feel that's necessary.
     Looking through my pile of leftover exotic scraps I found this piece of Canarywood.  The first step was to locate the center and then drill two holes.  The first one was sized to fit and squared area of the tang while the second was slightly smaller to accommodate the tapered section.


Ready to be Re-Assembled
 

     I have a piece of leather so decided to use that between the chisel and the handle to cushion the shock.  Even that looks better than the white pieces of plastic Marples used.  There is a hole drilled in the leather first and then it was roughly cut out.  This chisel will be used as a utility chisel at the bench or on a job so having that piece of leather there will act as a bolster between the handle and the steel of the chisel.


Epoxied in Place
   

         Now to put it all together.  For sure I couldn't place either end on a bench and beat the handle on with a mallet so here's what I did.  A couple of scrap pieces of wood were places on either side of the blade which was then clamped in a vise.  The epoxy was put in the hole, things were lined up and then a couple of tabs with a mallet set the handle in place.


          Here's how that looks once the epoxy is set.

Ready for Shaping

       This particular chisel is a 3/8" wide bench chisel.  This was the experimental on so I didn't pay as much attention to the shape of the handle as I should have.  For the carving ones I'll definitely make a pattern and be a bit more exact.  The nice thing about building any of your own tools is that you can form them to fit your hand exactly.
     The first step was to locate the centers of the chisel and lay them on the wood.  This was done with a black sharpie which doesn't give a very precise line but I wanted it to show up for this blog.

Preliminary Layout 

     What the plan was it to cut one side then use the cut off piece to transfer the shape to the opposite side.

Transferring Curve
     Just as with any other bandsaw work where you're essentially sculpting the wood, the scrap pieces are taped on temporarily so you have a stable surface when cutting the other side.

Cut-Offs Reattached
     To shape the handle I employed several different tools the main one being spokeshaves.  That leather bolster proved to be valuable for more than just bolstering!  The part of the handle closest to the blade was too small to get the spokeshave in.  Besides, I didn't want to run the spokeshave blade into the metal of the chisel.  Here's where that leather helped:

Trimming by the Metal
     I used a carving knife and carefully pared away the wood being carful to stop at the leather.  This left a slight bit of leather that still needed to be removed and a utility knife took care of that.  Didn't mind dulling its replaceable blade against the chisel.

Final Trimming of the Bolster

     Sanding and working the wood until it felt good in my hands is all that's left.  I'll put a couple coats of the 3 part top coat mix I use and it'll be a great little chisel.  Next up, well there's a list in my head so I'll just keep checking things off as they go.

Saturday, October 27, 2012

A Dutchman for a Dutch Man!

   
     My uncle, who's Dutch like me, will be celebrating his ninetieth birthday next month and there is a luncheon planned in his honor.  Anyone who can survive ninety years deserves to be honored!  Well, this presented somewhat of a problem because after all, what do you possibly get for someone when they've spent nine decades here on this earth?  After all, I've only done six+ of them and my favorite gifts seem to be gift certificates to tool places.  A passion of his has always been music, he's been involved with it for all the time that I can remember so that seemed to be the perfect starting point.
     I recently bought some Sapele and plan to  eventually make a sofa table from it.  It seems similar to African Mahogany with a very pronounced ribbon grain.  Since I'd like to incorporate some carving in the table I thought this would be the perfect opportunity to see how this wood works.  Here's the motif chosen for the pencil box I'm making for my uncle.  By the way, I'm swearing any of my relatives to secrecy on this project -- please don't tell him about it.


     What could be more appropriate for a life long musician than the treble clef.  Here it's in the early stages of carving but in spite of the interlocked grain I feel like it's coming along okay.  The box itself  will have a sliding top and dovetailed corners.  Always up for a challenge and this wood proved to be just that.  The back of the box was pretty straight forward and my goal was to make as small of tails as possible.  Not only is the grain interlocked but it also has the tendency of wanting to split as you pare off the ends.  So far, so good.
     When I got to the front of the box I started with a half pin but the remainder of the box had remain intact to house the groove the lid would eventually slide into.  Well, you can see there is a bit of a gap above the middle pin.

Whoops!

     Good time to follow my heritage and create that Dutchman to fill the gap.  The story I've always heard is that this term came about because the Dutch are frugal and thrifty people, that sounds so much better than cheap!  Rather than tossing the entire board which would be wasteful, a sliver is glued in to take up the slack.  It's best to do this from a cut off of the board so that the match is as close as possible. You could use a hand saw to cut this sliver but I used the tablesaw instead.

Beginning of the Dutchman

     Use a push stick and don't cut all of the way through cut off piece.  If you're lucky you'll only need to do this once.  Prior to fitting it into the gap I use a bit of sandpaper to taper the end.  Always pay attention to the grain direction, it needs to match the joint.

Dutchman Glued In

     For these boxes my preference is to use Liquid Hide Glue, it has a pretty long open time and cleans up well.  Once the glue was dried, a zero-set saw was used to cut it flush.

Dutchman Trimmed Flush

     This was followed by careful planing with my block plane.  I've put a slight camber on this blade but even with the low cutting angle of the block plane the Sapele wants to splinter if you plane off the edge.  Very important to not only plane from the outside in but also pick up the plane without dragging it back over the edge.  The plane did a great job cleaning up the dovetails.

Upper Left Pin Remains
      Here you can see the results of careful planing.  The wood takes on a different appearance, obviously the pin on the upper left remains to be planed flush.  With the interlocking grain of this wood, even a smooth plane set for a super fine cut creates a bit of tear out.  Before doing the final work I'll need to experiment to see what the best way to finish the surface will be, it may call for a cabinet or card scraper with a very small burr.
     By the way, this is the first project I was able to use the new marking gauge that I made.  Beautiful, thin line that was easy to work to.  The sides for this box were resawn from a piece of 4/4 Sapele, here's how that line looked.  I always scribe the line from both sides and then bandsaw between them.

Scribed Prior to Re-Sawing

Tuesday, October 23, 2012

Pandemic Box headed to Michigan

   
     Well, it's time to wrap up another project and as is the case with most of them it brings mixed emotions!  This one was particularly interesting because it was something I'd never heard of and all of the communication was done via the internet.  I'm really pleased with how it turned out and hope it meets all of the requirements my client has.  She's been watching the process of the construction via my blog so she knows how things are looking.
     Here's a view of the box completed with the hardware attached.
Completed Project

     When you open the box, there is a compartment underneath where the game board will be stored, notice the pieces on the inside of the lid?  Those will close against the game board and keep the lower section intact.

Inner Panel, Game board Area

     You remove this inner panel with the finger hole in the middle to access the storage area for all of the cards.  The section in the middle is for 6 petri dishes that are used to hold the game pieces.

Box Interior

     The final stages of a project is where sometimes things can go wrong so there's always a bit of stress.  This is most common when installing the hinges.  I use a router and template to get them almost sized but the final fitting is done by scribing and chiseling to the exact size.  I recently had a student and we discussed why a marking knife is a much better choice than a pencil for this step.

Scribing Hinge Mortise
     When you have a scribed line it's better because you can set the edge of your chisel in that line.  Your chance of success is much better with a scribed line then with a pencil line.  Well, it's time to change the blade on the tablesaw and cut some foam pieces to protect the box on it's way to its new home in Michigan.

Losing the Ugly Plastic Handle, Sorry Marples!


De-Handled Marples Chisels

     I've been in the process of paring down and then adding to my carving chisel collection based on what I seem to use the most.  These are a couple of Marples that I've had since the early 70's and although they hold an edge well I could never stand the feel of the plastic handle.  I put out a question on a website on removing them and a hacksaw, perhaps followed by a propane torch was the reply.
     Looking at the design of the chisel I assumed they were a socket style but as you can see, that's not the case.  I did the hacksaw bit at first but realized I was hitting metal so continued to  work my way up the handle until I cut completely through.  I put it in the vise and twisted it off with a pair of vise grips.  Well, I thought that cutting wasn't necessary so the second one I just put in the vise and the handle twisted right off.  The tang is tapered after a square section of about half an inch.  I think I'll drill a hole in whatever I use for a handle that is roughly the average size of the tang then cut a square mortise to match.  Epoxy should hold things together.  This will be a good exercise in forming handles to fit my hand, I don't have a lathe so a spokeshave will be just the ticket.  I'll blog the results as I get into it, currently finishing up a box commission  and have one other client scheduled so it'll be a while.  Paying customers go to the head of the line!

Monday, October 22, 2012

Yep - Plumbing Too and I Feel a RANT Coming!


Under the Kitchen Sink
     Well, I'm going to take a break from writing about wood related stuff and get into plumbing and where has all of the quality gone!  Add to that the regulations and other legislation that forces manufacturers to change their products to meet them and you'll get the gist of where I'm going to go with this one -- okay, you've been warned.
     First off, yes I'll admit to being an older guy who grew up in the construction trades so know a bit about all of this.  Let's start at the beginning, if you're one of my blog followers you'll remember the complete kitchen remodel earlier this year, updated and new Energy Efficient appliances.  Love the results except the dishwasher never seemed to get as clean as we thought it should.  Plus it took 4-5 hours to complete a cycle.  We noticed that it would run for a couple of minutes then stop, run then stop, and so on.  Since it's under warranty we called the repair guy in and he said that the water being delivered to the machine isn't warm enough.  The reason it keeps stopping during the cycle is that the sensors tell it the water is too cool and it attempts to heat it again.  Notice I said attempts, that's because to get the Energy Star rating the heating unit can only warm it up 5 degrees at best.  Sure, in days past the heating unit was capable but in order for the company to get that Energy Star rating, it reduced its capability.  Okay, there's strike one.
     Strike two; this house was built in 1996 and uses a Man-O-Block plumbing system.  In other words there are no angle stops under sinks and toilets, it's all in one place similar to an electrical circuit breaker panel.  Here's the problem with that, you should always run your hot water before starting your dishwasher so that it gets hot water.  If you don't do that it'll fill with the cold water that was in the line already.  The Man-O-Block has a separate line for the dishwasher so there wasn't anyway to run it before it fills the machine.  That's what the picture is all about.  I soldered that tee and male adapters together so that the water for the dishwasher comes from the same supply as the hot water to the sink.  Now I can run the hot faucet prior to starting the dishwasher and all's well.  If you've ever worked inside a sink cabinet you know what a hassle that can be.  Between resting your back on the sharp edge and bouncing your head off of the pipes, frames, etc. it can get old fast.
     Now for Strike Three; I needed to add an air gap and re-route the dishwasher waste through the garbage disposal.  Went to Home Depot since it's only a few blocks from the house to get my supplies. The air gap they have is so flimsy the threads would strip the minute you tried to put any pressure on them to attach it to the sink.  Then to compound that problem the drain hose they sell is only 2 feet long and very, very stiff.  So stiff in fact that it'll kink once you manage to slip it over the garbage disposal port.  That puts even more stress on the cheaply made air gap so it now looks like the leaning tower of Pisa!  One more trip to return the hose and air gap and then to a plumbing supply company that doesn't put profit over quality and the jobs complete.  By the way, I went to Home Depots website and rated both of these items with a single star.  Needing to install, un-install, then return the low quality parts and then get in the truck to  drive to the plumbing supply store added 2+ hours of time to the job.
     Right now I'm running a test wash cycle to check for any leaks and so far so good.  The dishwasher supply line needed another 1/2 turn to seat completely.  The bottom line is that at the cost of $29.12 the job is done.  Having a plumber come out would have probably moved the decimal place one to the right!

Saturday, October 20, 2012

Are We There Yet?

 
     Remember your kids asking that when you were on a road trip?  I sure do and my standard answer was usually "....eh, twenty minutes".  That's the feeling I get sometimes when I'm getting to the final stages of a project, seems as if you always need just another  20 minutes, then another, and another; well, I'm sure you've been there.

Twenty Minutes Ago?
      Well, not quite but this is the latest of the major steps that needed to be done.  The pieces that are against the box sides have just a spot of glue to anchor them in place.  That's pretty much located by the clamps.  At our last Sin City Woodworkers meeting the subject of wood movement came up and since this box is leaving the dry arid desert and headed east I want to make sure the wood can move if it wants to.  There should be enough play in the center pieces and all of the dividers to allow for that.
     The last blog I talked about assembling the box and then cutting the slots for the splines.  Here they're being cut off.

Trimming Splines
     There are two splines in the box section plus one more for the lid.  Once these were cut and planed smooth I was able to separate the two pieces and cut the mortises  for the hinges.  There is a huge range in the quality and pricing of brass hinges.  Even locating the once prevalent Stanley brand is difficult and they're not the quality they once were.  It's a huge jump up to the Brusso ones at $35.00+ a pair!  Since this box has internal dividers a fold down stay isn't possible so that leaves Brusso's quadrant hinge as a $50.00+ option.  Neither of these options are in the budget but I was able to get a good quality, solid brass hinge from Rockler.  It's made in India and pretty robust, not like the Stanley stamped or extruded style.  Sizes were limited but the one I selected will allow the lid to open all the way back for easy access to the game pieces.

Separated with Hinge Mortises Cut
     The last few steps needed to complete this project is to finish the interior.  The exterior has Danish Oil and my hand rubbed top coats but for the interior of boxes my preference is to use shellac.  It protects well and is odorless, also my finish of choice for drawers.  Lately my method of applying the shellac to small surfaces has been with a simple air brush.  The first time I used this was on carved picture frames and I really like the ease of application without any runs or build up of the shellac in the carvings.  It's pretty easy to set up an area to spray in the side yard.

Shellacking the Interior Pieces
    The only thing left for these parts is to rub them out with a bit of synthetic steel wool and wax.  In the meantime the dust check for the front of the lid needed to be installed.  This is a perfect task for using a good, old fashioned gimlet to pre-drill the holes for the small brass screws that are used here.

That's a Gimlet
     That screw needs to be about 5/16" from the top and it's impossible to do that with a conventional drill -- the chuck gets in the way.  The tape on the gimlet is to set the depth, wouldn't look too good to have the hole go all the way through.  The plan is for the front, full length dust check to hold down the inner lid.  There are two other pieces on either side of the lid.  If our long distance measurements and planning is correct, these will put pressure on the game board itself and all of the cards and playing pieces will be secure inside of their custom box.
     The remaining interior portions of the box have been shellacked so after curing for a couple of days they can be rubbed out and waxed.  Apply the hardware and ship it off to my client.  It's an anniversary gift needed on the eleventh of November so no problem making that deadline.

Sunday, October 14, 2012

Glad It's Not a Production Job (yeach!!)


Interior Almost Done
     Since today is Sunday it was an easy day in the shop between church and working out.  You can see in the picture above that the interior is almost complete.  All that's left is to cut slots in the uprights about every inch to put dividers.  These will separate the various game cards required.  The center section is space for 6 petri dishes and there'll be two dividers there that they can use to contain them, that's an option but seems as if it'll be a good thing so they don't move around when the box is carried.
     Whenever I work on a project it's the thinking and planning part that is the most intriguing.  I'd hate to have a job where I'd have to perform the same task over and over and over .............. yeach!  I've talked to several custom woodworkers that feel the same, what we do is more about the process and figuring out how to accomplish it than the final product.  Years ago Diane and I were talking about her approach to completing a painting.  What she told me is that basically she works on a painting until she encounters a problem, then she solves that problem and continues on until the next one comes along. That's stuck with me and really makes a lot of sense.  Even though my work is pre-planned before starting there's always that part of the work where you have to stop and think it through.
     As you can tell, the box and miters are fitted and ready for glue up.  That's on hold because I'm finishing the top and bottom panels before glueing the box together.  In the mean time the dividers and interior partitions needed to be done.  I had thought of mitering them but decided against that for a couple of reasons.  This box is leaving the dry desert climate and headed east to a more humid one.  Everything needs to float and be able to move with the atmospheric changes.  I decided to use interlocking joinery instead.  The only piece that will be attached to the box itself will be the front and rear inserts.
     The first step was to notch the ends of each piece.  This was done with a dado blade on the table saw.  A stop block was attached to the fence to control the width of it on each end.

Initial Steps for Notches
     Notches were also cut on the ends of the center dividers.  Since the blade couldn't cut the entire required size, the pieces were clamped together and marked as needed.  In this instance I used a Japanese razor saw to complete the cuts, first in one direction:

Increasing the Depth
and then the other way.

And the Length 
     Even though this saw leaves a pretty fine cut a quick pass with a paring chisel brought it up to par.

Joint Details


     When you look inside of the box this joinery won't be evident, it'll just appear to be butted together.  Here is is mocked together, now you can tell that the front and rear pieces will lock down the side ones.  They also lock down the two dividers for the card sections.


     Tomorrow will be time to lay out the slots for the dividers.  Seems like a good thing to do first thing in the morning when I'm fresh.  It'll probably take some work with dividers to get them as close to evenly spaced as possible.  Glueing the box together is in the plans as well, don't think I'll have any problem meeting the November deadline.


Friday, October 12, 2012

Shooting Miters & Other Hand Work


Front & Bottom Panel for Box Freshly Oiled

     Up until about a week or so ago I'd never heard of the game called Pandemic but here I am, making a custom case to hold it and all of its component parts.  Of course I had to find out a bit about this game so consulted Wikipedia, here's a LINK from them explaining the game.  It sounds pretty interesting, especially since my daughter has a degree in microbiology and told me years ago that we don't need to worry about the big things (lions, tigers, bears oh my!) getting us it's the little bugs and viruses that'll do us in.  Having Valley Fever I can definitely relate and agree to that statement.  In any case, the game pits the players against 4 viruses that they need to stop before it turns into a pandemic and wipes out the world -- pretty cool!
     When I was first approached (via my Etsy store) about this project I just had to see if it was possible to carve the gas masked icon for the game that I found doing an image search.  It was printed out and since I had an 8" wide piece of Alder I decided that's what I'd use.  It came out well and the client liked it so work began.
     Alder is a nice hardwood that is sometimes considered to be a Cherry substitute although it's not nearly as hard.  There are a lot of cards used with this game that are the same size as a regulation playing card.  That was the basis for the over-all sizing of the box, really designed it from the inside out to make sure the cards, components, and game board would be custom fit inside of it.  The box will be an anniversary present so I have a deadline.
     The construction of the box will be mitered corners with Walnut splines for strength and decoration. You know how every time you do something you usually end up learning something as well?  You may recall that I recently re-adjusted the top of my tablesaw to the blade, it was off just a very slight amount but now it's cutting dead on.  Well, it didn't dawn on my that I'd need to also re-adjust my miter and crosscut sleds because they were dialed in to the miter slots being off a tad.  Of course, this had to be learned when cutting the miters not the 90 degree cuts; they would have been much easier to true up than the miters!  To make a long story short, I needed to do more work shooting the miters than just the few passes to true up the miters as I usually do.  Here's how I go about cutting them.  First, I'll use a scrap piece of wood to dial in the length of the piece:

Scrap, Test Piece to Be Exact

     Whenever possible I like to lock in the rip fence with a block clamped to it at the correct length.  Once the scrap piece of wood is correct, I'll then cut the actual box side.

Actual Side Piece

     No matter how accurately the miter is set up,  it's always good to shoot the miter to remove any saw marks and just clean it up a little.  To do that I have a small shooting board that uses a block plane; works well.

Shooting Miter
    I needed to do a little more than I really wanted to with this since I re-calibrated the tablesaw but it's well worth the effort.  Here's a close up of one of the boards that seemed to be out the most.  The sides of the box are 5+ inches and this piece has a very slight crown to it which compounded the problem in the miter.

Miter Close Up
     Now that's done I can concentrate on the panels for the top and bottom.  The bottom panel was glued up from two pieces but for the top it was necessary to laminate a piece to both edges to get the required width.  Then it was some careful hand planing to level it out without messing up the carving.  I like how the piece at the top of the gas mask guy has a grey streak, almost like there's some sort of virus or fungus up there!

Making the Top Panel

     Before oiling the piece I took the time to enhance the carving and deepen the cuts where needed.  Since the top will float in the box another thing was to soften the edges of the rabbet.
     Now that the first coat of the finish is drying it gives me at least three days to work on the box interior.  There will be partitions and slots to organize all of the cards.  The reason for waiting is to give me time to get the first couple of top coats, hand rubbed into them.  It's so much easier to finish them before the box is assembled.


Monday, October 8, 2012

Carving the Camellia


Final Effort for Now!
     If you've read my blog in the past you'll know that relief carving is something I continue to pursue.  It's definitely more of an artistic endeavor than designing and building furniture.  With carving, you need to show an object on a fairly level plane but manipulate the wood and the edges of the design to make it appear to have more dimension than it actually does.  There's a style of painting that has a French term which I can't recall exactly, something like Tromp leis which means; "fool the eye".  My carving skills are evolving, you know they say that practice makes perfect but after all my years working with wood I realize perfection is not a term that relates to woodworking very often.  I mean really, think about it; wood is a natural material and even though the tree a board you work may have been dead for a long, long, time it's still a living material.  It's subject to the effects of humidity and when you work it the grain structure will determine how it cuts and reacts to your tools.
     In any case, most of my carving is self taught from books, videos, and watching others.  I did take a week long class that taught me a lot but you need to do this continually to build up that muscle memory and skills needed.  I recently enrolled in a video carving class by Mary May.  If you're interested in what she has to offer, here's a LINK to her site.  She's been on the Woodwrights Shop, written up in some of the woodworking magazines,  and has videos on YouTube as well.  I like her style of teaching, very thorough in her explanation and gives you more than enough information.  Each project has a template and list of recommended tools to complete it.  A real plus is that you can ask her questions and she'll reply via email.  I had a question on tool selection and she responded within 24 hours or so.  Carving is what's happening in the shop right now.  I'm waiting to hear from a potential client on Etsy that I've sent a design to for a custom box she's interested in.
     I recently ordered a bunch of Sapele that I plan to use for a sofa table that is in the planing stages.  I really want to add some carved details to this project which was another incentive for enrolling in the school.  Oh, by the way, the fee for the carving school is only $10.00 monthly; I'd say it's well worth it.
     Step one was to transfer the template to your board, since this is practice and I have it in my shop I'm using Basswood.  It's a pretty straight grained wood which makes it easier to carve unlike the Sapele I plan to use for the table!

Transfer & Initial Cuts

     One of the things I really like about her template is that she tells you to put all of the markings on it to help your work.  Those short, straight lines by the outline of the Camellia help you while you work.  The initial work is done with a V-chisel.  Once the entire design is outlined with it, various sizes and sweeps of gouges are used to refine the shape.  This is where I had a question since I don't have the exact, recommended ones.  Her reply was to use what I have and modify the design if needed.  In her video's she shows how to substitute and use what you have.
     Next comes the initial steps of creating motion and layers in the work.

Enhancing the Outer Leaves

     The goal here is to give the leaf a sense of undulation, just as you'd see in nature.  I've begun some of that on the upper, left hand leaf.
     Now the rest of the work begins, trying to create that sense of life from a relatively flat piece of wood.

Adding Texture

     Layering of this flower was an interesting process but in Mary's video she really explains how it should be done.  Notice I said "should" because I didn't quite nail it.  Her technique here was using different colored pencils to indicate which petals are on top and which go underneath.  A good friend of mine (Dennis) who is an excellent carver has told me that he'll really study plants and flowers to get a sense for how the carving should look.  Since I'm a nature boy myself I'll just have to take a bit more time not only smelling the roses but also checking out their form.  Of course, you know that here in the Las Vegas desert I will have some limitations!
     Until the next commission my plan is to do another one of these Camellia's right next to the first one.  The goal being improvement in the layering and dimensioning of the carve.  Honestly can't think of a better way to spend my time then to stand at the bench and improving my skill level.  You know what I've said before, life is not a spectator sport!

Wednesday, October 3, 2012

Belt Sander Saga Continues


Sample, Un-Stropped Chisel Cuts

     Well, after fiddling around with the belt sander set up, experimenting on my carpenter work flat chisels, the picture above shows two sample cuts from a couple of gouges.  These cuts are right off of the belt sander and not too bad of quality.  Basswood is the wood and the cut is across the grain.
     I've seen some comments about this series of blogposts I'm doing and most of them are positive.  My goal in all of this is to change the cutting angle of my gouges so they suit my particular style of carving better -- everything is evolving!  Since reading through Leonard Lee's book on sharpening yet again it seemed to me that he really felt the belt sander is an underused tool for sharpening and rates it highly.  From Lee Valley I picked up their 120 grit Blue Zirconia sharpening belt and give that two thumbs up. I also got their 15 micro silicon carbide and have some mixed emotions about that but will get into that later in this blog.
     The first issue I addressed was the one about getting the rotation of the belt to go the other way.  Makes sense that you wouldn't want your edge slammed against the tool rest while you're trying to hone it.  Here's a LINK to that blog if you need it.  I came up with what I think is a pretty effective way to maintain the needed angles on the chisels.  For my carving work I'm using 20 degrees.  Just to clarify, for my bench chisels and planes I use hand held guides and stones only.  I'm not a fan of hollow grinding.  Saying that though, the first bunch of experiments I did with this set up was on the Stanley butt chisels I bought back in the early 70's and used during my carpenter years.
     Okay, let's get started.  The picture below shows how easy it is to swap out the belts on my set up.  There is plenty of clearance on the side to get your hands into, the only slight hassle is pulling up on the tension knob but really not bad of a chore.

Plenty of Clearance for Belt Changes

     I improved the tool rest, I think!  It's an aid which will allow you to sharpen a tool that's wider than the belt.  It's simply a fence that hooks over the tool rest.  To make things easier to move during cutting, the guide and the tool rest have been waxed.  By holding the tool against it you can now move it from side to side to grind the entire edge.  For tools less than an inch wide clamp the tool rest so it's stationary.
This View is looking from the back of the machine so it's easier to see. 

Detail of Rest --- Viewed from Back

     In practice there are a couple of things to consider.  First of all be prepared that the tool you're grinding will want to pull away from the rest so hold it securely.  The belt moves pretty quickly and things will heat up so just "kiss" the tool to it and then pull back.  The amount of sparks you get will be a good indication of how heavy or light your cut is -- you want to work slowly and make multiple, light passes cooling the tool in some water as needed.

Actual Cut in Progress

     Like I said, I'm using some carpentry chisels to get a feel for this process and they were in dire need of some reshaping.  Funny how nails and ceramic tile screw up their edges!  I'm one to use a sharpie on the edge to check the progress of my sharpening.  Here is one of them after a few passes:
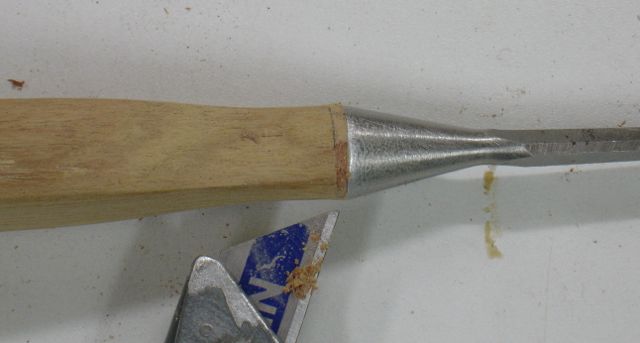

1 1/2" Butt Chisel
     
     After carefully guiding each of these into the belt I checked them both for square and to see how the cutting angle was coming along.  For utility use bench chisels I use an angle of 25 degrees. 

25 Degrees and ........
......... Square

     Next up was using the 15 Micron belt to hone and remove the scratch pattern put in by the 120 grit.  The first use for this was on a small size chisel and boy, did it ever heat up fast!  I remembered seeing in Lee's book that he honed a knife blade near the top of the machine where the belt ran free.  I double checked the instructions that came with the machine and it said this piece of angle iron that's under the belt should always be touching unless you're polishing.  There's my aha moment, there are two allen screws that hold the angle iron in place.

Angle Iron NOT Touching Belt
 
     This made all of the difference, the heat didn't build up as before.  This is how the bench chisels looked after honing on the belt.  A bit of work with water stones and a guide and they'll cut like butter.

Carpentry Chisels Re-ground, Honed, & Ready for Final Hand Work
 
     So the practice work is now complete so it's time to experiment with some carving gouges.  I changed the tool rest supports to the 20 degree set.  The chisels I practiced with are some of the plastic, blue handled Marples that although they're good tools I just don't care for the feel of the plastic handle.  Matter of fact, now that they're sharp I've put them on ebay (See one here).  First up was to re-establish the 20 degree angle.  Same technique as with the bench chisel but rather than having to move the tool rest I clamped it down and used it as a guide while rotating the edge on the belt.  I re-adjusted the angle iron so it was close to the belt (1.5mm or so) and began with the 120 grit belt again.

Initial Re-grind with 120 Grit

     In the picture I've almost finished it, there's still some of the old edge on the corners.  Keep in mind that the goal of this operation is to grind to new metal, you can tell you've achieved it when there's a uniform burr on the inside.  The next phase was to switch over to the 15 micron belt, lower the piece of angle iron and hone them.  Here's how I guided them for this process.

Honing Stance
      The edge of the gouge is against the rest, my fingers are supporting it loosely, and my other hand is rotating the gouge against the belt.  If you go back to the picture at the top of this post, that's the cut after this.  The only thing I did was to remove the burr with a slipstone.
     Well, truthfully I'm pretty pleased with this  whole process.  My goal was to find a way to either re-configure the cutting angle of my carving tools and/or refresh the edge as needed.  I've discovered that honing will tend to round that edge which gradually changes the action of the cut.  I'm really a novice carver and have spent most of my years building furniture types of projects.  I'd be interested in getting feedback from any of you that may go ahead and give this a go.  If my blogging has helped you with your work so much the better --- John