 |
| Top or Bottom -- What's Your Choice? |
Several blogs back I mentioned that I've sold some of my Marples carving chisels for the simple reason I just don't care for the blue, plastic handles. Not only does it cheapen them (IMHO) but they just don't feel good when you work with them. The 2 chisels that didn't sell were a double bevel, angled skew and also an #8 gouge. Decided to keep them and once I figured out how to remove the handles it was on to the next phase.
 |
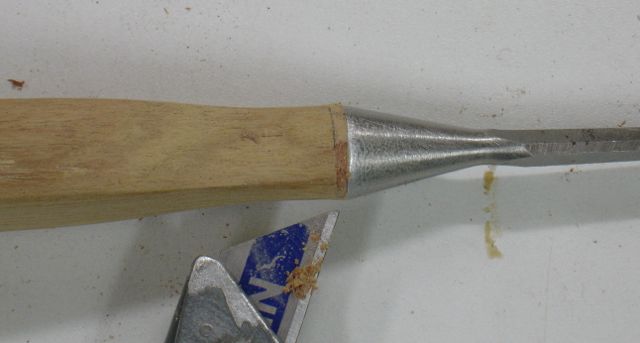
| Carving Chisels |
From the outer appearance I assumed these were socket type chisels and handles but as you can see, that's not the case. The chisels have a large, tapered tang that has a squared section for the first 1/2" or so from the handle. To remove the handles I placed the chisel between a couple of scraps of wood in a vise. A pair of vise grips firmly locked on the plastic handle combined with some twisting and pulling got the off. The first one I did a hacksaw was used to cut off some of the plastic but don't feel that's necessary.
Looking through my pile of leftover exotic scraps I found this piece of Canarywood. The first step was to locate the center and then drill two holes. The first one was sized to fit and squared area of the tang while the second was slightly smaller to accommodate the tapered section.
 |
| Ready to be Re-Assembled |
I have a piece of leather so decided to use that between the chisel and the handle to cushion the shock. Even that looks better than the white pieces of plastic Marples used. There is a hole drilled in the leather first and then it was roughly cut out. This chisel will be used as a utility chisel at the bench or on a job so having that piece of leather there will act as a bolster between the handle and the steel of the chisel.
 |
| Epoxied in Place |
Now to put it all together. For sure I couldn't place either end on a bench and beat the handle on with a mallet so here's what I did. A couple of scrap pieces of wood were places on either side of the blade which was then clamped in a vise. The epoxy was put in the hole, things were lined up and then a couple of tabs with a mallet set the handle in place.
Here's how that looks once the epoxy is set.
 |
| Ready for Shaping |
This particular chisel is a 3/8" wide bench chisel. This was the experimental on so I didn't pay as much attention to the shape of the handle as I should have. For the carving ones I'll definitely make a pattern and be a bit more exact. The nice thing about building any of your own tools is that you can form them to fit your hand exactly.
The first step was to locate the centers of the chisel and lay them on the wood. This was done with a black sharpie which doesn't give a very precise line but I wanted it to show up for this blog.
 |
| Preliminary Layout |
What the plan was it to cut one side then use the cut off piece to transfer the shape to the opposite side.
 |
| Transferring Curve |
Just as with any other bandsaw work where you're essentially sculpting the wood, the scrap pieces are taped on temporarily so you have a stable surface when cutting the other side.
 |
| Cut-Offs Reattached |
To shape the handle I employed several different tools the main one being spokeshaves. That leather bolster proved to be valuable for more than just bolstering! The part of the handle closest to the blade was too small to get the spokeshave in. Besides, I didn't want to run the spokeshave blade into the metal of the chisel. Here's where that leather helped:
 |
| Trimming by the Metal |
I used a carving knife and carefully pared away the wood being carful to stop
at the leather. This left a slight bit of leather that still needed to be removed and a utility knife took care of that. Didn't mind dulling its replaceable blade against the chisel.
 |
| Final Trimming of the Bolster |
Sanding and working the wood until it felt good in my hands is all that's left. I'll put a couple coats of the 3 part top coat mix I use and it'll be a great little chisel. Next up, well there's a list in my head so I'll just keep checking things off as they go.


No comments:
Post a Comment