Saturday, March 31, 2012

Completed! (except for cutting board & ovens)

 
   A little less than a month ago, our kitchen looked like this:

BEFORE ---
And now it's looking clean, spacious, and updated:

----- & AFTER!
 North wall is looking bright and new:

Sorry, ugly cutting board :-(
        East Wall:

Computer Clutter Removed and Concealed
     This has been another of our house projects where Diane and I collaborated, planned, and worked together to keep our home up to date, comfortable, and a great place to live.  Like all projects there were a few unforeseen "happenings" but they were fixed.  For example, the 1 1/2 inches of granite I needed to learn how to remove so the stovetop would fit, first time for that but found it cut somewhat like a brick but needed a diamond blade, plastic tent to contain the dust, and a willing neighbor to get in there with a shopvac to suck up the dust.  Needed a steady hand to cut a straight line, wouldn't have looked to good to mortar in a stovetop! The same will need to be done when the oven arrives next week but --- that's wood and I'm pretty handy with that stuff.  Same technique, plastic tent and a router but this time Diane will be handling the shopvac.

     To keep track of all the doors, I stamped each one to identify it and then made a diagram showing who goes where.  Not being sure the stamp wouldn't disappear when the door was painted, a sharpie was used in the hinge location and covered with tape prior to painting.  You can still see the M imprint but I always figure it's better to be safe than sorry!  Old habit, stick a toothpick into the screw hole to "re-line" it.


Relining the Holes

     It went against my usual Dutch nature to splurge $25.00 on a 12' by 400' roll of plastic at Home Depot but boy, am I glad I did!  Watching how Ron, the sheetrock guy, taped it to the wall to completely cover whatever needed to be covered was a neat technique to learn.  It was done about 4 times to protect the completed work.  Here's the almost last time when I did the grout Thursday night:

Ready for the Grout

Me Too!
    
     This was one of those projects that really make the house even more of a joy to live in.  Since being retired and spending most of our days at home it's great to have an environment you really like.  Diane works part time and then spends most of the rest of her time in the studio while I spend most of my time in the shop either working on a project or giving instruction to a student.  At the end of the day though, nothing like that glass of wine in an atmosphere we love.

Monday, March 26, 2012

You Know What They Say About ALMOST

    Yep, they say it only counts in horse shoes and hand grenades but after struggles the past two days with what should have been fairly simple jobs I feel the need to show what's been done.  One of the struggles had to do with the venting for the microwave/exhaust fan above the stove.  I've already lamented about having to enlarge the hole in the granite which I thought would be a hassle but really went quite well!  The vent, now there's another story.

   
     The microwave has a 3 1/4" x 10" rectangular vent, centered near the rear of the unit.  This is pretty standard.  The problem was that the builder of the house has the vent located slightly off to one side and has forced it into an undersized hole making it oval.  Code says that vent pipe should be solid, not flexible ducting but after several attempts to create my own solid ductwork I gave in and used flex.  Even that was a hassle but now it's done.
     The last thing to give me fits was the dishwasher.  If you've ever installed one it's pretty straight forward, run your drain, run your water inlet, and then add electricity and you're done.  This unit has a new way of attaching the water inlet and it's not user friendly.  Add to that the Maniblock plumbing system that the developer of these homes used 16 years ago and the problems compound. Needed to get real creative with various adapters and fittings to get things hooked up.  Almost cross threaded the plastic inlet on the machine but managed to work my way past it -- that would have been a real nightmare!  But, know what?, it's just a memory now because we're in and running fine.


     It's somewhat hidden by the island but the stainless looks great.  Also decided that since the drawer fronts had to be removed for painting we'd hinge them and add trays to them to keep those icky sink related items like sponges, scouring pads, etc.  Added that to both items.
     There are only two things remaining left to be done for the kitchen makeover.  When the new double ovens are delivered I know I'll need to enlarge the cabinet to accommodate them but that's wood and I'm pretty adapt at working with that.  That should be sometime next week so in the meantime I'll probably add the glass tiles that will go above the splash to the bottom of the cabinets.  Here's a teaser picture of how it should come out:


Not a real clear shot of it but you can get the idea.  They'll really add a bit of sparkle to the project.
Have to admit, I'm ready to get back to the shop and work on strictly wood for a while.

Sunday, March 25, 2012

Added to my Repertoire!

     It's been an exciting time since the last blog 4 days ago.  All of the appliances were delivered except for the double ovens that should be here in early April.  This was pretty exciting.  We figured that we should be able to get something for the old (16 years or so) ones so Diane took some pictures of the refrigerator and posted them to Craig's List.  The phone started ringing within 10 minutes and the people wanted to come over.  The first lady came over, paid for the refrigerator and asked if we'd help put it in her Ford Explorer -- wisely; we declined.   She called some "friends" and pretty soon here comes two guys with a U-Haul truck and a much needed dolly.  While she was waiting she checked out the microwave and double ovens that were on the back patio.  Unbelievable but they bought those too.  Then I mentioned that I had a stovetop in the garage, showed it and then that was bought.  I thought, what the heck, hey I'll have a dishwasher too by the end of the day, would you want that?  Not only did they want it but the man who appeared to be in charge said "my guy can take it out now"  Felt just like we were visited by American Pickers and we bundled everything just like Frank does on that show -- crazy good!  Turns out that he buys foreclosed houses at auctions and flips them after doing a remodel to them.
     The not so good is that the newer stove tops need a hole that is about 1 1/2" wider than the hole we currently have.  If it was wood, not a problem but our counter happens to be granite.  I thought to myself "great, how will I find someone to cut this larger?"  My good neighbor,  across the street, has a 4 1/2" angle grinder and thought that if it was fitted with a diamond blade it would cut it although it would be very messy. He offered to hold a shop vac if I wanted to give it a try.  Why not, never have done that but I'm always up for the challenge!  I needed to take 3/4" off each side to keep it centered.
     Went to home depot, bought the diamond blade, and made a plastic cocoon to try to contain the dust.  Mike held the vacuum right by the blade as I sawed on the line.  Should have taken a picture of it but was too intent on just getting it done.  Pretty interesting, the vac would suck in the plastic and one time the plastic got wrapped around the blade and stalled it.  In the end though, I used a cold chisel to clean out the corners and after a little more trimming and finagling the stove dropped into place -- here it is:


     Kind of distorted but you get the picture.  The metal rail above it is for the Microwave which I hope to get in today.  Earlier I'd mentioned that our backsplash design had to change.  The tile that we put up over the granite backsplash is just not going to come off.  I know the guy who put it on (me!) and it's on to stay.  I tried to pry some off and it's bonded to the granite and am afraid it might crack that.  Not a good plan so the small glass tiles we've picked out will go on top of it and extend to the bottom of the cabinets.  Here's a picture of the new refrigerator and you can also see the island and the contrasting color.

 
       I may build a cabinet to fill in the space next to it for a broom and tall items like cookie trays -- have to catch my breath first!  On to the dishwasher and maybe the microwave today and see what is done next.  I think I'm having shop withdrawal pains though.

Wednesday, March 21, 2012

Almost, and I stress ALMOST; Done with the Cabinets

     Yesterday, since I had so many doors to spray, was kind of a nail biter!  My set-up for spraying is on the western side of the house so direct sunlight is blocked until around 12:30 or so.  That's important because the sun would cause the paint to cure way too fast.  The routine was to spray the backs and edges once, wait an hour and then spray the second coat on the backs. Wait another hour and repeat the process on the fronts.  Well, this time the sun came over while the first coat on the front was drying which meant I had to get them into the garage while they were still wet.  To add to the process, 5 of these doors were pretty large and just fit through the door but you know what?, it's done and just underscores the statement that through adversity we build strength!


     As you can see in this picture, the kitchen is in a major state of confusion.  Yes, that's the refrigerator stuck in the middle of the kitchen between the stove top and the island!  Makes it pretty hard to fix a meal but what the heck, there's a lot of restaurants here in Las Vegas.  Besides, the microwave and the oven is in the side yard awaiting their debut on CraigsList.

     So, what remains to be done?  The cabinetry by the refrigerator is ready for the second coat this morning.  All of the scribe needs to be measured, bought, cut, and painted by the end of the day tomorrow.  The new refrigerator will be delivered on Friday so that "hole" needs to be ready.  Other than that, all that needs to be sanded and painted are the drawers.  Diane has been working on cleaning out the cabinets so the doors can be re-installed.
     Monday was the day the ceiling was painted and that took a lot of prep.  To protect the floor Diane ( with Ali's help) taped painters paper all over it:


     I used this taping technique I saw Ron doing when he did the drywall work.  I thought it was pretty clever so let me share it with you.


     What you do is put your 1 1/2" wide tape on the wall and press the upper half of it tight.  You unroll the plastic and put the edge under the tape and secure it.  The plastic is a boxed roll that you can get at Home Depot and measures 12' x 400', it's even marketed as "Painters Plastic".  Once it's all up, you can unfold it and paint to your little heart's desire:


     Speaking of painting, time to put on the over-alls and get to it.  Other than the drawers and installing the appliances the only major thing left is tiling the backsplash.  I'll more than likely need to cut the drywall and remove it completely, doubt the tiles we put up there 6-8 years ago will come off without a fight so it'll be easier to cut the wall and remove it drywall and all!

Sunday, March 18, 2012

No More Nineties!!

Smooth and Up to Date
     Today was a difficult day for me because instead of working on the kitchen myself I hired Ron to come in, fix that gaping hole, and re-texture the ceiling so it all matches.  He did a great job, came right on time at 8am and was done and out by 1:30.  That was the one job I knew I didn't want to tackle and he did an outstanding job which is probably hard to see by the photograph.

     The first thing he did was to completely mask off the kitchen with plastic to contain that fine, drywall dust to one area.  He also taped the floor off and then created a walkway from the kitchen to minimize tracking the dust through the rest of the house.


     Here is the patch in place and he's starting to taper the two pieces of drywall to create a seamless joint.  He used a fast set mud compound so he was able to be in and out in such a short time.  Back when I worked construction drywall work was a multi-day job because you had to wait for one coat of mud to set up before you could sand and apply the next.  He told me that this will be good and dry so I can paint tomorrow.  That's good to know because the weather forecast is calling for continued winds and temps in the low 50's, neither one of those conditions is good for spraying the next batch of doors.

     Just to remind you what things used to look like, this is the before picture:

   
      Quite an improvement I'd say, not only in the appearance but also with the quality of light we now have to work with.  What do you think?

Saturday, March 17, 2012

Pardon the Dust, Remodel in Progress

In Progress for Sure!
     Well, I guess I'm getting antsy due to the fact I'm unable to spray the last 15 doors!  Terrible winds and rain is forecast for Sunday and Monday.  Pretty ironic that the weather would chose to do that now since last year we only received about half of our annual 4" of rain -- oh well, patience is a virtue.
     As you can tell, things are somewhat in a state of disarray!  Although I'd planned to spray yesterday I decided to start on the face frames on the north and west walls.  There is a definite food theme going on with the paint choices, this is called Marshmallow.  Saying you want "white" paint just doesn't work.  We had initially chosen what we thought would work and matched the trim in the rest of the house but after putting it on one of the end cabinets it was very yellowish green.  Thank goodness Diane has her artists color sense!  We ended up taking a piece of the granite to Sherman Williams to work with and this is what she decided and it's good.  We're using their ProClassic line of paint which is an acrylic rather than a straight latex.  It dries very hard and has all of the characteristics of an oil base paint without the hassles.  I'm doing two coats whether it's brushed on inside the house or sprayed on outside.
     One of the things we like about this is that the grain of the Oak still telegraphs through.  You can see that in this shot of the island:

The Island with its Jewelry
       To keep that food theme going the color on this is called French Roast.  Adding these brushed stainless bin pulls to all of the drawers and have egg shaped knobs for all of the doors.  Just placed the order for the replacement stainless steel appliances which will be delivered when the rest of the kitchen is ready.  Drywall on the ceiling tomorrow and paint it after a few days to allow the mud and texture to dry thoroughly.  Planning to sell the old appliances on Craig's List to recoup some of the costs.  Last thing we'll do is replace the backsplash with these really cool, 3/4" square glass tiles.  They're variegated and pick up the colors of the granite, cabinets, and also the stainless steel.
     So that's where things are as of now.  Really looking forward to some quieter shop time.  There's the frame I carved in the workshop that is just begging to be water gilded with 23kt. gold and I'd also like to carve some type of panel for the kitchen.  If you look at the first picture there is a half round, recessed design element above the microwave -- that's destined for a carving.  It'll be up high enough where any mistakes won't be too evident.  Trying to think of a good "kitchen theme" there, Diane's already told me that a big rooster is not in the plans!

Thursday, March 15, 2012

The Painting Begins & Continues

     I have to confess that while I'm sanding doors, drilling handle holes, and otherwise prepping these for paint I did what no runner should ever do -- counted how many doors (miles) are left to go.  When you're midway through a 50 miler the last thing you want in your head is that there's 20 miles to go!  Well in my defense, sanding is much more tedious than running in the mountains any day.
     I can only spray until around noontime, after that the sun hits the western side of our yard and the house no longer gives me any shade.  The other problem has been the wind, pretty hard to lay the paint down on the door when the winds gusting.  Here's the set-up:


     I made some quick and dirty sawhorses, ripped a couple of 8 foot 2x4's down the middle, and then spaced finish nails about 4" apart all the way down them, this will be the drying rack.  I then set up a turntable on a garbage can, covered it with tarps and that's the place to spray.  Worked out well if I do say so myself.
     First off was the backs, after one was sprayed it was put down the far end of the drying rack.  Repeat until the rack is completely filled up, then wait about 45 minutes to apply the second coat to them.

     Again, wait a bit and follow the same procedure on the fronts.  When all was said and done here's the results:

Two Coats, Front & Back

     Since the sun was just about to come into the side yard I needed a place to put them.  Best thing I could come up with was to run to Home Depot to get some lengths of cheap PVC to lay down on the garage floor and get them out of the sun -- sorry Mini you get to park outside next to the truck.
     Always a bit of a learning curve.  The paint is Sherman Williams ProClassic which is an acrylic latex.  I needed to thin it down quite a bit  (20+%) and even at that it seemed to come out with some splatters.  Keeping the gun close to the surface and shooting on a thin coat worked.  This paint flowed out nicely.  Diane and I both like how the grain of the Oak still telegraphs through the finish so you know it's not some plasticized door.  If you know me, I hate to paint wood!  My furniture is all about showcasing the species and selecting exotics to do just that.  I've even been given a hard time by the guys in the woodworkers group but what can I say?
     The center island is painted darker:

   
      It makes it disappear, we were afraid that if it was painted like the cabinets it may just look like a big block sitting in the middle of the kitchen.  We didn't plan this food theme but it's called French Roast and the color for the cabinets is called Marshmallow!  This was applied with a mohair roller (2 coats) and you can see how the woodgrain telegraphs through, the baseboard is taped off as is the floor.  Diane really has a knack for selecting the right colors.
     The plan for tomorrow, wind and weather cooperating, will be to paint the remainder of the doors.  Once they're sufficiently dry to put into a rack they'll be covered and the sanding will start for the drawer fronts.  Lots of wind and rain are predicted for Saturday through Monday so painting outside will be put on hold.  That's okay though, the drywall guy will be here to patch the hole and I have plenty of sanding and painting to do on the face frames but; who's counting!!

Last Class Session

     Last night was the final session of the plane making class at WoodItIs here in Las Vegas.  This was an awesome class and even though there were only four students they all came away with their very own custom, made to fit their hands and needs, Krenov style wood plane.  At the start of tonights session, here's what we had:

Start of Day 3
   
     The one on the lower left is Bobbie's and is made of Australian Lacewood and Mahogany.  The handled plane on the upper left is Jay's and it's destined to become a scrub plane.  The upper right plane belongs to Lupe and the bottom right is Larry's.  At this point the bodies have been cut out and readied for the blade, the sides have been dowel on and glued as well as the soleplate.  We all used Purple Heart for the soles which is very hard but also pretty brittle as we discovered while forming the planes.
     The first order of the day was to smooth out the ramp the blades will sit on.  That's what Bobbie is doing on the left with the aid of a long paring chisel.  The ramp needs to be smooth so the blade is securely wedged on to it.  Lupe is at the sanding stage on her plane.


     Once the ramp's are smooth and the plane has a nice mouth it's time to shape the bodies.  This is started with the bandsaw and then various tools can be used to get the shape that feels good to your hand.


     That's what Larry and Jay are doing here.  Jay's plane broke the tradition of the classic Krenov style but followed the design I came up with for a scrub plane.  A scrub plane is used to remove high areas of a board by using a radiused blade.  Scrub planes have been replaced by the jointer but if you enjoy hand tool work it'll come in handy.  The fact that you're removing a lot of wood means you really need to be able to grip that plane and get physical with it, that's the thought process behind this design:

Jay's Version of the Scrub Plane
     This design is a bit more complex, I remember that making mine was time consuming because I wanted it to feel "just right" when I gripped it.  It may take time but it is time well spent!
     A tool that I really enjoy working with is a spokeshave,  Larry is finding that it worked well for shaping the front of his plane.


     The class was stopped after abut an hour and a half to do a sharpening demo, no matter how good your plane iron may be a final honing is required to get the smooth, thin shavings we're aiming for.  Lupe was the first of the class to make shavings, you can tell by how thick it is she got a beautiful edge on her iron!


     The final step we had time for was finishing the planes with a mixture of boiled linseed oil, turpentine, and polyurethane.  We only had time for one application which was sanded into the finish with some 320 wet/dry sandpaper.  This is when the wood really shines, like Bobbie's heart shaped, Australian Lacewood example:


     Hard to see the beauty of the wood but the look on her face let's you know she's pleased with it!

     All in all, this class was quite rewarding and I'm sure they all felt the same.  There's something magical about making and creating objects from wood.  Now they have a tool that they made and will be able to use for many years to come.

Monday, March 12, 2012

Prepping the Doors

     This type of work is not what I usually blog about but it's the project I'm getting ever deeper into.  Usually I share the hand cut joinery or smooth planed surfaces of some type of exotic or domestic wood species but this, it's different!  Diane and I have decided that since our original retirement plan of selling and downsizing our house has been scraped because of the economy we would just upgrade and repurpose the house we have.  Great neighborhood and neighbors so, why leave?  If you've been following along you know the first step was to get rid of the double tiered, fluorescent light box.  This was replaced with LED recessed lighting and the drywall will be re-installed and textured this Sunday.
     In the meantime, I've started removing the doors and prepping them for painting.  Something about those open cupboards that Ali just can't resist:

Just Checking Things Out!
 

     Sometimes you can hear her trying to work the door open which wasn't too hard with the old hinges.  Now there's no door but she's starting to lose interest, guess that like me she enjoyed the challenge.


     I won't get into the details of how I know this but I'm thankful for 3/16" dowels that are capable of plugging holes drilled in the wrong place!  I've decided to break the door prepping into manageable bites of 7 doors at a time.  I remove them, stamp a letter near the upper hinge position to know where they belong and then put a piece of masking tape on the corner that needs to be drilled for the handle.  Well, in the process it could hypothetically happen that you would drill the hole on the horizontal member instead of the vertical member of the door where it should be.  Remember the 3/16" dowel?  I decided there had to be a better way to mark them so my aging, sanding dust addled mind wouldn't make a mistake.  Just like so many other things in woodworking a simple jig was all that was required:

Marking Handle Position
     What this is is a two sided jig which should insure that the handles will be on the proper door member and at the same location.  Before removing the door I simply hook the jig over the top then use a scratch awl to center punch the location.  Easy now to drill a nice, straight hole on the drill press.  As of now, half of the 28 doors are ready to go and the rest will be completed tomorrow.  I'd really like to start the gesso process on the frame I carved in the workshop with Ian Agrell and I plan to fit that into my schedule.  Wouldn't you know that it's supposed to be windy most of this week and then there's a good chance of rain during the weekend.  That's going to make it difficult to spray the doors and drawers outside so I may have to start brushing the face frames and cabinet sides indoors.  I'll keep you posted.
   

Thursday, March 8, 2012

Second Session of Plane Making Class

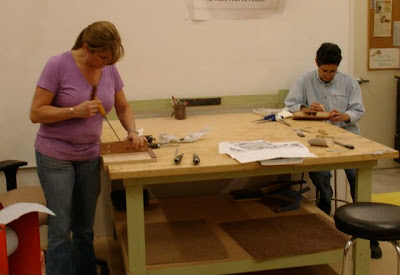
     Last night was the second session of the class and unfortunately one of our members was absent.  Hopefully we'll get her caught up over the weekend, I'm sure we will.  At the end of the first session everyone had their main body parts cut, the recess for the chip breaker blade screw had been routed out, dowels were made, and things were ready to go together.  Jay, who is making a plane similar to my version of a scrub plane, had a bit more work so he came by over the weekend to my shop to finish a few details.  Now that the body is put together the next step is making and attaching the sole.
     Before that can be done, the bottom of the plane needed to be trued up and square to the sides.  This was done with a combination of planes and, as Lupe is doing here; using a piece of sandpaper on the flat and level surface of the table saw:

Checking the Plane Body for Square

     Jay is working on the same process, notice how his plane has a handle.  That's the part that is taking him a little more time since it needs to be formed, drilled, etc. to where it feels just right in his hands:

Jay using a Block Plane to true up the bottom

     Luckily, he has a shop at his house so he can work on his plane and not fall behind since his design is a bit more complicated.  To attach the sole to the body we use 3/16" dowels to register them together.  This is very important since the mouth opening (where the blade comes out) needs to be carefully made.  Theoretically speaking, the smaller your mouth the finer your cut.  I had them make their own 3/16" dowels for this purpose.

Making Dowels, Cutting out a Mouth, and Gettin' it Done!

     Last of all, work was started on making the wedge needed to hold the blade in place.  They all drilled out the location for the 1/2" dowel for that and we're good to go!  Next week we will first hone our blades and then see what kind of cut they are able to achieve.  Once that's done the final step will be forming the body to fit their hands.  That's accomplished with the bandsaw, spokeshaves, files, sandpaper, etc.
     Looking forward to seeing how well their planes will perform -- hopefully it will meet the expectations they had when they signed up for the class.

Tuesday, March 6, 2012

Kitchen Progress -- Slower than I Thought!

Well, here is that old cliche;
     
                          OUT WITH THE OLD -------


AND IN WITH THE NEW:


Sorry, must be too tired to focus


This is what we finally decided to go with and now that 6 out of 8 are installed and burning brightly I'm really happy with them.  We bought these at Home Depot and they were one of the few items that received 5 starts from almost every reviewer.  We had tried the CFL bulbs but they were very blue and created a glare.  Almost decided to stick with incandescent flood lights and wait for LED's to drop in price but then saw these.  What's nice about them is that they are bulb and trim all in one.  At about $35.00 each this was a less expensive way to go then buying separate bulbs plus the trim ring.  We had tried an LED bulb and it too, seemed to leave quite a glare.  Most also show the separate LED's giving them a Jetson, space age look.  These don't have that and the bulb has a built in cover.  We should realize a great savings on these bulbs, rated at 65 watts but only use 14.5 watts.  I installed them in an air tight can and since they don't put out much heat (compared to other bulbs) we figure our a/c bill this summer will be a bit lower as well.
     Had a little bit of a problem with the Halo, 6" recessed cans.  I ended up asking my neighbor who works on kitchen remodels and installations to give me a hand.  He too had some hassles and mentioned that these had some grey foam on the clips, something he hadn't seen before.  Since we needed a total of 8 I bought an unopened case of 6 plus 2 loose ones.  The case had the clips without the insulation and installed much easier!
     Here's a picture of how these look now, I still need to add the final two by the window.  The way the kitchen is wired there are three switches, the four lights in the center are on one switch, the two over the bar are on another, and the last two by the window are on their own switch as well.


     Looking good!!  Replace the drywall, have an expert retexture the whole thing and then we'll paint it so this phase will be complete.

Monday, March 5, 2012

Kitchen Progress

A Gaping Hole
     After a couple of hours work and clean up time this is what we have now.  The hole is about 64" x 100" and took a while to open up.  After removing the existing fluorescent fixtures (3) the final piece of sheet rock was taken down.  The amount of bracing and blocking they put into this structure was crazy!  My cat's claw and crowbars worked overtime to get rid of it all.  Much of the backing was lower than the bottom of the rafters but I guess they didn't care about that since it was inside of the light box.  The floors are fairly clean with the steam mop but will need lots of TLC when the entire project is done.  That drywall dust even got between the seams of the laminate floor.
     I had a message from Ralph Bagnall  who encouraged me to check out LED bulbs.  We did and will probably go with them in spite of the additional added up front cost.  Bought a CFL lamp to test and it's really very bright and glaring.  That, combined with the warm up period is having us consider the LED's.
     Once the ceiling was removed and things cleaned up, Diane and I measured all of the features and made the floor plan.  It was drawn in 1/2 scale and here's the progression:

  The initial plan was drawn on to graph paper and then copied, upper left drawing.
Next the counters and upper cabinets were located, upper right drawing.
This was followed by locating the rafters and approximate location of the ductwork that we'll need to work around, bottom left drawing.
And the final plan is the colored version on the lower right.


     Now it's time to load up the truck with all of the destruction debris and haul it off to the transfer station in Henderson.  We plan to stop at the Bulb Man to get their advice on placement and number of fixtures we'll need to complete this phase of the project.

Sunday, March 4, 2012

Too Late to Change My Mind?

Ouch -- It's Beginning!
     Well, this isn't the normal post but I have the feeling this will be taking me away from the shop for a while even though my new carving chisels arrived yesterday.  Like many of you, our plans changed due to economy.  Seems like not too long ago the plan was to sell the big house and use the profits from the sale to downsize plus have a good chunk of change to use during retirement.  Since the economy retired about the same time I did in 2008 we are re-doing the house to keep it fresh.  No problem, we're just re-purposing and doing what we want to keep the house perfect for our use.  The project now is keeping the kitchen more current than it was in the 90's when we bought the house.

Oh So  90's
     Like many of the homes built in the mid nineties ours had this huge, dropped fluorescent light fixture and the Oak cabinets.  Part of the plan is to change the cabinets by painting them white.  There is one door I brushed white by the refrigerator that we put there to live with that change.  As much as I don't care for painted cabinets I agree with Di that this will really freshen up the over-all look.  The fixture just had to go!  When I got to the stage of the first picture I really did think that maybe it wasn't such a good idea after all.  Unreal the amount of nails and wood they used to build that monstrosity!  Much of it is solid lengths of 2x6 and the nails --------- bizillions of them!!  When I worked as a carpenter and built my own house, nail guns weren't very common.  If we lowered the ceiling we'd build soffits, almost like a ladder out of 2x4's and attach them to the rafters.  This darn thing had some of the crappiest wood and was nailed with a nail gun from every conceivable angle.  Pretty much impossible to simply pry the boards off so the cat claw I used in the 70's as a carpenter apprentice still came to good use!  It took me much of the day to get to this point:

End of the First Day
     I left the lights there for now and this will be gone by the end of work day #2.   Pretty amazing, the electrician who put these up didn't use a junction box and these lights are barely hanging on.  Guess they figure if it were to fall that awful Oak grid would catch it.  Definitely don't think this structure and electrical would have passed a  HGTV Holmes Inspection!

Thursday, March 1, 2012

Plane Making Class

     Had the first session of the class last night.  Got so wrapped up in helping them get started on making their own versions of the Krenov style plane I forgot to take pictures!  In the works are two different block planes using the 1" wide blade from Ron Hock, one general purpose plane with the 1 1/2" blade, and another plane that will be patterned after the scrub plane version I designed.  Found out that if you do a image search on any of the search engines my plane comes up under "Krenov Style Planes".  Must admit it's kind of cool to see my creation on the image page.
     Things were going well until one of the sides on a block plane split as the dowel pins were inserted.  Luckily it was at the dry fit stage and I had another piece of Australian Lacewood.  Looking forward to seeing how that turns out.  I think the students all enjoyed themselves in spite of some minor setbacks.  Two of them weren't too crazy about making their own dowels so opted to use a tenon cutter for that operation instead.  Making those dowels is time consuming but personally I like the results so feel the time is well spent.
     Next session we'll be gluing on the soles, learning how to hone the blades, and then setting up and using one of these planes.  The class is only 3 sessions so the last session will be spent on shaping the mouth and the plane body.  I'll be sure to take pictures next session.