Showing posts with label Plane Making Class. Show all posts

Thursday, March 15, 2012

Last Class Session

     Last night was the final session of the plane making class at WoodItIs here in Las Vegas.  This was an awesome class and even though there were only four students they all came away with their very own custom, made to fit their hands and needs, Krenov style wood plane.  At the start of tonights session, here's what we had:

Start of Day 3
   
     The one on the lower left is Bobbie's and is made of Australian Lacewood and Mahogany.  The handled plane on the upper left is Jay's and it's destined to become a scrub plane.  The upper right plane belongs to Lupe and the bottom right is Larry's.  At this point the bodies have been cut out and readied for the blade, the sides have been dowel on and glued as well as the soleplate.  We all used Purple Heart for the soles which is very hard but also pretty brittle as we discovered while forming the planes.
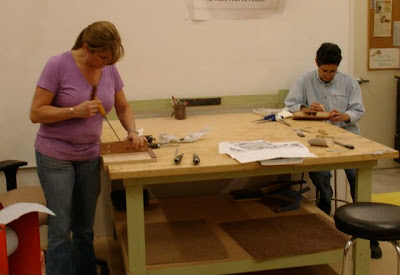
     The first order of the day was to smooth out the ramp the blades will sit on.  That's what Bobbie is doing on the left with the aid of a long paring chisel.  The ramp needs to be smooth so the blade is securely wedged on to it.  Lupe is at the sanding stage on her plane.


     Once the ramp's are smooth and the plane has a nice mouth it's time to shape the bodies.  This is started with the bandsaw and then various tools can be used to get the shape that feels good to your hand.


     That's what Larry and Jay are doing here.  Jay's plane broke the tradition of the classic Krenov style but followed the design I came up with for a scrub plane.  A scrub plane is used to remove high areas of a board by using a radiused blade.  Scrub planes have been replaced by the jointer but if you enjoy hand tool work it'll come in handy.  The fact that you're removing a lot of wood means you really need to be able to grip that plane and get physical with it, that's the thought process behind this design:

Jay's Version of the Scrub Plane
     This design is a bit more complex, I remember that making mine was time consuming because I wanted it to feel "just right" when I gripped it.  It may take time but it is time well spent!
     A tool that I really enjoy working with is a spokeshave,  Larry is finding that it worked well for shaping the front of his plane.


     The class was stopped after abut an hour and a half to do a sharpening demo, no matter how good your plane iron may be a final honing is required to get the smooth, thin shavings we're aiming for.  Lupe was the first of the class to make shavings, you can tell by how thick it is she got a beautiful edge on her iron!


     The final step we had time for was finishing the planes with a mixture of boiled linseed oil, turpentine, and polyurethane.  We only had time for one application which was sanded into the finish with some 320 wet/dry sandpaper.  This is when the wood really shines, like Bobbie's heart shaped, Australian Lacewood example:


     Hard to see the beauty of the wood but the look on her face let's you know she's pleased with it!

     All in all, this class was quite rewarding and I'm sure they all felt the same.  There's something magical about making and creating objects from wood.  Now they have a tool that they made and will be able to use for many years to come.

Thursday, March 8, 2012

Second Session of Plane Making Class

     Last night was the second session of the class and unfortunately one of our members was absent.  Hopefully we'll get her caught up over the weekend, I'm sure we will.  At the end of the first session everyone had their main body parts cut, the recess for the chip breaker blade screw had been routed out, dowels were made, and things were ready to go together.  Jay, who is making a plane similar to my version of a scrub plane, had a bit more work so he came by over the weekend to my shop to finish a few details.  Now that the body is put together the next step is making and attaching the sole.
     Before that can be done, the bottom of the plane needed to be trued up and square to the sides.  This was done with a combination of planes and, as Lupe is doing here; using a piece of sandpaper on the flat and level surface of the table saw:

Checking the Plane Body for Square

     Jay is working on the same process, notice how his plane has a handle.  That's the part that is taking him a little more time since it needs to be formed, drilled, etc. to where it feels just right in his hands:

Jay using a Block Plane to true up the bottom

     Luckily, he has a shop at his house so he can work on his plane and not fall behind since his design is a bit more complicated.  To attach the sole to the body we use 3/16" dowels to register them together.  This is very important since the mouth opening (where the blade comes out) needs to be carefully made.  Theoretically speaking, the smaller your mouth the finer your cut.  I had them make their own 3/16" dowels for this purpose.

Making Dowels, Cutting out a Mouth, and Gettin' it Done!

     Last of all, work was started on making the wedge needed to hold the blade in place.  They all drilled out the location for the 1/2" dowel for that and we're good to go!  Next week we will first hone our blades and then see what kind of cut they are able to achieve.  Once that's done the final step will be forming the body to fit their hands.  That's accomplished with the bandsaw, spokeshaves, files, sandpaper, etc.
     Looking forward to seeing how well their planes will perform -- hopefully it will meet the expectations they had when they signed up for the class.

Thursday, March 1, 2012

Plane Making Class

     Had the first session of the class last night.  Got so wrapped up in helping them get started on making their own versions of the Krenov style plane I forgot to take pictures!  In the works are two different block planes using the 1" wide blade from Ron Hock, one general purpose plane with the 1 1/2" blade, and another plane that will be patterned after the scrub plane version I designed.  Found out that if you do a image search on any of the search engines my plane comes up under "Krenov Style Planes".  Must admit it's kind of cool to see my creation on the image page.
     Things were going well until one of the sides on a block plane split as the dowel pins were inserted.  Luckily it was at the dry fit stage and I had another piece of Australian Lacewood.  Looking forward to seeing how that turns out.  I think the students all enjoyed themselves in spite of some minor setbacks.  Two of them weren't too crazy about making their own dowels so opted to use a tenon cutter for that operation instead.  Making those dowels is time consuming but personally I like the results so feel the time is well spent.
     Next session we'll be gluing on the soles, learning how to hone the blades, and then setting up and using one of these planes.  The class is only 3 sessions so the last session will be spent on shaping the mouth and the plane body.  I'll be sure to take pictures next session.