Thursday, March 28, 2013

Tails Around the Corner, A New Box Series


Tails Around the Corner
     I've had this idea playing around in my head for quite some time now so decided it was time to act on it.  Since I'm one of a biz zillion folks on Etsy that makes custom boxes and the Etsy business is somewhat slow now is the perfect time to try something new.  The thought I've had was to make a dovetailed box but in an unconventional way.  Having never seen this before, as far as I know it's my original design.  Rather than having two sides of the box have tails and the other side have pins I wondered what would it be like to have a tail and a pin on one side!  With the contrasting wood (Quarter sawn Sycamore & Walnut in this case) I thought it would have an interesting appearance.  The box in front is glued and sanded, the one behind isn't.  I'd be interested in any constructive opinions you may have for me.
     Dovetails are the hallmark of fine woodworking.  Whether or not it's deserved is open for opinion but traditionally it's what you'll find on hand crafted furniture anywhere in the world.  This joint is commonly used to join drawer pieces at right angles to withstand the racking and pulling and yet, stay together.  You can find any number of articles and videos on the internet to discover ways to make it.  I prefer the quiet and simple way by the use of hand tools.  I thought I'd poke around and see if there was something I could do to make the work a bit easier.  I chanced upon a YouTube video by David Barron who's a furniture maker in the United Kingdom.  In it he used a fixture that automatically lined up the two pieces when you transfer your tail markings to the pin board.  Here's what it looks like:

Fixture from David Barron
     Basically it's an L-shaped piece with a raised edge on one side.  I used a piece of 3/4" MDF, some Poplar, and Pine to make this one.  When you put it into your vise you'll clamp the pin board flush with the top and up against the raised edge.  The raised edge should be less than your thinnest board, I made mine about 1/4" since I rarely dovetail anything thinner than 3/8".

Putting in Pin Board
     Once the pin board is secure you simply set the tail board on top of it and against the raised edge.  This is a small box but if it were larger you'd want to clamp it down before you scribe the pins.

Scribing the Pins
    My hands are somewhat in the way but I think you can see how it works.  Traditionally the pin board is put in the vise, raised up to the level of a block of wood or a plane.  You then put the tail board on top of that to scribe the pins.  It's always a challenge to keep things square and lined up.  With this fixture it's much easier ---- thanks David!
     One last thing on cutting dovetails.  With the new Knew Concepts fret saw many students have asked me if I'll be using that.  Well, the one thing that keeps me from that is it's quite expensive!  Besides, if you have a wide space to remove you could use a coping saw or simply chisel it out.  You just need to use care when you set your chisel in.  The method I use is to first cut a shallow recess on my scribed line with the chisel bevel pointing towards the waste side of the joint.

First Cut to Remove Waste
     I then flip the chisel over and cut back to that line to create a "pocket":

Pocket for lack of a better word!
     The purpose of this is to give some room for the bevel, if you don't do this the chisel can be forced backwards into your scribed line.  The most common problem most people have when removing this waste is taking too much at a time, this results in a very uneven and rough cut.  Take your time, it's not a race!

Easy, Take a Little at a time
     Hope this helps all of you cut your dovetails, check out the video from David Barron on YouTube.  Here's a LINK to that to make it easier.
     If you're so inclined I wouldn't mind getting some opinions on my concept of tails around the corner.  It is a little tricky to assemble and serves no real purpose other than being unusual and decorative -- I like it!


Wednesday, March 27, 2013

Taming Some Quarter Sawn Sycamore


     When I first started making the boxes for a show I ordered a couple of board feet of Quarter Sawn Sycamore.  Based on the pictures from Woodworker's Source I've linked to here.  Well, the pieces didn't quite live up to what I'd expected, which is rare from them, so I've kind of let them sit in the rack.  I've had a concept for a box floating around in my head so I thought this may be just the wood for it.  Well, here's what I found when I got the wood:

Not Flat!
      The board had a definite wind to it.  If you're a regular reader to my blog you'll know that I don't have a jointer but did make my own scrub plane just for boards such as this.  If you're interested in making your own scrub plane here's a LINK to the process.  Trying to run a board with a wind in it across the table saw is a safety hazard.  It could rock as you pass it through the blade, bind, and kick back on you.  I wanted to plane the board to about 7/16" and even though the board is surfaced, running it through the planer would give me a thin board with a wind in it and that wouldn't be any good either!  As I'm writing this it crossed my mind that non-woodworkers may not know the meaning of the word "wind" and think I'm talking about the wind that gives us a bad hair day!  It took a while to find this but here's a definition of it as it refers to wood:


intransitive verb
1
: bendwarp
2
a : to have a curving course or shape : extend in curves


Let me introduce you to Winding Sticks:

See the WIND?
     These are a pair of sticks that you place on a board to locate the high and low spots or corners of it.  In the first photo you see me checking the board by laying it on a perfectly flat surface and seeing that it rocks.  With winding sticks you place them on the board and locate the high/low areas by sighting over the sticks.  Can you see that they're not parallel? To flatten these boards I'll need to plane off the high spots which requires a Scrub Plane.

Scrub Plane

     This is the one I made and love to use!  Look at those shavings -- large and coarse; they remove the wood in a hurry.  Usually you'd plane across the grain to eliminate the high areas of the board.  The little hammer you see is used to adjust the depth of cut for this plane.  The blade has a radius to it and will leave a scalloped shaped cut.  To see if the surface is flat you can use the winding sticks or else lay it on the tablesaw to see if you've gotten rid of the rocking.  If you have, the next step it using a jointer plane to remove the scalloped cut you made with the scrub plane.


Jointer Plane, #7 Stanley
     Now that one surface is flat I can run safely run the board through the planer to bring it to its required thickness.  If you don't have a planer you would scribe the required thickness all around the board and use your hand planes to get to that scribed line.  I used to have my 7th. and 8th. graders do that in our Industrial Arts classes.  Too bad those have been replaced by technology and computer oriented classes.


Sunday, March 17, 2013

Bound for Chicago


Ready To Go!
     Well, I was able to keep to the timeline and the box is now packaged and ready to bring to the post office first thing in the morning.  I tell you, this is one big cigar box!  I'm anxious to find out what its intended purpose will be.  To get this job there have been 18 Etsy convo's (that's what communication is called on Etsy) but it has worked out.  This is a paint grade project made of Baltic Birch plywood and Maple.        
     As usual,  it was built as a solid cube and then cut apart on the tablesaw.

Trimming the "Flash"
     The process I use is to cut two opposing sides completely through and then lower the blade to leave just a thin sliver of wood for cutting the other two sides.  The prevents the box from closing over the blade and creating a snipe at the end of the cut.  This sliver of wood is easily cut with either a utility knife or saw.  Then, all that remains is to plane it smooth.  That pile of tape is what was around the perimeter of the box to make the glue clean up easier.
     In the previous blog I mentioned trying the method of making an integral  dust check by cutting a groove before assembling the box and that worked well.  In the picture above you can see the step on the inside of the lid.  Here is a picture of the box and lid where it's easier to see how the dust check works.

View of Dust Check
     A slight chamfer was planed on the dust check to relieve the edges before glueing and pinning it into place.  Probably the largest lift off lid box I've made to date.  Next comes the shipping.  The shipping weight is 10 pounds so I was sort of apprehensive.  When I gave the quote I figured about half of that weight.  Turns out that USPS priority mail with an expected Wednesday delivery is about $40.00. For comparison, FedEx is asking $102.51 and it gets there the same day except they guarantee delivery before 12pm.  I know which one of those would be my option.

Saturday, March 16, 2013

Chicago Bound, Custom Etsy Box


      This Etsy business is pretty cool, I mean how else could you get the opportunity to build something for someone half way across the country?  Last Wednesday afternoon (the 13th.) I had a convo on Etsy asking about making a custom box in the style of a cigar box.  My goal is to answer any and all requests I get and have found it's well worth while.  Well, this cigar box has turned out to be 16" square and 6" tall --- that's a lot of cigars!  After 16 Etsy convo's  that included a sketch I got the job.  It's a rush job but glue can only dry so fast!
     The project will be made out of Maple and Baltic Birch plywood and the client will paint it when it arrives.  Like all projects, the first step was to square and dimension the lumber.  As a "hybrid woodworker" I utilize my saw for the rough work and then a #7 Jointer plane for the final passes.

Truing up the Edge
     Something satisfying watching the shavings curl up through the throat of the plane.  Reminds me of students I've had and their satisfaction after sharpening and setting up their own planes.
     Next up was cutting the miters for the box.  This was accomplished on the tablesaw with a jig:

Cutting Side Miters
     Since this box is square it was easy enough to set up a stop block one time and cut each piece exactly the same size.  I hadn't put it into my plans or bid but decided that 6" is a pretty tall box to miter.  Took the extra step of cutting a slot for a spline to reinforce the work.

Cutting for Spline
     This was done by setting a stop block and then testing the depth and location on some of the extra pieces I made.  I imagine I'm not the only one that finds this to be true; if I cut an extra side just in case something goes wrong I never need it.  On the other hand,  if I don't have an extra piece or even enough material to make on, something does go wrong.  Since this was the weekend and a rush job I decided to make 6 pieces for the box and no --- I didn't need the spares!
     There was a technique I saw in Fine Woodworking Magazine quite a while ago that I wanted to try on this box.  Since it's a lift off lid it definitely needs a dust check to align the bottom and lid together.  What they showed in this article was to dado a groove on the inside of the box before assembly.

Dust Stop Dado
     When you separate the lid from the box you cut towards the center of that dado.  Next step will be to make a dust check that will be glued into the box portion and the lid will sit securely on top of it.  Seems like it should work like a charm, sure hope so!
     Glue up was next, thankfully Diane was able to give me a hand getting the clamps in place.  We hit 86 degrees today so that means you need to move quickly so the glue doesn't set up before the clamps are in place.  I used three different band clamps to get it together.

Clamped Up
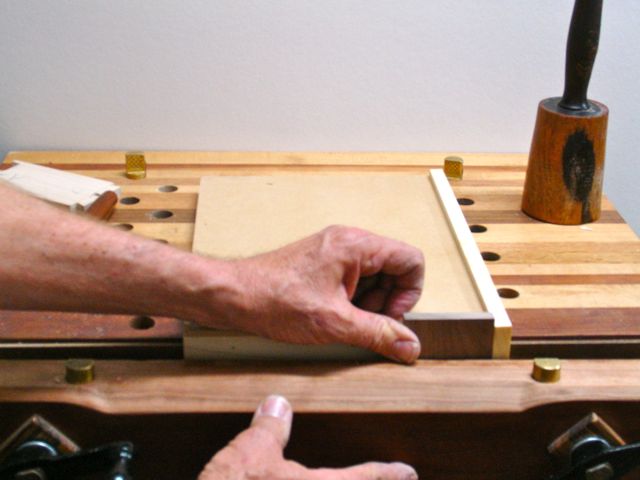
     You can see the ends of the masonite splines sticking up out of the corners.  The tape is there to make any glue squeeze out easier to clean up.  After the box had dried for a few hours I was able to attach one panel.

There's a Box In There Somewhere!
     To accomplish that I was able to separate my torsion boxes which just happen to be the same width as the box.  Since glue makes everything so slippery the first thing I did after applying a bead of glue was to use my 23 gauge pinner to hold things in place.  About 3, one inch pins on each edge is all it took.  The building block supplies enough weight to for the glue to form a strong bond.
     Time for dinner but before I call it a night I plan to flip the box over and attach the other panel.  That way it'll be ready to work after church tomorrow.  I may need to put the slightest bit of putty over the pinner holes but this box will be painted and that's more than enough to conceal them.  Even though the client offered to pay extra for a rush job couldn't see doing that, sometimes we work better under some pressure.  As it is, I bought a box from Box Brothers so if all goes well I should have no problem taking it to the post office first thing on Monday.

Tuesday, March 12, 2013

Sapele Hall Table is Done!


Sapele Hall Table
     I'm really happy to share the photos of this project.  Just like the feelings you have after completing an ultra race you trained for or having a child (postpartum blues); it's always a time of mixed emotions.  This table is just under 54" long and 30" tall.  The top is a little over 16" wide at the center of it and tapers towards each end.  Here's another view of it from a side angle.  


Side Angle
     What I feel gives this table a unique character is the detail on the apron.  This was made with a beading tool from Lie-Nielsen  that a friend gave me for helping him on a move across the country.  For years I'd been making my own scratch stock and he surprised me with this wonderful tool.  I suppose you could call it a router of the olden days but I really enjoy using it.  The triple bead detail is mimicked on the drawer pulls as well.


     The shelf on the bottom features a Radio Weave style of woven cane.  This comes from Frank's Cane & Rush  and is actually made of paper!  I had played around with different design concepts for the shelf design but prefer the lightness of the cane inserts.
     Incorporated into the overall design are drawers at either end of the table.  These would have been considered a glove drawer when folks actually wore them on an every day basis!

Drawer Detail

    Here in the desert southwest, gloves are a rare occurrence but this makes an ideal place to put your keys, cell phone, pagers, etc. when you come home from work.  The drawers are made of Maple and ride in traditional wooden runners with a solid Pine bottom.  Notice the Ebony pegs for the breadboard ends.  I had just enough of the Ebony to pin the tenons and stretcher supporting the shelf.
     The original name and concept for this project was the Star Jasmine Table.  The plan was to carve that flower into the center section of the shelf but it just didn't look right.  That would have been the only carved element and seem out of place.  My carving skills are "evolving" so I didn't want to chance ruining the project with a poorly carved design element.  Regarding that though, I am currently taking a carving class from Dennis Patchett a local, topnotch carver here in Las Vegas.
     Since the carving was eliminated, I now refer to this table as the Elliptical Hall Table.  Here's a shot of the top to illustrate why I chose that name:

Nope, Not a Surfboard!
     There's about an inch difference in the width from the center to the ends, just enough to add some visual interest to the design.  So, what are the plans for this project?  Personally I would like to market and sell it so I can buy more materials and create another project.  Diane, on the other hand, wants to make a permanent place for it in our house.  At $1950.00 I'm hoping it finds a home elsewhere and funds my wood addiction.  In either case, it was a good project and like every one of them; a great learning experience.

Friday, March 8, 2013

Teaser Peek and Old School Woodworking


Spoiler Alert
Just had to post this one picture of the Star Jasmine table that is now safely placed in the house.  Wanted to share how the beaded accent on the apron and then again on the drawer pull looks.  To my eye, this just adds a quiet style element.  The plan was to photograph it today.  The backdrop would be the foam piece draped with burlap.  Guess what though? very overcast and we just had a good rain shower so I'll wait until tomorrow when lighting conditions should be better.


     There was one little detail that needed my attention before the photo shoot.  The caned shelf is held in place by two wooden clips at each end that secure it to the stretcher.  Once I put the table in the house I noticed that you could see those ends when you're sitting down -- that's not acceptable!  I labeled them so they'd go back in the same location and could have simply used the tablesaw or chop saw to cut off the 1/2" or so but thought better of it.  Such a quiet, peaceful rainy day as today shouldn't be disrupted by the whine of power machinery so decided to go old school instead.

Shooting Board & Bench Hook
     The first step was to cut them shorter with on the bench hook with a crosscut saw:


                        Followed by cleaning it up with the shooting board and block plane:


       These are little steps that make woodwork so enjoyable.  Even with a sled on the tablesaw this wouldn't have been a very safe task.  I tried to take a photo of the difference in the end grain after planing but it didn't come out very clear.  If you've ever planed the end grain of a piece of wood with a good, sharp blade you know how nice it looks.  Applied a bit of oil to that cut end, re-attached the clips, and it's just a waiting game for the sun to come out again.
      Hmmm, wonder what my next project will be?  I'm currently taking a carving class on Monday nights so I'll bet it's safe to assume it will have something to do with carving.

Sunday, March 3, 2013

Kaizen Foam --- French Fit for the 21st. Century?


     If you've ever made a case for a pistol or tool you're probably familiar with the term "French Fit".  Then, had you tried this technique you'd know that it's not an easy process to do -- very time consuming as you make layers of wood that taper to match the contours or else sculpt an opening in a solid board to fit an object.  This is something I've wanted to do for my dovetail and small crosscut saw but the time to do it has never seemed to be right!  Enter Kaizen Foam a new product from Fastcap I happened to run across while checking out the web.  Here's the final result:

Kaizen Foam Insert in Tool Chest
     You can click on my link to learn more about this and also see some videos they've produced about it.  It comes in sheets that are 2' x 4' and in three different thicknesses.  I  bought the thickest one and re-sawed it on the bandsaw to get the thickness I needed.  Price is reasonable and I have plenty for me and my neighbor who's building a case for an expensive jig he has and wants to protect.
      The process is pretty straight forward.  The first step is to position the tool where you want it to be.  I used some painters tape to align the saw to the edge.

Position Your Tool
     I used a black sharpie to outline the saw.  Angle it towards the tool as you trace or else your opening will be bigger than you need.  I learned that when I cut the opening for the first saw you see at the bottom of the foam.
      For the curved cuts you simply use a razor knife with a pointed blade (helps get the tight radius) and rotate it around as you cut.  You could mark the depth on the blade but eye-balling it worked just fine.

Initial Cutting

     For the straight cuts I chose to use a straight edge to control the cut, looks better too!


Guided Straight Cuts
     Now comes the fun part, peeling away the layers to make the recess.  I found that by digging in my fingers I could get the piece started and then by clawing all the way across the piece comes out, more or less, in one piece.

Removing the Layers
     Work slowly and watch the edges.  Better to cut too deeply than to tear the edge because it wasn't cut completely through.  Some areas of the saw needed to be deeper.  As an example, this portion of the handle needs to go lower than the blade:

More Depth Needed Here
     To accommodate that it was easy enough to draw in the approximate shape, cut that area deeper, and then remove the layers as needed.

Customizing the Fit
     The surface it leaves behind is a little bit uneven but more than acceptable for this application.  In the video a technique was shown where you heated up a piece of metal and used that to blend in the edges.  For this, that's overkill.
     So the question remains, will this replace a French Fit case for a pistol, musical instrument, or tool?  Not in my estimation.  It certainly makes fitting an object securely into a box or drawer much easier but lacks the finesse you may want when building a pistol case or other application.  I have a till at the top of this case where I keep my good planes and may add a piece of the foam there as well to cushion them and keep them from touching one and other.