Showing posts with label Etsy Store. Show all posts

Friday, April 19, 2013

It's All About the Wood


     I spent a couple of hours this morning preparing stock to make more boxes for the Etsy Store.  This is that "grunt work" portion requiring mostly power tools.  It starts off by hand as I plane one working edge to guide the wood safely on the table and band saws.  Then comes the ripping to width, followed by re-sawing to get the required thinner material, which is followed up by a pass or two on the surface planer.  What you're looking at (from left to right) is Curly Cherry, Quarter-Sawn White Oak, more of the Cherry, then Lacewood.  These will become the sides of the boxes.  The roughly formed end pieces are Walnut and Sapele.  I'm completely sold out of this style of box:


     It's been a good seller and is one of my original designs.  I really like the play between the angles of the dovetails and the angles of the side pieces.
   

View from the Outfeed Side of the Saw


     Making the side piece for that style  is somewhat tricky.  The box above is the trickiest because it requires that the rip fence is on the left side of the blade.  That's not the side it's customarily on so it feels kind of awkward!  Definitely need to use a push stick and a feather board.  The off cut piece tends to lodge between the blade and the opening in the throat plate.


     The other style is a bit more straight forward and is cut with a panel raising jig, this time on the customary side of the blade.

Forming the Side Pieces
     You can see the basic profiles created this way.  They will be modified to suit not only my design but mostly to take advantage of the woods beauty.

Side Profiles
     Thankfully, the remaining work on these boxes is hand work.  The profiles of the side pieces will be planed to remove all of the saw marks.  Then all pieces will be cut to size and the hand cut dovetails laid out and cut.  Creative knobs will finish off the lids and these will be ready to add to the store after finishing.
     When we had our discussion at Sin City Woodworkers meeting last Wednesday pricing our work was a big part of it.  In my experience your best bet is to somewhat mass produce the phase of making boxes.  The majority of my work is done by hand which, no matter how you look at it; is time consuming.  I can maximize my time by cutting enough material with the power tools to make multiple boxes.  Then, between students and any other job that may come up, I can spend that quiet shop time carefully creating them by hand --- just as God intended!

Wednesday, April 17, 2013

Enjoying the Process vs. Power Tools --- Worth It?


Hand Crafted Lid Pull of Leopardwood
     The inspiration for the custom box I'm making for a client in Toronto came from a box on my Etsy store that had a pull made from a knot that came from the Pine the box was made from.  Since this box is made out of a clear grade of Alder, aka 
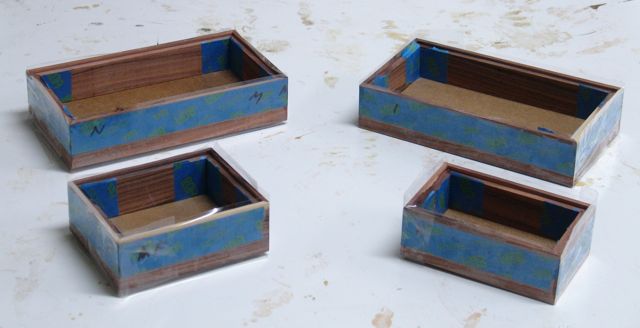
"poor man's Cherry" there aren't any knots.  My client granted me artistic license and here's the result.  The Leopardwood is from a scrap I've held on to for a long time, I believe it's from my TV Tray Redux tables.  Interestingly enough, a friend of mine came by to run a piece of Curly Maple through my planer and commented on the process I was going through.  He asked me why I didn't just use the table saw to form the joinery for this and it did get me thinking.  I'm afraid we're going to get philosophical here but before that, here's another picture showing both lids and their pulls:

Both Lids with Pull
     Regular readers of my blog know that I enjoy the process of woodworking as much or maybe more than the final results.  Hand tools are a large part of the craft, after all; I teach hand tool classes and give one on one instruction in my shop.  I look at every project as a skill building exercise to continue to hone and improve my work.  That's part of the decision to do this primarily with hand tools.  The other is safety, you need to exercise extra care when using power tools with small pieces of wood.  Add the quietness factor to the equation and hand tools become much more attractive.
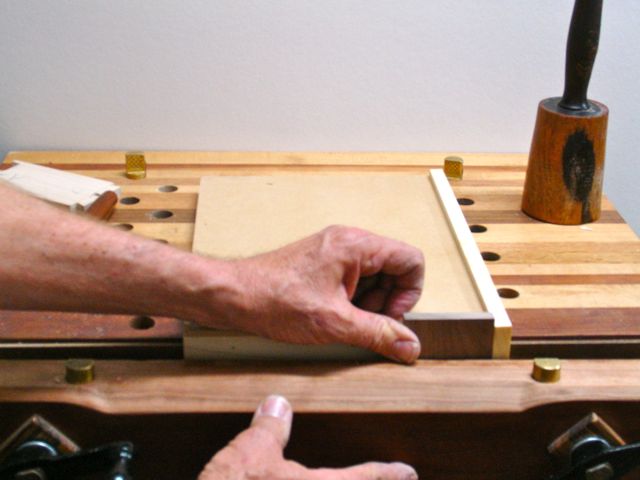
     To start the process, each end of the piece of Leopardwood was rounded over with a file and sandpaper.  Figured it would be easier that way, keeping the piece long for the preliminary work.  Next the thickness of the lid was scribed onto it with the marking gauge.

Lid Thickness (lines darkened with pencil)


To mark the thickness of this lap joint I could have used the marking gauge but decided that since the router plane was adjusted for that, why not use it to mark that dimension as well?

Router Plane used as Marking Gauge
     Now it was a matter of cutting on those lines to the marked depth with a cross cut saw.

Lines Set for Thickness
     I suppose I could have used the tablesaw here to make a series of cuts.  Instead, let's keep it quiet and chisel to each line from the center out.  Good practice, quiet, and easy enough.

Chiseling To Saw Kerfs
     The middle was left slightly higher so to avoid going to deep.  The Leopardwood chiseled quite well, I had some concern about it wanting to split as it is rather grainy.  To bring it to the required depth I used a small router plane and supported the work with a bench hook.

Working to Depth
     After reaching the depth, lines were drawn and the pull was cut from both ends of the board.

Ready to be Cut Loose!
     When I cut mortises for hinges and, in this case the pull; I'll generally use a trim router and template to rough it out.  This is one area where I prefer to guarantee a flat mortise for the pull or hinge to sit against.  Maybe it's the chicken way out but ruining a box at this stage negates a lot of work!

1" Hinge Template for Pull Mortise
The pull was carefully trimmed to fit and then Gorilla glued securely in place.

     I'm using a new hinge (to me) that is available from Rockler.  It's a reasonably priced brass hinge that has built in stops to allow the hinge to stay open 105 degrees.  So far they seem to be suitable and a far cry from the $30.00 or so Brusso offerings.  I'll use them on fine jewelry boxes or a custom instrument case but the average client would not want to pay for that added cost.  They are wonderful to work with though.  Thick brass castings, extremely close tolerances on the knuckles, tight pins, and a beautiful finish.


Installing the hinges begins with the trim router and a bearing guided bit.  After locating the template it's an easy process to carefully route them out.  Note that the template is maybe a sixteenth of an inch smaller than the hinge length.  This gives me a little bit of room for final chiseling of the mortise.


Final Fitting


      There are a couple of things I do when I fit hinges.  Since there could be a little bit of variation when using the template I'll set the small combination square for the distance from the outside of the box/lid to the hinge.  Since the router bit leaves a radiused corner the square is used to guide the chisel and square that side of the mortise.  Remember that the template is undersized for the hinge so by squaring each mortise the same distance from the outside of the box, installation should by correct.


     So now there are two questions.  First of all, will the client like the lid pull and secondly, is the hand process of making it worth it?  I'll let you answer that on your own but for me it's a resounding YES.  Very little I enjoy more than the hours spent in the shop creating what I hope will be a nice project.


Tuesday, April 9, 2013

UpDate on Latest Etsy Custom Order and Mystery of the Planer


    First of all, what the heck happened to our spring like weather?  Over the weekend I washed and put away what I call my "winter over-alls", the heavy stone-washed Carharts with the double knees and all!  In the summer time I switch to a pair of their denim ones instead. Also put away the heater figuring that with our daytime highs reaching the upper 80's I surely wouldn't be needing that either.  Well, the wind blew (30-50 mph) and the temps dropped down to the 50's which for most of you is still downright balmy but for us desert rats ---- not so much!  Work goes on just the same, just wanted to complain a little.  We're supposed to get close to a high temperature record on Thursday which was 88 degrees back in 1985.
     Fell one day behind in my schedule for the two boxes due to some adjustments on my planer.  You may remember my post where I had rotated all of the carbide cutters to have a fresh edge.  This is after having the planer for 7 years or so.  Well, the cut became worse instead of better and there was a huge amount of snipe at both ends of the board.  Turns out that the in feed and out feed roller were out of adjustment and putting way to much pressure on the stock as it was being fed into the cutter.  Somewhat of a mystery, there's only .02 difference between the height of the cutter compared to the rollers.  Only thing I can imagine is that over the years the cutting edge wore down and the performance deteriorated ever so slightly, then when the cutters were renewed every thing went the other way.  Oh well, just a mystery that may come up whenever the blades are changed.  Once done I was able to accurately plane the Walnut to fit the slot at each corner of the boxes.


Measuring Key Length

     I really do relish the quietness of hand work, the length of the key was set with a small combination square and placed on a bench hook.


Cut to Length
   
     For this I use a Japanese razor saw which makes quick work of cutting the key.


Gluing Keys in Place

     The final step is to glue the key into the slot previously made on the tablesaw.  High tech work here with your standard toothpick glue applicator and a small hammer to set it firmly into the slot if needed.  Adding miter keys to the joint can be interesting,  many times I make the key fit snugly into the slot but too snugly!  You know that because the glue causes the grain to swell and you can barely fit it into the slot -- that's where the little hammer comes in.  This was done yesterday morning and due to the unusually cold weather decided to wait until today to cut and finish them off.  On a typical spring day here in the desert the glue would set up in a matter of hours but with the drop in temperature decided giving it 24 hours was a wise choice.
     Off to the shop to get these boxes completed and shipped out as promised.

Thursday, March 28, 2013

Tails Around the Corner, A New Box Series


Tails Around the Corner
     I've had this idea playing around in my head for quite some time now so decided it was time to act on it.  Since I'm one of a biz zillion folks on Etsy that makes custom boxes and the Etsy business is somewhat slow now is the perfect time to try something new.  The thought I've had was to make a dovetailed box but in an unconventional way.  Having never seen this before, as far as I know it's my original design.  Rather than having two sides of the box have tails and the other side have pins I wondered what would it be like to have a tail and a pin on one side!  With the contrasting wood (Quarter sawn Sycamore & Walnut in this case) I thought it would have an interesting appearance.  The box in front is glued and sanded, the one behind isn't.  I'd be interested in any constructive opinions you may have for me.
     Dovetails are the hallmark of fine woodworking.  Whether or not it's deserved is open for opinion but traditionally it's what you'll find on hand crafted furniture anywhere in the world.  This joint is commonly used to join drawer pieces at right angles to withstand the racking and pulling and yet, stay together.  You can find any number of articles and videos on the internet to discover ways to make it.  I prefer the quiet and simple way by the use of hand tools.  I thought I'd poke around and see if there was something I could do to make the work a bit easier.  I chanced upon a YouTube video by David Barron who's a furniture maker in the United Kingdom.  In it he used a fixture that automatically lined up the two pieces when you transfer your tail markings to the pin board.  Here's what it looks like:

Fixture from David Barron
     Basically it's an L-shaped piece with a raised edge on one side.  I used a piece of 3/4" MDF, some Poplar, and Pine to make this one.  When you put it into your vise you'll clamp the pin board flush with the top and up against the raised edge.  The raised edge should be less than your thinnest board, I made mine about 1/4" since I rarely dovetail anything thinner than 3/8".

Putting in Pin Board
     Once the pin board is secure you simply set the tail board on top of it and against the raised edge.  This is a small box but if it were larger you'd want to clamp it down before you scribe the pins.

Scribing the Pins
    My hands are somewhat in the way but I think you can see how it works.  Traditionally the pin board is put in the vise, raised up to the level of a block of wood or a plane.  You then put the tail board on top of that to scribe the pins.  It's always a challenge to keep things square and lined up.  With this fixture it's much easier ---- thanks David!
     One last thing on cutting dovetails.  With the new Knew Concepts fret saw many students have asked me if I'll be using that.  Well, the one thing that keeps me from that is it's quite expensive!  Besides, if you have a wide space to remove you could use a coping saw or simply chisel it out.  You just need to use care when you set your chisel in.  The method I use is to first cut a shallow recess on my scribed line with the chisel bevel pointing towards the waste side of the joint.

First Cut to Remove Waste
     I then flip the chisel over and cut back to that line to create a "pocket":

Pocket for lack of a better word!
     The purpose of this is to give some room for the bevel, if you don't do this the chisel can be forced backwards into your scribed line.  The most common problem most people have when removing this waste is taking too much at a time, this results in a very uneven and rough cut.  Take your time, it's not a race!

Easy, Take a Little at a time
     Hope this helps all of you cut your dovetails, check out the video from David Barron on YouTube.  Here's a LINK to that to make it easier.
     If you're so inclined I wouldn't mind getting some opinions on my concept of tails around the corner.  It is a little tricky to assemble and serves no real purpose other than being unusual and decorative -- I like it!


Sunday, March 17, 2013

Bound for Chicago


Ready To Go!
     Well, I was able to keep to the timeline and the box is now packaged and ready to bring to the post office first thing in the morning.  I tell you, this is one big cigar box!  I'm anxious to find out what its intended purpose will be.  To get this job there have been 18 Etsy convo's (that's what communication is called on Etsy) but it has worked out.  This is a paint grade project made of Baltic Birch plywood and Maple.        
     As usual,  it was built as a solid cube and then cut apart on the tablesaw.

Trimming the "Flash"
     The process I use is to cut two opposing sides completely through and then lower the blade to leave just a thin sliver of wood for cutting the other two sides.  The prevents the box from closing over the blade and creating a snipe at the end of the cut.  This sliver of wood is easily cut with either a utility knife or saw.  Then, all that remains is to plane it smooth.  That pile of tape is what was around the perimeter of the box to make the glue clean up easier.
     In the previous blog I mentioned trying the method of making an integral  dust check by cutting a groove before assembling the box and that worked well.  In the picture above you can see the step on the inside of the lid.  Here is a picture of the box and lid where it's easier to see how the dust check works.

View of Dust Check
     A slight chamfer was planed on the dust check to relieve the edges before glueing and pinning it into place.  Probably the largest lift off lid box I've made to date.  Next comes the shipping.  The shipping weight is 10 pounds so I was sort of apprehensive.  When I gave the quote I figured about half of that weight.  Turns out that USPS priority mail with an expected Wednesday delivery is about $40.00. For comparison, FedEx is asking $102.51 and it gets there the same day except they guarantee delivery before 12pm.  I know which one of those would be my option.

Sunday, January 27, 2013

All Over 'cept the Shipping


     Here's the first photo of the custom chess piece case completely finished:


Ready to be Shipped to Washington D.C.

     I'll be the first to admit that this project took a lot longer and was much more complicated than I initially planned for.  Let's just say to duplicate it will cost about $200.00 more than this one does and leave it at that!  That being said, this was a wonderful project, one that definitely kept me on my toes and thinking every step of the way.  When you open it up, it will lay completely flat and look like this:

Open with Half Exposed
    If you're a chess player you're familiar with the pieces, there is space for 4 pawns on the left, then comes the bishop, castle, and knight, while the king and queen go at the right.  Under the cover is the same arrangement for the pieces of the opposing team.

Installing Hinges
     The final stages of a project can be some of the most challenging.  As an example, let's talk about the hinges.  I'm using quality brass hinges so naturally brass screws are a must.  Even though they're a bit touchier to install I prefer to use a traditional, slotted screw.  Anytime you use brass screws you run the risk of twisting them apart.  This is especially true with a hardwood like Walnut and a small, #4 screw.  Each screw hole was first pre-drilled and then pre-screwed with a steel screw.  Once all of them were installed, the steel screw was removed and carefully replaced with a brass screw.  Yes, that's beeswax there, that's my insurance and not one of these little screws twisted apart.

     Once the hardware was installed it was time to get the grid work in place.  Talk about a jigsaw puzzle!  Each piece is numbered on the end and installation starts by placing the long pieces along with the required spacers in to the case.

Long Dividers and Spacers In Place

      Once these are installed, they will be held in position by the two, short end pieces. You can see one laying outside of the case in the above picture.  Putting these in position requires everybody to cooperated and stay in line!

Side One Installed, One More to Go
     The final piece to this puzzle are the long, outside pieces.  The way I designed this is that they will hold the entire grid in place.  There are only four screws that keep the grid in place, two in each of the long, outside pieces.  There is enough space for the grid to "float" within the box.  That part of the design is to compensate for seasonal changes that will probably occur in the eastern part of the United States where this box is headed for, not too much of a concern here in the desert where are average humidity is well below 10%!

Screwed in Securely

     Getting those four, little screws in was a challenge and I knew it would be.  I was showing a fellow woodworker the grid and he was wondering how I'd accomplish that.  On the pawn side of the box there is only 1 5/8" to work in and the king/queen gave me about 2 1/4".  Well, I pre-drilled the holes to begin with.  The tool I'm using in the picture above is an old Stanley No. 3400, Yankee screwdriver.  It's one I bought at Silvera Lumber in Antioch, CA when I worked there as a teenager in the 60's!  At that time I probably didn't have any real use for it and bought it because it was a cool little tool.  If you check Ebay, there are 3 available ranging for under $20.00 each.
     To sum it up, this was a great project and I'm grateful for the trust my client put in my work based on my website and Etsy store.  I've been fortunate to have positive feed back from other clients on these and that's the only way to build my reputation.  Couldn't have done this without the internet and it's long distance reach.


Saturday, January 26, 2013

Morado aka Bolivian Rosewood


     The focus of the emails I've been receiving from Etsy is for all of us sellers to gear up for and promote items that can be sold for Valentine's Day.  Hate to be so commercially oriented but with the lack furniture commissions need to find something to keep me in the shop and feed my wood addiction!  Etsy has proven to work towards that end so I really can't complain.  The other day I was in Peterman Lumber and they had a couple of 4' long pieces of a really interesting looking wood called Morado.  Here's a picture of where they look like at the end of today:

Valentine Presentation Boxes (unfinished)
   
    There's always a challenge trying to design something with a limited supply of wood and these were no different.  The wood has some beautiful coloration as you can see and will be finished with shellac and wax to emphasize that.  The lid on the box at the upper right is spalted on one edge which is pretty cool.  The wood comes from tropical South America, mainly southern Brazil and Bolivia.  As is common with some of these exotics there are a couple of other names it goes by, notably Pau Ferro, Caviuna, and Jacarenda.  It's pretty hard and it seems that there were a couple of interlocked streaks that simply refused to be smoothed by planing.  I was having a conversation with one of my students and he was wondering if there are just some pieces of wood that won't be tamed with a plane, no matter how carefully it's set up and how sharp the blade is honed.  Well, after tackling this particular piece of wood I think he may be right!  Another thing we discussed is how making small items like these boxes seems to be just as time consuming as larger items like cabinets, chairs, or tables.  Makes it somewhat difficult to price projects like this according to the time spent.  Much easier to charge more for an item when it's a large size.
     Keeping time and eventual cost in mind I wanted to be as efficient as possible in making them.  Simple construction of mitered corners and a solid bottom that could be assembled using only glue and packaging tape.

Glued and Taped Together 
     Although it takes a bit of time, each of the inside corners were protected from glue ooze out with a small piece of tape.  What makes this kind of construction appealing is being able to have the grain continue all the way around the box.  Three of the four corners will be a perfect match, the remaining one is usually okay.  I tried a different way (for me anyway) to keep track of the pieces, let me explain it to you.
     It's incredibly easy to flip a piece upside down or end for end and at first glance the grain seems to be aligned.  These boxes are pretty small so what I did was to put a piece of tape the entire length of the board.  Next up was to cut the miters using a sled on my tablesaw.  As I cut each piece I marked both sides of it with a sharpie right on the tape. It's also critical that opposing pieces are exactly the same length if you want the final box to be square.
     Step One:  After cutting a 45 on one end I use a quick piece of scrap wood as a stop block.  It's placed between the rip fence and the end of the short piece.  Hold the wood tight, remove the stop block and make the cut.

First Short Side
     Step Two:  Flip the piece over and trim just enough of it to create the next 45 degree end.

45 Degree cut the Right Direction
     Step Three:  Use another scrap piece to cut the long piece and cut it.

Making the Long Side
     This system is an easy way to make mitered boxes.  Since I'm designing them based on the amount of material I have the lengths don't need to be exact.  The stop blocks are just pieces of scrap but they  ensure that opposing ends are the same length and the boxes will turn out square.  After all pieces were cut, the bottom of each one had an 1/8" wide slot cut into it for a Masonite bottom that will be lined with ultra suede.  With the tape protecting the inside from any squeeze out it's a fairly quick and efficient way to make a box.

Thursday, December 13, 2012

All Waxes Are Not Created Equal


Here is the finished project I began a week or so ago with the carved and gilded lid.

Finished Camellia Box

    At that point I'd left you with a lid that was brightly gilded with Dutch Gold and I promised to share the technique I'd use to tone it down.

Bright & Brassy Composition Gold Metal

     Well, that's the point of this blogs title; all waxes are not created equal.  The first step to this process was to completely paint the lid.  I used a Krylon, satin black spray paint for this project.  They make a paint called Ultra-Flat which is a great one to use for picture  or mirror frames.  I should mention that this technique can also be done by using carved appliqués that you can find at craft stores.  Simply attach them to flat stock and that will eliminate the carving step in this process.  For me though, this gives me a great avenue to practice my carving.  After you've applied the spray paint it's best to wait 2-3 days to allow the paint to cure completely.
     Next up is selectively remove the paint to bring out the highlights of the carving.  This is a process that you can control if you realize a few things about waxes.  I'm familiar with a few different brands so that's what I can share with you.  Waxes have varying amounts and types of solvents in them, something you can tell strictly  by the smell.  The reason that's important to know is that the more solvent there is in the wax, the quicker you will rub off the paint and reveal the gold underneath.  Here's the basic premise:

  • More solvent = quicker removal of paint which can be a plus -- or a negative!  You may remove more of the paint than you wanted.
  • Less solvent = slower removal of paint which again, can be a plus or a negative.  It'll take you longer to reveal the gold below the paint layer but you'll have a bit more control.
     As far as waxes go, my favorite is made by Liberon and called Black Bison.  I love the smell and feel of it and is the one I use as a top coat on picture frames, boxes, and any furniture projects that I choose to wax.  It doesn't have a lot of solvent so it is quite slow at removing the paint layer.
     Another one that you may have seen since it's advertised quite a lot is Briwax.  It has a lot of solvent, you'll be able to smell it, and removes the paint layer extremely fast.  Because of that I don't like to use it.
     The last one I'm familiar with is Johnson's Paste Wax.  It's readily available and has a moderate amount of solvents and doesn't have a strong odor like the Briwax.  I should mention automotive paste waxes too because they are sometimes used on wood.  The only drawback with them is they usually contain silicon and they tend to leave a white residue in the pores of the wood.  I'd avoid them.  For this project I began by using the Johnson's to accelerate the paint removal process and then finished off with the Liberon.  The amount of time the paint has cured and the temperature/weather conditions will affect how the paint reacts to the wax too so, as you always hear -- test in an inconspicuous area first.
     I prefer to use cotton balls to work the wax onto the surface.  Because of the lack of structure to them they will get into the crooks and crannies of the carving.  Put a small amount of wax on the cotton ball and begin wiping the surface.  I'd advise that you put some wax on a scrap piece of wood rather than continually getting it out of the can with the cotton ball --- you'll contaminate the can with the paint.  At first you'll think nothing is happening but all of a sudden you'll feel some drag on the cotton ball.  That tells you the paint has become softened and is ready to come off!  Take your time and creatively remove what you want.  Obviously this is subjective but here's a photo sequence of this particular lid.

Initial wax application, notice dullness on lower left?


Drag on cotton ball & dullness means you should lighten up.

Remove as much of the black as you desire then


Buff entire lid.

     One of the disadvantages of course to black and waxed surfaces is that it will show any defects or blemishes but this is referred to as the patina and aging of the piece.  Tends to add to its appeal, makes it seem like a treasured heirloom object.  Like a gallery owner once told Diane as we were discussing her awards vs. sales: "the public votes with their checkbook".  I'll list this on my Etsy store tonight and see how the public votes!


Tuesday, October 2, 2012

Opened up an Etsy Store!


It's a Start

     Those of you who have been following my blog know that I recently had a showing of my original custom boxes.  The show had a very good turn-out and sales were good but now it's time to shamelessly attempt to market my work.  Something most of us artist/craftsman don't really care to do.   I had no problem doing that for Diane and rather enjoyed being the Artist Representative.  Big difference there was that it really wasn't personal.
     I've done some internet marketing with my website and taken a stab by using Custom Made but the results weren't the greatest.  It seems that unless you build furniture that is knock down and screwed together on site the shipping costs are prohibitive.  There is a very limited market for a small scale, one man custom furniture shop such as mine but I'll continue to work on finding ways to enter it during these trying economic.
   
 Here is the link to the Etsy store:

               http://www.etsy.com/shop/WoodworksbyJohn?ref=si_shop

     At this time I've only listed the boxes remaining from the show.  I plan to add some other items that are reasonably sized so that shipping isn't a huge concern.  If you enjoy your wine a project coming soon will be an apartment or condo sized wine and glasses cabinet.  I don't want this to sound like a commercial but if you get the time I'd appreciate it if you could check out the Etsy store.  I'm open for suggestions on lay-out, photography, pricing, or any other constructive comments you may have.  If you have anyone you think would be interested in the site it'd be great if you share the link with them.

................... jeez, I feel as if I should end this post by saying:

 "I'm John Eugster and I approve this message"