Showing posts with label Oil Gilding. Show all posts

Thursday, December 13, 2012

All Waxes Are Not Created Equal


Here is the finished project I began a week or so ago with the carved and gilded lid.

Finished Camellia Box

    At that point I'd left you with a lid that was brightly gilded with Dutch Gold and I promised to share the technique I'd use to tone it down.

Bright & Brassy Composition Gold Metal

     Well, that's the point of this blogs title; all waxes are not created equal.  The first step to this process was to completely paint the lid.  I used a Krylon, satin black spray paint for this project.  They make a paint called Ultra-Flat which is a great one to use for picture  or mirror frames.  I should mention that this technique can also be done by using carved appliqués that you can find at craft stores.  Simply attach them to flat stock and that will eliminate the carving step in this process.  For me though, this gives me a great avenue to practice my carving.  After you've applied the spray paint it's best to wait 2-3 days to allow the paint to cure completely.
     Next up is selectively remove the paint to bring out the highlights of the carving.  This is a process that you can control if you realize a few things about waxes.  I'm familiar with a few different brands so that's what I can share with you.  Waxes have varying amounts and types of solvents in them, something you can tell strictly  by the smell.  The reason that's important to know is that the more solvent there is in the wax, the quicker you will rub off the paint and reveal the gold underneath.  Here's the basic premise:

  • More solvent = quicker removal of paint which can be a plus -- or a negative!  You may remove more of the paint than you wanted.
  • Less solvent = slower removal of paint which again, can be a plus or a negative.  It'll take you longer to reveal the gold below the paint layer but you'll have a bit more control.
     As far as waxes go, my favorite is made by Liberon and called Black Bison.  I love the smell and feel of it and is the one I use as a top coat on picture frames, boxes, and any furniture projects that I choose to wax.  It doesn't have a lot of solvent so it is quite slow at removing the paint layer.
     Another one that you may have seen since it's advertised quite a lot is Briwax.  It has a lot of solvent, you'll be able to smell it, and removes the paint layer extremely fast.  Because of that I don't like to use it.
     The last one I'm familiar with is Johnson's Paste Wax.  It's readily available and has a moderate amount of solvents and doesn't have a strong odor like the Briwax.  I should mention automotive paste waxes too because they are sometimes used on wood.  The only drawback with them is they usually contain silicon and they tend to leave a white residue in the pores of the wood.  I'd avoid them.  For this project I began by using the Johnson's to accelerate the paint removal process and then finished off with the Liberon.  The amount of time the paint has cured and the temperature/weather conditions will affect how the paint reacts to the wax too so, as you always hear -- test in an inconspicuous area first.
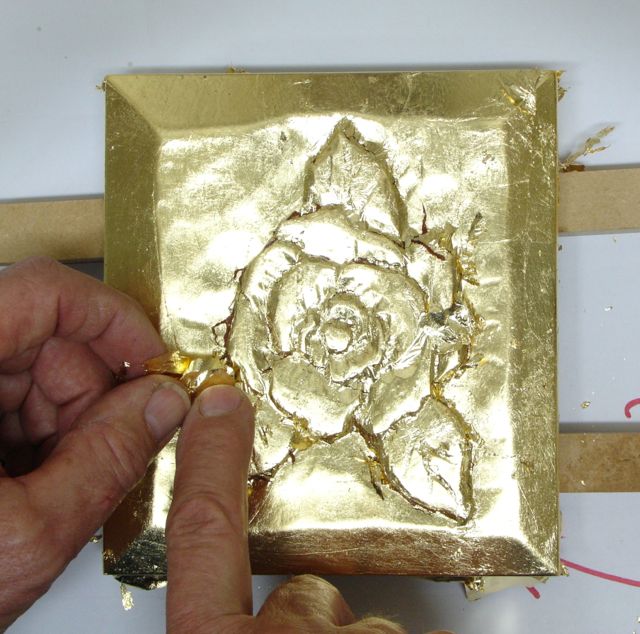
     I prefer to use cotton balls to work the wax onto the surface.  Because of the lack of structure to them they will get into the crooks and crannies of the carving.  Put a small amount of wax on the cotton ball and begin wiping the surface.  I'd advise that you put some wax on a scrap piece of wood rather than continually getting it out of the can with the cotton ball --- you'll contaminate the can with the paint.  At first you'll think nothing is happening but all of a sudden you'll feel some drag on the cotton ball.  That tells you the paint has become softened and is ready to come off!  Take your time and creatively remove what you want.  Obviously this is subjective but here's a photo sequence of this particular lid.

Initial wax application, notice dullness on lower left?


Drag on cotton ball & dullness means you should lighten up.

Remove as much of the black as you desire then


Buff entire lid.

     One of the disadvantages of course to black and waxed surfaces is that it will show any defects or blemishes but this is referred to as the patina and aging of the piece.  Tends to add to its appeal, makes it seem like a treasured heirloom object.  Like a gallery owner once told Diane as we were discussing her awards vs. sales: "the public votes with their checkbook".  I'll list this on my Etsy store tonight and see how the public votes!


Friday, December 7, 2012

Oil Gilding Tutorial / Brief but Informative


     In my desire to build my carving skills I enrolled in an on-line class taught by Mary May.  I had seen an episode of the Woodwrights Shop that featured her and enjoyed her style and delivery.  She has been written up in a number of woodworking magazines and has several YouTube videos as well.  When I first heard about these on-line instructional methods I must admit I was a bit skeptical.  That's probably  based on my own experience as a classroom teacher for 31 years!  In any case, I enrolled in the program a few months ago and at $10.00 per month I'm finding it well worth while.  Here's a LINK to her web site if you want to check it out.
     One of the on-line courses was one on carving a Camellia.  Her lessons are broken up into different phases and include a downloadable pattern and tool list.  Like many people, I prefer to have an end use for my practice work (used to hate practicing my trombone alone in a little practice room) and thought of a way to have my practices carvings be useful.  I decided that any carving that is "suitable for human consumption" could be used as a lid on boxes in my Etsy store.  Depending on the wood used I could leave it alone, stain it, or gild it.  In the case of the Camellia I chose to gild it since it was carved on Basswood.  Here it is in the beginning  stages.

Rattle-Can Clay and Quick Size
     Traditionally, after a picture frame or other piece that will be gilded is carved many coats of gesso are brushed on to completely fill in the grain of the wood and create a smooth surface to gild.  This is quite a complex process where powdered gesso is mixed with rabbit skin glue and water, then warmed, stirred, and strained through cheese cloth to remove any lumps.  Well that may be all fine and well and I've done quite a number of frames that way but a lid calls for a quicker and less labor intensive method.  Enter the spray can!  Rustoleum and Krylon both make a product that is designed to prime rusted metal.  Instead of using actual clays to prime the object you want to gild this can be substituted.  It will fill grain and small imperfections of the wood.  You can even use automotive primer/putty if needed.  I spray on several coats and let it dry, usually over-night.
     Next up is to use either a fine (400+ grit) sandpaper or steel wool to burnish the cured primer.  You will actually burnish it so the gold leaf will be quite shiny.  Now, before I forget; when we talk about oil gilding it's almost always done with what's referred to as composition metal or Dutch Gold -- not precious 18-23kt. which is accomplished by a process known as water gilding.  After the piece is burnished, blow or tack cloth off all traces of dust  and apply a very thin, even coat of quick size.  Depending on the brand, quick sizes usually have a working time of 1-3 hours.
     To know when your size is ready for gilding, use what I refer to as the knuckle test.  You rub your knuckle over the surface and it should kind of squeak as you drag it across.  Remember dragging your thumb over a desk when you were a kid?  That annoying sound it  made is what you're after.

The Knuckle Test
     To lay the composition leaf takes some experience and getting just the right feel for it.  It's best, especially when you first get started, to cut the sheets into several, small pieces that you can handle.  It took me some time to be able to lay a full sheets.  The great thing about Dutch gold is that you can handle it with your fingers if you have a very light touch.

First Sheet
     To lay the leaf I have a waxed piece of MDF that has rounded corners and edges.  This way the leaf will slip off easily.  Hold the MDF in one hand but let the leaf hang over the edge.  Use your other hand to gently tap the leaf onto the size to anchor it.  Now, slowly pull the MDF back and at the same time use the fingers of your other hand to tamp the leaf down.  Once it's made contact you can rub it down completely with your fingers.  The remainder of the piece is gildedvusing the same technique.

Remaining Sheets
     Work slowly and gently press the leaf down into the carvings' low areas.  You'll more than likely get cracks which are known as "faults", there's a number of them on the left of the flower.  Generally speaking, they are most common where the level of the carve changes.  What happens is the leaf bridges the high and low spots and then cracks as you tamp it down.  Not to worry!

Patching the Faults/Cracks
     As long as the quick size is still tacky you should be able to tamp a piece of leaf over the faults.  It's better to do that now than wait too long and try to add a small amount of size and patch that -- it almost always shows up.  Once all is covered I'll use a soft brush to remove any bits of leaf and follow this with a microfiber cloth to really press the leaf into the size.
     Let this all dry over-night.  For this one I plan to use a technique that, hopefully will interest you.  A gilded surface is rarely left bright and shiny.  You'll need to wait for my next blog to see what I plan to do with this one.  I know this was brief but feel free to contact me with any questions or details you'l like to know more about.