Tuesday, July 27, 2010

Publicity Helps

     Two really good things happened after the article about the Dovetail Chair appeared in the newspaper.  One was that I got a telephone call from a gentleman offering me some of his tools!  Without boring you with the details, basically he hasn't been able to use them for many years.  He's now retired and living in a condominium and wouldn't have the space to work anyway.  He was trained in Sweden and knew James Krenov.  If you're not familiar with him, Google his name as he was a great influence and educator here in the US.  Unfortunately he passed away not too long ago but his influence will last for a long time, he started the College of the Redwoods in Fort Bragg, CA which is a top notch woodworking institution.  In any case, I was given stewardship of several Swedish wooden planes, clamps, and a Stanley #4C.  I've already given some of it away to a woodworker I know that has the same philosophy towards the craft and using hand tools.  Really something -- a God thing I believe.  He told me he wanted the tools to go to someone who would use them so that's my mission.
     The other good thing is that I was contacted by a man who was wondering if I'd be interested in designing some bar stools for him.  Of course I was, we've met and I'm adding this to my list of projects.  As luck would have it I decided to take the prototype of the bar stool I designed for my own.  It was just about the perfect height, shape, and design and I probably could have sold it right then and there!  However, it's made of Poplar with a laminated Walnut back but not finished to the quality I'd let leave the shop, besides, he needs two of them.  We made some changes, it'll be made of Hard Maple to match his kitchen cabinets and island and have a laminated back and grid of Chakte Kok (aka Bloodwood).  Since two stools are needed I've been busy making the pattern for the legs and improving the lamination form for the back rest.  That's the kind of thing that takes an incredible amount of time.  It's probably taking 5 times more time to make the form as it will to laminate the backs.  There is a possibility of doing a set of chairs for him as well so it's worth it to make a quality form and not toss it like I did with the other.

The first thing I did was to make a pattern out of 1/4" MDF taking time to make the curve as smoothly as possible.  The screws used to attach this to a piece of 3/4" MDF will also mark the centers of the holes that will become pockets for the clamps.  You can see the plunge router with a bushing that I used to cut 4 pieces.  This will be a segmented, male/female form which I've found works the easiest.  I'll post more pictures as the work progresses.

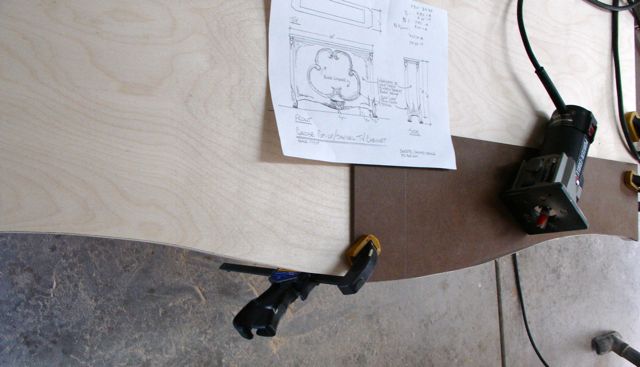
Luckily there isn't a huge rush on the bar stools.  The TV lift cabinet needs to be completed first and I should be getting the compo for that within the next two days.  Once that's all applied I can get it to the faux finisher and concentrate on the other work.  What other work? well, besides the stools there are two picture frames I have compo coming for and also a Walnut frame for a painting Diane has entered into a show coming up.

Friday, July 23, 2010

What Diane Says

     A long time ago, Diane and I were having a discussion about our work and how we're continually making decisions on how to complete the project.  This holds true whether you're creating a painting or building a piece of furniture.  Rather than allow it to frustrate us she said: "I just work until I get to a problem, solve it, and continue working until the next problem arrives!".  Really makes sense and I too have adopted that philosophy.
     One of the things required for the TV lift cabinet is that the top comes up out of the center of the cabinet and needs to have the smallest reveal possible.  Even though this piece is being painted I still want the grain of the wood to be continuous.  The piece that is movable must match the rest of the top exactly.  Here's how I solved this problem:

   By using a plunge router with an up spiral cutter, I was able to make successive passes to remove the center.  First, on a practice piece, I clamped a straight edge to guide the router by an made the cut.  I discovered that the bottom of the cut was the smoothest so what you're looking at here is the underside of the top.  I measured the distance from the cut to the straight edge, it was about 2 3/4".  I was able to use brads to temporarily nail the straight edges all around the required opening and cut out the center.  Then it was simply a matter of making successive cuts of about 1/8"+ until they separated.  To avoid any possibility of the piece shifting when the final cut was made I screwed a couple of temporary cleats to the bottom.
     All went well and now I'm just waiting for the glue to set on the pieces so they can be installed into the cabinet.  Hopefully the composition ornamentation will arrive early next week and I can get it applied and the cabinet to the finisher.

Thursday, July 22, 2010

Las Vegas RJ View

   For anyone interested that hasn't seen this, here's the article that appeared in the Review Journal on the 13th. of July.  Besides being fun to get the recognition, several friends that I'd lost touch with since retirement contacted me.  A gentleman contacted me to see if I'd be able to build him a set of bar stools that would be designed in a similar style -- we met and now I have a deposit!  I'll put those on the blog when I start construction.  Seem to be pretty busy which is great!  Here's the article and picture:

Tuesday, July 20, 2010

Nexus TV Lift

     It's been a while since I've posted on the cabinet but this morning (before the temp hits 110 again!) the lift system is in place and working.  It is without a doubt the quietest lift I've heard, here's a couple of pictures of it fully extended and part way on it's way down.  You can see the overall curve of the cabinet bottom from these pictures and the way they flow into the legs.  The next part of the process is to build the top and carefully cut out the opening.  I decided to center the television in the cabinet for two reasons, first of all the way the plan is drawn the center of the top raises up with the television.  The other reason is for better weight distribution.  I also talked to Bowmar, the company I'm getting the ornamentation from, and they said they should be shipping my order towards the end of the week.


Sunday, July 11, 2010

Fairing a Curve

   The bottom of the TV cabinet has a gentle, sweeping curvature which you can see in the drawing I was given from the interior designer.  This can present a problem because it is basically a free form curve that you need to lay out.  It's virtually impossible to draw both sides of the curve and have them be the same so it's best to only do half of it at a time.  I use a thin but flexible piece of wood to draw in the curve on a piece of masonite.  The first step is to sketch in the curve freehand, technical term for that is to "eyeball it".  The only critical place is where the curve runs into the legs at the sides and also the center point of the panel.  Once it's roughly sketched onto the pattern piece I'll use the flexible piece of wood and force it into the shape I'm after.  By placing a clamp where the curve begins I can then force it to go where I think it looks good.  Sometimes you'll find that you need more than two hands, thanks Diane!
  I like to use masonite or MDF for the pattern because after cutting it on the bandsaw it's easy to file and sand to a smooth, fair curve.  Before cutting it out on the panel you should draw it in and see if it really is what you're after.  In this case, my first pattern ended too abruptly in the center.  After modifying it to look better it was drawn onto the panel and cut out with a jig saw.  This was followed by clamping the pattern back on and carefully lining up the center point.  Using a small router with a pattern bit smoothed the curve exactly like the pattern.  In the picture the left side is done and the pattern set to cut the right side.  Once the piece is assembled there will be a composition ornament line of carving applied along the entire curve that will run into the legs.
  I'm ready to begin assembly but it's been so hot in the shop the glue would set up before I can get it all clamped.  Probably need to bring it inside the house to accomplish that.  The columns need to be detailed out by using tadpole sanders inside of the flutes and smoothing out the edge chamfers with a block plane.  Once that's done I can begin to install the lift mechanism.

Saturday, July 10, 2010

First Blog of TV Lift Cabinet

    I've purchased most of the materials for the TV lift cabinet I've been commissioned to build through Durette Candito Design studio.  This will be done in a French Provincial style; carved feet, scrolls, and  gilded details are a signature of that style.  I've found a new source (for me) of wood components by the name of Premier Wood Products.  They were easy to work with and I actually talked to a live person!  They sent me a PDF file of the foot I was interested in and it's proudly stamped: "Made in America", gotta like that!  Here's a picture of it as well as the column leg I created for this project:

As you can see, it's quite a nice scroll foot.  At this point I've laid out the curve for the bottom.  This particular job will be faux finished to replicate the period.  Since faux finishing is not in my bag of tricks, it will be done by the same painter who's been working on this project already.  You can see how the legs have a fluted detail that will be gilded. To soften the curve and give it a finished edge there will be composition material along the bottom.  I've ordered lots of composition material for this project and threw in a couple so I can make some frames for Diane.

I'll be using a Nexus brand, single post lift system.  I already have it and once the cabinet is assembled that will be put into place.  From my research, this is one of the quietest systems and being a single post it won't be prone to the racking problem I've heard that can occur with systems that utilize it.  One of the things that impressed me enough to use the Nexus brand is that it has a 5 year warranty, it's made in Phoenix, and when I called and emailed them they responded right away.  Customer service is so very important in this business, whether you're a small one man shop like me or a huge commercial concern it really makes a difference.