Wednesday, June 27, 2012

Dovetail Tutorial / Slanted Dovetail Box #2

     The second slanted dovetail box is made of Zebrawood and Walnut.  The length of the tails adds some difficulty to it but I think the final result is well worth the effort.  I can only echo what I said in an earlier post -- smaller does not equal easier!  This seems like a good time to do a tutorial on making dovetails.  There are many ways to do them and like most other woodworkers I've come up with a system that works well for me.  My preference is to cut tails first.

Stanley #140 Trick on Table Saw, not OSHA approved
     Stanley made a skewed plane that could be used to cut a rabbet of sorts on the end of your drawer or box sides.  The purpose of this trick is to create a shoulder that will sit against the front piece and give a clean intersection inside of the box or drawer.  A set of skewed planes was used and Lie-Nielsen makes their quality pair but they are pricey.  This way works too, keep in mind that tails wouldn't be this long in a typical drawer, you'd have 3/4" of blade showing at most.  I suppose you could use a tenoning jig for this as well but this way works, just be careful. Keep a firm grip on the wood and around your rip fence.
     After this step is complete it's time to lay out and cut the tails.

Cutting the Tails

          I generally cut both sides of the tail boards at one time, before transferring the tails to the pin board you should check them for square:

Checking Tails for Square
     If the sides aren't square you'll have a real hard time fitting them into the pin board.  In case you're wondering what the green tape is for I found it pretty confusing keeping track of which end is up so this was just a way to mark them.  After these edges are square it's time to remove the waste between the tails.

Removing Waste
     A small section is removed right on the scribed line to give the chisel back a flat surface.  I'll generally enlarge that until I'm half way through.  There's really no reason to remove all of the waste to the end of the board.  By leaving it, there is more support and less risk of a ragged cut when the tail board is flipped over to remove all of the waste.
     Now it's time to transfer the tails to the pin board.  To hold the beveled sides for this box it's necessary to either use the cut offs or make an angled jig like the one shown here:

Jig to Secure End Pieces
     Transferring is done with a marking knife and due to the length of these (1 1/2") I make about 2 additional cuts in the waste area to make removing it a bit easier.  In the above picture the pin board is almost complete but the jig is also used for the initial steps of chopping out the waste.  Notice the additional cuts made in the waste area.

Holding Jig

Holding Jig


     A complication with this box design is keeping everything square during glue up.  The small size makes it tricky to check for 90 degrees because the clamps take up a bit of room.  If the box wiggles when it's on a flat surface here's an easy method to make it sit flat.  I'm using decorative screw hole buttons for feet, these are glued on into 1/2" holes.

Decorative Screw Hole Feet
     Next you clamp a piece of 100 grit paper to a flat surface, I'm using the tablesaw and by putting weight on one end of the box and rubbing it back and forth on the sandpaper it's a quick process to remove any slight wiggling:

Taking Care of the Wiggle

     This box has just been oiled so it's on to the next one.  I'm planning 2 more of the Slanted Dovetail boxes as well as 2 more of the Urban Ranch design.  I have a beautiful piece of curly Maple that I want to showcase for some other boxes, right now I'm leaning towards a sliding top design similar to the style of boxes the Shakers made to hold candles.

Saturday, June 23, 2012

Extremely Labor Intensive

First Coat of Finish

     I'm not sure how others who work with wood feel about this but there are times on a project where I question the direction a project is going in.  Maybe I feel it's taking more time than I thought it would or should, maybe there's a set back or a failure, or what I envisioned in my mind is not what's happening.  Then, after working through all of those negative thoughts, I apply the first coat of finish and my vision is just as I'd anticipated.  Now all of the time spent has been justified and most of the problems are forgotten and lessons are learned.  Kind of like Marine Corps boot camp, only the good memories remain.
     The dark, reddish wood is called Macacauba and I just had a vision of brass being the perfect highlight for it.  Time consuming process because each finger was predrilled before the box was assembled to make sure they're all in the exact location.  Once the box was assembled the hole was enlarged ever so slightly so a brass screw could be inserted.  Well, brass is soft and Macacauba is hard so in my trial piece the screw twisted apart before it went in beyond the threaded part.  That added a step to the process:

 
Brass Screw Sequence (4 down; 48 to go!)
     I needed to cut the screw down first (right in picture) from the original 1" length (center in picture).  Then pre-drill each hole and drive the screw in until the threads were below the surface.  Next the head (left in picture) was cut off which ends up a little point at the bottom of the box.  This needs to be filed first, then sanded flush with the wood.  At the time I was wondering if it would be worth the effort but after seeing the first coat of finish I feel it was.  This process, just like so many others in woodworking, had it's finer points.  There was a fine line between the screw driven deep enough or else having the head twist off. That's what I feel makes this craft exciting, you're never really in control of what the wood wants to do. Just when you think you may have a technique figured out some bit of gnarly grain or tiny knot reacts in a way to let you know  you're really not in full control here.
     Now is time to start on the slanted dovetail series of boxes.  This style of boxes is predominately done by hand with dovetail saw and chisels.  The plan is to do one in Cherry & Leopardwood, one in Walnut & Zebrawood, and another in all Maple.  Looking forward to spending some quiet, relaxing work on those.

Friday, June 22, 2012

Whatever Was I Thinking?

     The morning started off with some pretty cool temperatures in the shop -- 83 degrees.  Because of that I figured if I got right on it at 7 am I could assemble the finger jointed boxes before the heat set in.  Here's the results:

75 % Isn't the Best Results!

     Unfortunately the Brazilian Satinwood box at the lower left isn't going to leave the shop.  During the assembly process, one of the Walnut pegs hit the groove the bottom sits in and went off by about an eighth of an inch.  That resulted in the box being out of square the same amount -- bummer.  I'll cut it apart to save the top piece and repurpose it for another box in the future.  I attempted planing the side of the lid but it's not up to my quality standards for leaving the shop.  The lid has some red coloration in it so hopefully I can design a different box for it.  Lots of work left to do on these though.
     For starters, each finger of the Macacauba boxes in the background will need to be pre-drilled for a brass screw.  Once that's done and the screw is inserted, the head of it will be cut off and then filed and sanded level with the sides for decorative accents.  Total of over 60 screws between the two boxes!  The Satinwood box will be somewhat easier, all that it needs is to have the Walnut pegs cut flush, planed, sanded, and finished.
     Here's what I started the morning with:

Yeah, What Was I Thinking??

..... and this is only for the Brazilian Satinwood boxes.  The insides of the each edge was taped to make any glue squeeze out easier to remove.  Almost wish I was an octopus for this assembly job.  The sequence was to apply glue to the fingers for the back and it's corresponding side.  These were assembled and the bottom was inserted into the groove.  Next, a brass pin and washer was put into place and the lid attached to the one side.  Now comes the fun part, gluing the remaining joints, fitting the hinge pin and the fingers in their proper place and all the time trying to be expedient so the glue won't set up in the heat before all's assembled.  I started with the smallest box and worked my way up.  For work like this I prefer to use Liquid Hide Glue as it allows more open time than other glues do.  Plus, it is reversible by soaking the joint with water.  I'd considered doing that for the box that went astray but decided not to. I've spent an incredible amount of time on these so far so if I want to make at least welfare wages on them it's not worth saving at this time.
     You may notice that the lids of the boxes have a different look than the rest of the box does.  That's because they are pretty much finished prior to assembly.  The way things go on this design with the hidden hinge pins once it's glued together that's it -- no more adjustments or fixes.  I'm pleased with how they feel when you open/shut them and hope they'll be a project someone will want.

Tuesday, June 19, 2012

It's All About the Wood

     The last couple of days have been hotter than it should be for this time of year here in Las Vegas.  Been putting away literally gallons of water in my attempt to keep thinking straight as I continue to work on the boxes.  The lidded finger joint boxes are turning into much more of a challenge than I thought!  I'll get into that in a bit but between times the Curly Cherry boxes have received their final coats of finish. Since in my work I want the wood to be the star take a look at these photos of the boxes:


     These are about 3" tall and 5" by 7". The handles and splines are made of African Mahogany.  It's difficult to see the chatoyance of the wood in pictures but take my word for it -- it's there!
     Sometimes when a project is in the planning stages, whether it's in your mind or carefully drafted out; everything is not as clear as you think.  The lidded boxes are proof of that.  I'll need to put the front, back, and side pieces together and  insert the bottom plus the lid and hinge pins at the same time!  Seemed pretty straight forward in my mind at the time but now that I've been working on it it's becoming somewhat daunting.  The lid will have to be pretty much pre-finished before assembly.  To add to the complexity of them, the Satinwood boxes will be pegged with Walnut dowels.  The Macacauba boxes will have a brass screw driven into each finger which will then need to have the head cut off and filed/sanded smooth for a decorative touch.  I've always liked Art Carpenter's saying that Time = Care.  He contrasted that to the Time = Money and these boxes are definitely not a huge money maker.  I've always enjoyed the process of woodwork so not complaining.  Just hope I can pull all of this off.
     The lids were fitted to each box, this was accomplished using the small scale shooting board and a block plane:

Shooting the Brazilian Satinwood Top to Size

     One thing I'm really thankful for is that since the boxes are so small it'll be no problem assembling them in the cool, air conditioned confines of the kitchen on the island.  The past few mornings it's been in the mid to upper 80's when I start around 7am and temps only go up from there.  Creates a serious problem for gluing up since the glue will set quickly.  When I student taught in San Bruno in we used radio frequencies to excite and warm the glue during assembly -- sure don't need that now!

Sunday, June 17, 2012

Smaller? Yes -- Easier?, No!

     As a furniture maker, an area where I can really let the wood "speak to me" is taking the time to match grain patterns and coloration of the wood.  This is one of those things that many people will look at and like but not necessarily know why one piece of furniture appeals to them more than another.  Since my preference is to keep the wood in it's natural color rather than staining it it's very important to my design ethic.  Here's a in progress photo of the series I'm calling the Lidded Box:

Lidded Box Series in Progress

     The challenge here was to keep all of the pieces and ends straight so the grain flows seamlessly around the box.  The reddish colored ones are made of Macacauba and will be joined with brass screws that will be cut off and filed even with the surface.  You can see the trial piece on the left.   The others are the Brazilian Satinwood.  They will be joined with Walnut pegs which will result in a nice contrast.  Here's a photo of that experiment:

Satinwood with Walnut Peg

     I'm looking forward to seeing how this will end up, I like it so far!  The next phase will be to fine tune the finger joints which are 1/2" wide.  This is one of those machine operations where if there was only one box to do it probably would have been just as fast to do it completely by hand but ..... with four boxes in this series making a jig and taking the time to set it up was well worth it.
     The real trick here was to keep the ends, front side, and back side organized.  After many trials the first step is to cut the side piece which is then used to set the proper spacing for the front/back:

Using the Side to set the Front
     After the first finger is cut the side piece can be set aside and the remaining joints can be cut:

Finishing the Fingers


     You may have noticed the chalk markings on the pieces of Macacauba, here is the goal:

All in a Row

     Not only did I need to keep the grain pattern in mind, especially with the Macacauba; it was important to make sure the right side faced out and the top and bottom were kept in their proper location.
     The next step was to cut the top finger from the front and back pieces.  This is to make room for the lid which will pivot on a brass pin.  This was cut oversized on the tablesaw and then planed to fit.  When I planed the Brazilian Satinwood the shavings were really cool!

Cool Shavings -- Brazilian Satinwood


     The final things accomplished before leaving the 98 degrees was to design a set up which would allow me to drill the holes in the center of each finger for the pegs and, of course; make the dowels from Walnut with the dowel plate.

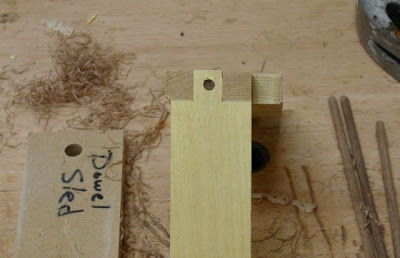
Making the Walnut pegs

     The Lie-Nielsen Dowel Plate is well worth its' cost, can't think of any other way to get accurately sized dowels out of any species needed.

Friday, June 15, 2012

Sneak Peek at Some Boxes & Wood Has Arrived

Collage of Boxes
   
     Here's a sneak peek at the boxes that are almost completed.  Durette, at the Urban Ranch General Store, asked for some photo's that she'll use to promote the show.  I thought it would add interest to give the boxes names to identify them.  The box in front is called Slanted Dovetails, on the left is Dominoes?, in the center is the Pagoda Box, and the right side one I'm calling VaVaVoom because of the lid design.  The box in the rear is named in honor of the Urban Ranch so (no duh!) it's been dubbed the Urban Ranch Box.  Rustic and somewhat distressed, the Knotty Pine and finger-jointed corners emulate the character of an old time general store.
     Late Wednesday afternoon I heard one of my favorite sounds, the diesel roar of that UPS truck!  Sure enough he had a 65 pound bundle of wood from Woodworkers Source in Phoenix.  I would have loved to go there and pick it out myself but they generally do a pretty good job at it.  Besides, the 5 hour, one way trip would have cost much more than the $25.00 shipping charge.  Here's what I have:

Wood for Boxes to Be

     From left to right  is Brazilian Satinwood, Quarter-sawn Sycamore, Leopardwood, Macacauba, and a small 8/4 piece of Zebrawood laying on the bench.  The only piece I'm less than thrilled with is the Sycamore, the quarter-sawn rays are really small.  I may experiment with dying it to see what happens then.
     Working on a series of boxes like this is almost, but not quite, like doing production work which I really dislike.  Since there will be 4-5 examples of a particular design I need to streamline the machine phase of the operation.  I don't plan to make two boxes of the exact same size but there will be variations on a theme; so to speak.
     For a few boxes that will feature pinned finger joints the first step was to laminate two narrow boards together to make a piece wide enough for the lid.  This was with the Macacauba, a wood I've never worked with or even knew about until I received a sale email!  Beautiful, check this out:

Macacauba being Jointed

     The coloration is stunning and since it has a very straight grain it promises to be a good match even though I can't book match the pieces.  I need to yield 1/2" thick panels for the tops of these boxes.
     While this is drying I began work on the ends and side pieces for the Slanted Dovetail series.  They start out with a piece of 8/4 stock that is planed down to around 1 5/8".  The noisy, dusty part of these is cutting the angles on the sides of them.  Probably would make a safety inspector cringe but here's the set-up:

Slanted Dovetail End Pieces

     By using the panel raising jig, a rip blade, and some clamps to secure the work; fifteen degree, angled cuts are made on the outside surface.  This is the Zebrawood and you can probably tell that there is an uncut sliver of wood where the two angles don't quite meet.  It's close enough though and gives me some leeway for the best part of this whole box -- planing the surfaces to reveal that beautiful grain.  At this point there are side blanks cut from Maple, Cherry, and the Zebrawood.  They'll be combined with contrasting wood for the box sides and lid.  From here on out it's mostly hand work cutting the dovetail joints.  The variation comes from where the dovetails are located on the angled ends which is the fun part.  The handwork phase of woodworking is the most exciting and challenging -- one slip and it's either firewood or yet another variation on the design!

Thursday, June 14, 2012

Taming the Curly Cherry

     An exciting, yet challenging part of woodworking is working with woods that may not want to be worked with!  I received a piece of Curly Cherry, along with another piece of Curly Maple, from a woodworker in Virginia.  I had shared plans and details with him about making the scrub  plane and this was his generous way of "paying it forward".  When wood  comes from anywhere there is humidity to our dry (2-5%) climate it will tend to react by twisting, cracking, and bowing.  A shipment of some exotics came from Woodworkers Source in Phoenix and since their climate is similar to ours usually it's not a problem but we'll see!
     The first step to taming the curly Cherry was to cut it into smaller pieces, that way it seems to be easier to locate the highs and lows of the wood with winding sticks:

Checking with Winding Sticks


     It's pretty obvious that the board has some issues.  Winding sticks are used by placing them on the ends of the board and then sighting  down it to see if corners are high or low.  You can also place the board on a flat surface, see where it rocks, and work it that way.  In the background is the Scrub Plane -- not a good choice for this piece of wood as I tore out a good sized chunk of it, curly grain is tough to work!  This called for a good old fashioned Cabinet Scraper:

This Works!
Which was followed with the smooth plane set with a very small mouth opening to tame this piece of Curly Maple:

Beautiful Isn't It?
     The board was then re-sawn so that it would yield two pieces approximately 1/2" thick.  These were surfaced and the sides of the box sized and cut.  There is a well known box maker by the name of Doug Stowe who shows a method of re-sawing and laying out your wood so the grain runs continuously around the box, this is a page from his book that shows that process:

Ready for Sizing

     The 45 degree sled I recently made works great for this process.  With a good, sharp blade the mitered ends need just a pass or two on the shooting board to make a perfect joint.

Using a Stop Block to Ensure Identical Pieces

 A box like this is a perfect one to use the packing tape clamping process on.  The size of these boxes is approximately 3" tall, 5" wide and 7" long so this method works fine.

Tape & Clamp

     In this instance I decided to add a strap clamp to the top, yes; I've been accused of over building things but what the heck!  The tape method is very easy and once the box was assembled placing the strap over the top was simple.  While they were drying I started work on the lids, these will have a pillowed effect which starts out by cutting a raised edge all around with a panel raising jig.

Pillowing the Lid

     Working the curly grain of this piece of Cherry is tricky at best.  Planing requires a very light cut since the grain reverses directions over and over.  Using a card scraper is possible but can still cause some tear out as you approach an edge or end of the piece.  On a piece like this, sanding is in order.
     Once the box was slotted for the miter keys I encountered the same problems blending those into the rest of the box.  To compound that I decided to use African Mahogany for them and the knob --- what was I thinking!

Cutting Miter Key Slots

     Even though this is a small sized project it takes every bit as much time as a larger one would.  Little details like the knob and cutting the mortise and tenon used on it take as much time as doing that joint on a table leg.  It may actually be more of a challenge since you're working with such a small piece of material and it's complicated trying to hold it while you work.  In any case, I'm enjoying the process and hope the show will be successful.  That would be a plus by giving me exposure to new, potential clients and keep the Urban Ranch General Store in the eye of the public.  With the current economic situation we can all use all the exposure we can get.


Monday, June 11, 2012

The Urban Ranch Box

     As I've been writing, I'm gearing up for a show of custom boxes that will be held at the Urban Ranch General Store here in Las Vegas.  If you're ever in the vicinity it's well worth a visit.  Durette has an incredible collection of hardware and an eclectic mix of home accessories in her studio.  Anyway, in honor  of her store I've created what I'm going to call the Urban Ranch Box.  I plan to make them in a small, medium, and large size but started with a size in the middle for the prototype.
     Since it's a ranch store it's only fitting that the wood used is what you may have actually found in an old general store.  I choose Knotty Pine for these and am using finger joints stay true to the character of that era.  You would have found Knotty Pine boxes for anything that needed to be shipped and the finger joint, aka box joint, would have been used for it's strength.
     Using a finger joint jig the pieces had all of the joinery cut and dados to house the top and bottom panels:

Ready for Assembly

     The green tape is put into the corner to minimize clean up of any excess glue inside of the box.  After the glue dried the next phase is to trim the fingers which is easily done with a low angle block plane:

Trimming the Fingers

     The only thing you need to keep in mind is that you can't drag the plane back over the edge of the box.  Even with it's low angle there's the possibility of chipping the grain.  Here too you can see the raised panel for the top of the box.
     Now came the hardest part of this project for me -- giving it some age!  If this was really a box from the General store era by now it would probably be pretty beat up so out came the weapons of destruction!

Beat Out Your Frustrations!


I must admit though it's kind of refreshing to whack away at the box and give it some age and patina.  Also difficult because I really admire and try to achieve a smooth, lustrous piece of wood.  Need to have some exceptions to the rule!
     To make a lidded box this is the easiest way.  The box is assembled with the top and bottom in place and then they are separated.  This can be done with either the bandsaw or the tablesaw with the tablesaw being my preferred tool to use.  The problem you can run into though is that as you're making the last cut, the kerf may close up and you end up with an uneven mating surface.  My technique is to make a full depth cut in the long sides of the box but then lower the blade so it only cuts a bit more than two thirds of the way through the short sides:

Close Up of Short Side Cut

By leaving that small amount of material on the short sides there's no risk of the lid and box closing in on itself leaving you with an uneven cut.  All that's left now is to take a flush cutting saw to complete it:

Separating Lid from Box

Which leaves you with a small piece of material that's easy to plane flush with the rest of the surface:

Just a bit of Planing

     At this point the brass hinges are soaking in some vinegar to age them, I've fashioned an interesting knob for the box and it's had it's first coat of Danish Oil.  This box will also have a sliding tray to double the storage room.

Saturday, June 9, 2012

Pure Gum Turpentine vs. Turpenoid

     Unless you have a bit of scientific curiosity and like to experiment with different ways to finish wood, this blog may not be too interesting to you!  You've been warned but I'd encourage you to read on because I found this quite fascinating.  I'm scheduled to do a show this September at the Urban Ranch General Store which will be of a series of boxes I'm currently working on.  These will be original designs and be made from unique and exotic woods, you know me; it's all about the wood!
     Virtually every piece of furniture I've ever built is finished with Danish Oil which is followed with a three part mixture that has pure gum turpentine as its' solvent.  This is hand sanded/rubbed onto it.  Generally, a minimum of 4-6 applications of this concoction leaves a finish that is beyond compare.  This finish was demonstrated by Art Espenet Carpenter at San Francisco State University when I was there in the mid 70's.  I've shared it with many woodworkers and the beauty of it is that it's very easy to repair and leaves a luster on the wood that can be felt and seen.
     So, where's the experiment you ask.  Well, I decided to try to substitute the pure gum turpentine with a synthetic, deodorized replacement called Turpenoid.  I did some research on the web and most of it was based on artists usage but I found some interesting tidbits of information.  The most interesting had to do with artists noticing that the residue in the bottom of their jar of Turpenoid used for cleaning brushes appeared stringy, something not seen with pure gum turpentine. The reason I wanted to try the Turpenoid was because of the odor of pure turpentine (which I happen to love!) but some may find objectionable.
     I noticed a few things about the Turpenoid, first of all it didn't dry as quickly and it felt "soft" to the touch.  No matter how well I rubbed it out, the next day there would be rougher areas and evidence of shiny  spots where the finish oozed out of the wood and dried on the surface.  Here's what I found:

Turpenoid vs. Turpentine

     I use a pie tin to hold the mixture.  The difference in color is because the tin on the right has been used for many, many years.  The Turpenoid has only been used for a couple of coats.  Pie tins are used since it's easy to saturate wet/dry sandpaper in them to rub into the finish.  See the difference?  Here's a closer look, this is the traditional finish with pure gum turpentine.  Note how it's dried:

Pure Gum Turpentine
   
    Compare that to the Turpenoid, see how it's dried -- very wrinkled appearance:

Turpenoid

     I'm not a scientist but there is a definite difference and I'm supposing it has to do with how the solvent evaporates which effects the finish left behind.  The last test was similar to the Pepsi challenge.  I re-did one of the box lids with a single coat of the pure gum mix and had Diane do a blind folded "feel test".  In every instance she confirmed that the pure gum turpentine finish felt smoother than the Turpenoid one.  Scientific or not it proved that Turpenoid is an inferior solvent and it will no longer be used on my work!
   

   Hope I didn't lose too many of my followers!


Thursday, June 7, 2012

Walnut Shelf Photo

Finished & Installed

    For those of you that were asking about the elliptical shelf I was commissioned to make here's a photo of it.  Looks pretty sharp if I do say so myself!  Started out as a couple of rough, 8/4 pieces of Walnut and this is what we ended up with.  Don't know who the designer was but personally I really like how the long, glass tile mimics the long sweep of the shelf.
    Here's yet another photo that shows how tall this glass tile, curved wall is.  When you figure an outlet is usually placed 12"-16" from the floor it makes it a pretty tall wall!  I believe it's the back of a staircase but not 100% sure.


IKEA's Got Nothing on Me -- 'cept $$$

     Adding furniture to Diane's studio has really gotten me to thinking about furniture pricing and quality as a whole.  Adam recently purchased a very nice dining table plus 6 chairs for under $400.00.  Sure he had to spend a small amount of time to assemble it but you know what?; it doesn't look half bad and after having dinner at his house last night, the set is functional and comfortable too.  To replicate it I couldn't even buy the materials!  I know that what I build is quality so maybe I have that over IKEA too.
     For Diane's studio she wanted white laminate so I used a Nevermar product on it.  I really liked working with the ultralight MDF as well.  This always strikes me as odd, when the forklift driver brought it over to the truck for loading I noticed that is was marked "Made in New Zealand".  I mean light or not, that's still a long way to ship material.  The driver said the other big supplier for that is in Chile!  Only thing that I can figure out is that American labor has priced itself out of the market or/and the EPA has put so many restrictions on manufacturing that it's no longer feasible or profitable to manufacture this in the USA.
     Okay, off the soapbox.  Here's a shot of the shelving cube in process:

IKEA Quality Plus

     The bottom is dado'd, glued, and nailed in as are the corner blocks and back.  To fit the back I used my somewhat antique Stanley #78 -- not sure that's what it was originally intended for but it sure made some long, continuous shavings!

Stanley # 78

     Since the entire studio has been repainted the doors looked pretty awful.  Decided that they too should get a fresh coat of paint.  I'm really liking the Earlex sprayer.  Can you imagine trying to brush all of the panels in the doors, not for me!

Spraying Again 

     What looks like half of a table is actually the legs for the shelving cube.  I figured that if these were bolted to the cube it would be plenty strong.  The overall length of the unit is 55", making the leg section a separate bolt on unit will alleviate any concern about the strength.  It seems to have been successful:


Shelving Cube and Work Station Installed

     As you can see all of the studio furniture has the same appearance, not matchy matchy like I hear the HGTV designers bad mouth.  This one has the power strip mounted to the side and each of the new units has a hole and grommet in the top to manage the cords.
     Diane has told me she really loves her new space and it's amazing how much more room it seems she has.  Putting all of the furniture against the walls really opened up her studio.  She's blogged it on her website as well, you can link to that here.