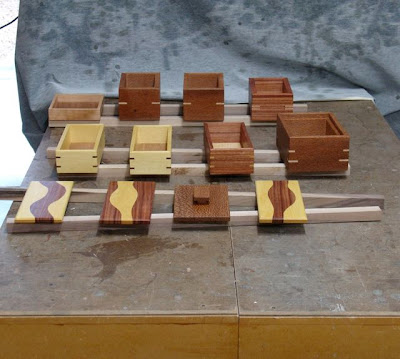
Well, Tuesday night the weatherman said we had a pretty good shot at rain today starting in the late morning. He also predicted that the lows could even be in the upper 70's and I was overjoyed! Finally the temps were going to be a bit lower so I could spray shellac on the boxes and lids that I have been waiting to do. Sure enough, at 6am the temps were just as he'd predicted and our usual blue and clear skies were cloudy and gray. Since I don't like to disturb the neighborhood before 7am or so I had breakfast, read the paper, and then headed out to the shop. After preparing the area on the side of the house with drop cloth, turntable, sawhorses, and boards to hold all of the parts I proceeded to tack cloth everything and prepare the air brush and shellac. Must admit, I was feeling good!!
I sprayed the bottoms of all the lids and the insides of the boxes and went back into the shop to work on hinge mortises. Things were going fine when I started hearing the pitter patter of our much needed rain. My first instinct was great, we're in a drought situation and really needed this --- then it hit me, I had 4 lids and 8 boxes out there with a fresh coat of shellac on them! I moved pretty fast in spite of the knee I that had just been shot with rooster juice to get them indoors. Probably muttered more than my share of "non-family friendly" words but it was a bit of panic. In spite of it all, I managed to get them dry and finished by the days end. Here they are inside with 5 coats of shellac on them:
 |
| Done & Drying |
 |
| Makeshift Spray Booth |
With the garage door open to the street I didn't want to leave the shop unattended so found plenty to do to keep busy. The one thing carried over from yesterdays jig making session was to fine tune the depth of the router and cut the mortises. Worked great! Since I was planning to spray the shellac I didn't want to make too much sawdust so this was done while I was waiting for the rain to evaporate from the boxes and lids.
 |
| Mortising the Large, Urban Ranch Box |
My procedure for the shellac is to spray 2 coats about 45 minutes apart and then let them dry for a few hours. Everything is then lightly sanded with some 400 grit paper and wiped of with a tack cloth prior to being resprayed. I generally put an additional 3 coats on them, spaced about 45 minutes apart. Once the shellac has cured at least a week it'll be rubbed out and waxed. Since I was in the process of finishing, I didn't want to raise any dust so it was time for that wonderful, quiet handwork.
The large Urban Ranch Box (pictured above) has a tray that is about two thirds the width of that box. Since it is pretty large I decided it would be a good one to divide in two. The first step is cutting the stopped dado to accept the divider. This will house the divider and is located above the groove for the bottom. Approximately 1/4" wide, 1/4" deep, and 3/4" tall.
 |
| Lay Out of Divider Dado |
The outside of it is outlined with a the 3/4" chisel for the sides, the 1/4" wide for the top and then removed with a 3/16 wide chisel. With the soft pine it was fairly easy going provided the chisels were as sharp as possible.
 |
| Stopped Dado |
Once they were both done it was time to make the divider piece. Like I mentioned, no power tools on this operation due to the shellacking process and it was great to work without the noise and dust of the power tools. Once the divider piece was cut to rough size, a marking gauge laid out the 1" size required.
 |
| Divider Ready for Planing |
 |
| Feather: Lower Left and Upper right |
Here's the tray almost ready for assembly. Still need to sand the inside and then it'll be ready to go. That'll be the first thing I'll do in the morning.
 |
| Mitered Tray with Stopped Dado Divider |


No comments:
Post a Comment