Saturday, September 22, 2012

Murphy's Law out to Get Me! Pull-Out Shelves


     After re-modeling the kitchen we're really happy with it but I decided that to bring it to the next level we really needed to add some pull-out shelves, especially under the stove top.  Maybe it's the knee surgeries catching up with me but I'm tired of kneeling down there to find the right lid for the pan I need.

Loaded and Ready

     I've never been accused of taking the easy way to complete a project and these were no exception.  Rather than use a common 3/4 extension, bottom mount slide I decided that 100 lb., full extension slides would be the best.  The sides of the pull-outs are made of European Steamed Birch with a MDF bottom fully supported in a dado.  The shelf is laminated with Formica left over from Diane's studio remodel.
     As I was planning out the work that Murphy and his law just kept trying to trip me up!  First off, I knew that I wanted the bottom to be housed in a full dado for strength.  Rather than make stopped dados that wouldn't show in the front and rear I used this joint:

Locking Joint to Hide Side Endgrain

     Since the tongue on the front piece is locked into the side there is little chance of separation.  No matter how carefully you set up your machines when you're making a matched joint like this there is always a bit of final fitting that's needed.  Ten to twelve passes with a hand plane brought it to the required size.

Front & Back Piece Fitted

     Now that the framework was complete the bottom pieces were fitted and laminated.  I really dislike the mess of laminate work as you trim it to fit so decided to try this method to contain some of the mess.

A Cleaner Way to Trim Formica

     Rather than using a hand held router I thought I'd try putting the router into the table.  I had made this fence that fits onto the rip fence.  It's hollow and you can see the shop vac hose attached to the end at the right, bottom corner of the picture.  Happy to say this worked just great.
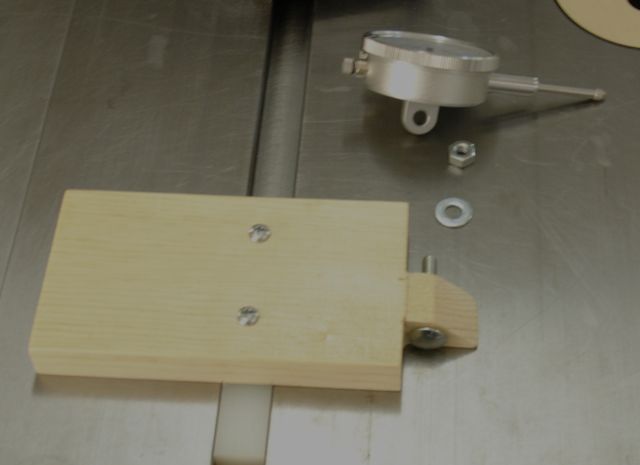
     To attach the runners to the cabinet I made a U-shaped channel that was attached behind the center stile.  Then separate ones were made for the sides.  My plan was to first attach the piece in the center, fit the pull-out to it and the corresponding side piece and then screw it all down.  Except for the Murphy's Law incidents it did work.  First up was to attach the slides to the correct parts.  Before I got too far on that I realized it would be pretty tight working up against the side of the cabinet so allowed just enough room for the drill chuck to clear.  I find that if you're doing more than one of a process it's worth the effort to make a quick jig so that every piece is located in exactly the same place.  One was made for the support side of the slides and another for locating the slide on the pull-out.


Attaching Slides to Pull Out

     I thought I was pretty clever making sure to mark the front of the pieces but somehow or another, Murphy's Law found me putting in one upside down and backswords!  Fixed that and started to install them.

Center U-Shaped Piece Installed

     That went as planned.  You can imagine what a hassle it can be working inside of a 24" cabinet with limited head room above and leg room outside of it.  Well, Murphy had to rear his ugly little head one more time!  The side pieces are 22" long and the slides are 20" long.  In the side piece I drilled three holes to attach them to the cabinet bottom.  What are the chances of one of those holes being in the exact location for a screw hole I used to attach the drawer slide?  Yeah, that's what I'd say too "slim to none".  Wrong!!, as I pre-drilled the front hole I noticed a little bit of resistance but was able to get past it.  Then, as the screw went in it stopped about two thirds of the way into the hole -- yep, the screw used to attach the slide was right in that hole.  This meant taking them back to the shop, pre-drilling another hole, taking out the offending screw and then putting it in its' new location. Not a real big deal but after the other little episodes I'm really glad it was in the first hole I used.  Anyway, here it is and you can see it's a good installation.  It's finished with a couple of coats of wipe on poly and wax. My wife thanks me and my knees and back will be forever grateful!

Nice, Even If I Do Say So Myself!

Saturday, September 15, 2012

My Official Show Announcement!


     Well, after working on and towards this moment it's time to share the official announcement for my box show.  If you click on this LINK , you'll be taken to the website of the Urban Ranch General Store.  From there you'll be able to get the full details.  The Urban Ranch General Store is the design studio of Durette Candito.  She, along with Suzanne Silk, will have her work displayed at the show as well.  Durette used to have her Interior Design studio on Main Street but those of you who are local will recall how a blast at the Nevada Power facility across from her devastated her studio along with the Attic and an Opportunity Village building.  Her new location features all of her fantastic hardware and finds from around the world.  She is a well known interior designer as well and I've been privileged to do some work for her in the past.

     For this show my intent was to design and build a collection of boxes that were artistic as well as useful.  There will be 29 boxes to choose from and, as is part of my design ethic, I wanted the wood to be the star.  Some of the boxes feature intricate joinery like this one made of Walnut and Canarywood.

Canary Tails

     Also included are some boxes that incorporate a carved and gilded top along with exotic wood.


The Gilded Cat

     Wood has always been a fascination to me.  The textures, colors, and grain patterns seem to be endless.  My earliest recollections of being attracted to it was in doctors offices where they had wood veneered doors.  To this day I see animals, mysterious figures, and all kinds of designs in the wood.


Splined Leopard
    I hope that many of you can find the time to see the show.  It's this Thursday from 5:00 to 8:00 and the address can be found on the link I gave at the beginning of this post.  I'm pretty excited, I'd get excited too every time Diane had a painting juried into a show and we'd go to the opening.  Now I have to add some nervousness to it because it's my first ever show!

Hope to see you there -- John


Thursday, September 13, 2012

How's this for a first ever Dovetail ??


     Check this out -- this is the very first dovetail ever cut by a student I just started with this morning.  The fit is good, the shoulders are square, and both pieces line up.


           Here's another view of it:


     There's only one slight bauble and that's on the right side of the tail.  That happened about 10 seconds before I mentioned you should pare from both sides of the tail and not off the edge when squaring up your initial cuts!
     We started work on dovetails around 8:45 and after explaining the theory behind it and some design considerations for sizing we started off doing practice cuts in some scrap.  It's enough of a challenge to follow a line and cut it square; for tails you also have to angle it inward as you cut.  Lots of little things to remember and try to control just for a cut about 3/4" long!  Add that to the fact he'd never even used hand tools and I think you too will be impressed.  Including the talking and practicing before we started the joint itself this represents roughly three hours work.
     He came prepared with what I'd consider premium quality tools --- Lie-Nielsons!  He had found someone selling their collection for less than they are new and these tools looked as if they hadn't been used much at all, quite the bargain.  Now one thing I always stress to my students is that a quality tool won't make a mediocre worker better but it will improve the quality of your work if you have the skills to back it up.  Let me put it this way, I played violin in the 4th. grade at the insistence of my Mom.  Give me a million dollar plus Stradivarius and it'll still sound like a cat that got its tail caught in the door!
     At this time he doesn't have a workbench to work on or enough space to put one anyway.  I showed him the bench on bench that I always use and that will more than likely be the first project we'll tackle.  It's small enough to place anywhere and move as needed.  When doing hand work you really need a reliable way to hold the wood, there's enough things going on that you don't want to worry about the wood moving on you.

Wednesday, September 12, 2012

Already a Refinement!


     You have probably heard about all the rain here in Las Vegas yesterday, actually made the national news!  Well, at this end of town things were under control but the dramatic spike in our humidity did its thing to wood -- mainly, expanded it the wood across the grain.  Usually that's not much of an issue here in the desert.


Still Looks the Same!

     The one part of the design I wasn't too sure about was the little Oak button that goes between the threaded lock and the beam.  It's purpose was provide a barrier of the brass rod to the Canarywood of the beam.  It was what I thought to be "the weakest link".  The humidity caused that to swell and resist tightening up.  I know that ivory was used for that in the past but there's a ban on that.  I thought of a button but ruled it out as too weak.  Then it hit me, I love using that ultra high molecular weight polyethylene when making sleds for the tablesaw.  Here's what I tried, first I cut a small piece on the chop saw to the approximate size of the Oak button I'd made.  This was then stuck to the UHMW with double back tape and by nibbling off the corners with a chisel it eventually became a rounded button.

From Square to ......

Round
     Put it in and the last minor adjustment was to file down a little bit of the brass so the beam is square to the holder part of the gauge.  Now it's even better than before and I really can't wait to use it tomorrow with my student that's learning the art of hand cut dovetails.


Tuesday, September 11, 2012

Making a Marking Gauge with a Hamilton Tools Blade


     I have to admit that I am really pleased with myself and how this project turned out.  Here's what it looks like, it's made of Canarywood and Chakte Kok:


Marking Gauge, My Design
     I was inspired after looking at the beautiful marking gauges made by Jeff Hamilton, here's a LINK to his website.  You'll see his are beautiful and of a different design than the traditional ones we're accustomed to seeing.  He offers a replacement blade which I used for my design.  I mentioned to him that I was eager to make my own and if he minds if I possibly incorporate some of his design in mine.  I like his reply; basically he said he gets quite a few orders for his gauges after someone orders the blade and discovers how much work is involved.  I can attest to that, this is not a quick project.
     The gauge I replaced was a typical Marples, in my case I've had this one for probably 25-30 years.

The Old and the New

     There really wasn't anything majorly wrong with it, age had made it sloppy but my main complaint with it was how it felt when you grip it to scribe a line.  That large, knurled knob is right under your finger as you wrap your hand around it.  Another drawback is that the fence doesn't have much surface area and can skew as you draw it against the wood.  You'll notice on my version that the knob is at the bottom of the gauge, now the hand can wrap securely around the entire piece as you scribe your line.  You can see what I mean in these pictures.  By the way, the blade from Hamilton Tools is perfect, forget making one out of a piece of bandsaw blade or whatever -- this slices wonderfully both with and across the grain.


     See how easily my hand wraps completely and securely around this gauge?


      Let me go through the procedure I went through to create this tool.  I used the Marples gauge as a guide and it was about 1 1/8" thick.  I had some Canarywood left over from a dining table and chairs project that was thick enough.  The first step was to cut the required size and plane the edge square.  I decided the best way to get the hole for the beam was to cut the two pieces, make the hole, and then assemble them together.


     To create the hole for the beam I used a dovetail saw, chisels, and a small router plane.

Preparation for the Beam

     That was just the start!  I knew I wanted a threaded knob to secure the beam in place.  Another option would have been a wedge but I like the idea of being able to tighten it without trying to hold it in place while pushing the opposite direction with the wedge.  A 1/4" x 20 insert is used for that, however; that meant a series of holes needed to be drilled.  First off was a 1/8" hole drilled completely through the block, this is like a pilot hole so all of the holes to remain aligned.

Pilot Hole
     Rather than have the screw threads pushing directly into the beam and chewing it up a 1/2" diameter hole was next.  This is where a piece of Oak dowel about 1/4" thick goes, it will be between the end of the threaded knob and the beam.

1/2" Hole for Oak Button

     Next up was an 11/32" hole which is the right size for the threaded insert.

Hole for Threaded Insert

     A little bit of bees wax helps take the stresses off of me and the wood -- don't want to hear that cracking sound after all the work so far!

Insert in Place

     Gorilla glue has been my choice for laminating panels together for a long time.  I really like how easy it is to clean up the foam when it's cured and it never seems to show when the piece is oiled.  A cut off from the beam was wrapped with wax paper and used to help align the two pieces.


Piece Re-Assembled

     While that was drying it was time to start on the knob.  The threaded 1/4" brass rod was epoxied into a piece of Chakte Kok.  I pinned it with an 1/8" brass rod before the epoxy set up to securely keep the knob in place.  Kind of free-formed it to where it felt good to my fingers.

Knob Beginnings


      My first setback was that when I placed the first beam made of Cherry into the hole the hole was too big!  Caused in part by some slight mis-alignment issues but really a blessing in disguise since I wasn't satisfied with the method I used to attach the Hamilton blade to the beam.  Here you can see the initial shaping of the knob as well as the Cherry beam.  I like the final version made out of Chakte Kok much better.


     Let me explain the problem with attaching the blade to the beam.  The hole is sized for a #6/32 machine screw.  The first way I did this was to cut a groove in the end of the beam for the blade to nest in.  The hole was drilled through for the blade screw and finally a 3/8" hole was cut partway into the beam.  Let me illustrate that:

Securing the Blade: Attempt One

     The nut was coated with a black sharpie so that it transferred to the plug.  Next I cut out that part of the plug and glued it into the hole and over the nut.  This worked but only once!  After that the nut slipped and the blade wouldn't tighten securely.  Okay, back to the drawing board.  On the Hamilton gauge there is a piece of brass pinned to the end of the beam but since I didn't have any brass looked around the shop to see what I could do without copying his design -- I had some aluminum!

Securing the Blade:  This Worked

     Here's my solution, after drilling and tapping the aluminum it was cut to a size that fits into a 3/8" hole drilled completely through the beam.  Next, two Cherry plugs were cut to approximate size, the aluminum piece was inserted, the brass machine screw held it in position, and the plugs were glued in from both sides capturing the piece of aluminum between them.
     Final steps were to cut a recess for the .064 piece of brass which is screwed and epoxied to the Canarywood.  The recess was cut oversize with the tablesaw and then final sized with a rabbet block plane.  The brass extends into the hole ever so slightly which should help reduce the wear inside the hole itself.  I used a jig saw for the initial shaping of the brass followed by files and polishing.  A couple of coats of shellac and wax finishes it off and I must say -- I'm a happy camper!  Can't wait to actually put this to use.  I have a student later this week learning how to do dovetails so this will be put to the test.

Parts for the Marking Gauge


Thursday, September 6, 2012

Table Saw Tune Up


     I mentioned in my last post that it seems to be time to check the alignment of the blade to the table and the fence to the blade.  I purchased an inexpensive dial indicator from Harbor Freight and made  a holder for it to ride in the miter gauge slot.  This is uncharted territory for me, I really hadn't used these type of measuring tools since my hot rod days and machine shop part of my industrial arts education -- suffice to say; that's a long ways back!

Step One:  Table Aligned with Blade

     I was a bit apprehensive on this step knowing that it could be a real pain in the !@#%#$^!#.  Even though the runner for the holding jig fit quite snugly I could get a variation in the reading of +/- .006 by applying pressure to one side or just leaving it alone and sliding it in the miter gauge slot.  To compensate for that I applied pressure towards the same side to keep the reading accurate.  You can't see it in the picture but I placed a black dot on the blade with a sharpie, set the dial indicator right on it at the front of the blade, applied pressure to the holder and zeroed out the dial.  It was interesting to note that if I left the blade stationary and slid the indicator along it there was a variation in the measurement as I moved from the front to the back of the blade. The important measurement though was to zero out the indicator on the mark made at the front of the blade and then rotate that mark to the rear.  There was only .001 difference in those readings so thankfully, I don't need to align the table.  That tells me a lot about the quality of this Jet Cabinet Saw, I've had it for many years and do move it around by grabbing on to the table so I honestly anticipated having to re-align it.
     The next step was to align the fence with the blade and also re-adjust it to be square to the table top. This is a bit easier, just takes some fiddling around with the set screws that lock against the rail.  I found it interesting that after adjusting it so the reading was exactly the same at the front and rear of the fence there was a measurable variation of +/- .010 while sliding the indicator the length of the slot.  No doubt that's caused by uneven wear on the side of the fence but no problem whatsoever.

Step Two:  Square Fence to Table and Align to Blade

     The final step to this process was to adjust the splitter so that it was in line with the blade.  That's the one part I'm not overly happy with, it is too easy to knock it out of kilter with a board or something.  It'll do for now but if I ever get that dull moment I'll mess around with that!

Tuesday, September 4, 2012

Just Like It Never Happened (almost)


Cleaned up and Ready for the Next Project


     There's a company that advertises on TV, they're a disaster clean-up firm and their ad states: Just Like It Never Happened  It seemed appropriate to use their slogan for this blog.  Whenever I'm working on a project things get to be a little disorganized which I really don't like.  Hate wasting time trying to find a tool because I was too involved to put it away in the proper place.  You end up tripping over bits and pieces, vacuum hose, extension cord, etc. and it really ruins the work atmosphere.  That's why years ago I began the habit of cleaning up the shop after every project so things were organized and ready to go on the next one.  This picture is the results of that effort this morning.  I'm donating a bunch of usable pieces of Walnut to a school and gave my neighbor a good sized box of firewood to boot.  Now I can move around without tripping and find whatever I need -- good feeling!
     I've wrapped up the final boxes for the show and begun to catalog them.  Diane has used her computer savvy to help me format a page for the labels and price tags.  This morning, before the sun hit the west side of the house I applied shellac to the last three boxes:

Final Shellac

     The box on top is the last of the dovetailed ones and since it's made of Walnut and Canarywood I've decided to call it Canary Tails.  The lid for it is in the foreground and then there are two more gilded lids that go to the Curly Maple boxes behind them.  After the shellac has cured for a week or so I'll rub them out and they'll be set for the show on the 20th. of this month.  Seems like I've been working on these for quite a while and I guess that's true!  Really looking forward to the show, I'll post the announcement next week for all of the details.
     One thing I've been noticing while working on the tablesaw is that I get some burning  on occasion when ripping.  It could be the blade is somewhat dull after all of the work I've been doing with exotic woods but I'm inclined to think that after all these years, the top has moved a bit so the blade is no longer in line and square to the table.  It's entirely possible since I move the saw around and all of that is done by grabbing on to the top.  If my memory serves me correctly there are only four bolts securing it, the hard part is checking the alignment.  In the past I've been able to use feeler gauges and get the rip fence parallel to the blade but have never messed with the tabletop alignment.  There are several systems that you can buy that cost in the $100.00 plus range and my pockets just aren't that deep!  As with most research these days, the internet was consulted and I found lots of different methods and suggestions.  What I came up with is pictured here.

Harbor Freight, Pine, and a Bolt

     At first I purchased a dial indicator with an arm and magnetic base for about $45.00.  Just couldn't get it to adjust and hold its' position to check the arbor run out.  Besides, to check whether or not the blade is parallel to the table and also that the rip fence is parallel to the miter gauge slot you need to have a way for the dial indicator to travel in the slot.  I made this sled out of a piece of pine and then drilled/tapped a piece of UHMW Polyethylene to attach it to.  Here's a close up view:

Sled Close Up
        The carriage bolt is bedded in the pine so that's secure.  The purpose of the slant is to allow the indicator to tilt when the throat plate is removed and get as close to the center of the arbor as possible.  Have I used it yet?, nope; it's too hot in the shop right now and I know that making these fine adjustments can be trying so I'll wait until I'm well rested and the temperature is lower.  Hope it works but I'll keep you posted.