The mortise and tenon joint is without question, one of the strongest traditional joints used in furniture construction. This is especially true where you need to make a right angled joint where the long grain of one board is running 90 degrees to the other. These Walnut table bases are a prime example of that. I may have mentioned that the client I'm making these for is the son of my first principal here in Las Vegas where I began my teaching career in 1977. At that time, we were either called woodshop or industrial arts. I taught my junior high school students how to make a mortise and tenon joint completely by hand with auger bits, chisels, and back saws. I reflected how my methods have changed through the years and I was able to dedicate my earnings towards some machinery. The position I take now is that the machines are my "apprentices" that perform the grunt work and I'm the craftsman that completes the task by hand -- works for me!
Here is the joint, ready for assembly. Since there are a total of 24 of these for the entire project I'm happy to have the dedicated hollow chisel mortiser to cut all of them. The stone for these tables are some pretty heavy pieces of Travertine. The apron is a bit over 4" wide and, as you can see, the mortise goes the entire width. This is to control any hint of twisting from the apron. The tenon is haunched at top and bottom. Whenever possible I'll use the measurement of a tool as the basis for the haunched area, in this instance I used width of my combination square to determine how long the haunch would be. I'll show you later on why that's beneficial.
 |
| The Final Joint |
A dado head on the table saw was used to cut the tenons. The length of the aprons makes using a tenoning jig on the tablesaw difficult. The first step was to screw a fence to the miter gauge. And yes, that is a gimlet. Why break out a drill when a simple tool will do the job as well and quicker.
 |
| Attaching Fence to Miter Gauge |
Then, a stop block was attached to that fence and carefully adjusted for the exact tenon length but slightly oversize to allow for final fitting of the cheeks:
 |
| Tenon Stop Block |
Whenever I do machine set-ups my habit has been to use a piece of MDF to adjust the blade height and stop block setting. Much easier to replace a cheap piece of MDF then to go back and machine another piece of Walnut that costs close to $7.50 a board foot.
 |
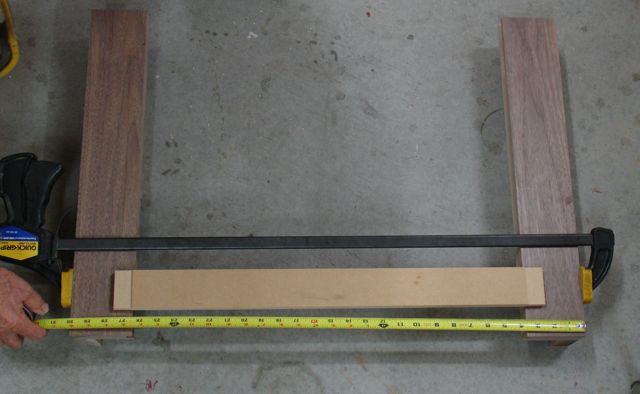
| Exactly 30", Just What I Needed! |
Once the tenons were cut on both ends of the aprons it was time to decide which piece goes where. This is where the grain and color patterns are arranged in such a way that they will flow and be pleasing to the eye. As you get into the joinery and hand work it's really easy to mix parts up. Just as I did earlier on the legs, machinists stamps are used to identify the mating joint parts.
 |
| End Table Parts Being Identified |
This is how my bench is set up for doing the next phase, the hand work that is quiet and enjoyable!
 |
| Left to Right: Apron - Bench Hook & Rabbet Plane- Leg Assembly |
It only took two cuts with the backsaw to remind my that this work is much easier when it is elevated so out came my bench on bench:
 |
| Easier on the Back! |
Whether you're young or older like me, bending over the bench vise and cutting down low is pretty hard on the back. Seems like it takes me forever to straighten up again. I made this bench years ago and it's perfect for hand work like carving, sawing joints, chopping dovetails, etc. Matter of fact, I'm scheduled to teach a class on making one of these next month at the
WoodItIs school here in North Las Vegas.
Now the hand work can begin. First up is laying out the depth of the haunch, I use a spacer that is as thick as the haunch is deep:
 |
| Haunch Lay-out |
Next is the width of that haunch. Remember I used the width of a combination square to determine that? By simply lining it up with the outer edge of the tenon it's easy to mark off:
 |
| Width of Tenon |
The tenon is cut to size:
 |
| Cutting Haunch |
Then a rabbet block plane is used to trim the cheeks, shoulders, and also chamfer the ends:
 |
| Final Sizing to Fit Mortise |
Now that all of the joinery is completed the next step will be to add the piece to the inside of each leg to create that triangular, beefier appearance.


No comments:
Post a Comment