Well, once again a project I'm working on has a manufactured, woven cane element. I really like to use this for doors and shelves. I know if I did it often enough I could get closer to that all elusive perfection but will stand by the saying that goes something like this: "the beauty of an item crafted by hand are its inconsistencies and variations." Here's what I ended up with at the end of the day.
 |
| Trimming on Schedule for Tomorrow |
I love the look of this weave. I buy this and other chair caning supplies from
Franks Cane and Rush who's located in Huntington Beach, CA. His website gives lots of information and he'll personally answer questions either by phone or email. This particular weave is actually made out of paper! Just as so many projects we take on, one slip up here can negate many hours of work.
If you've been following the progress of this table you may recall that the shelf had to be oiled and finished first
and then the groove for the spline is cut. This is so there is raw wood for the glue to adhere the spline to. The spline groove is about 3/4" from the opening so using a pattern, router with a guide collar, plus the 3/16" bit was the way to go. The question was how to hold the pattern in place? Here's my solution:
 |
| Spline Pattern, Bottom View |
To guide the router I used a 1/4" piece of MDF. Then I cut a piece of 3/4" MDF and screwed it together being careful to line it up square and maintain equal spacing all around. To hold it securely a scrap piece of wood was screwed to the bottom and the tension holds everything in place. All that remained was to be very careful as I guided the router around to maintain contact with the pattern. This was especially tricky going around the corners but doable as you can see here:
 |
| Right Side Done, Left One to Go! |
Boy, routers sure throw out a lot of dust and mess but that was by far the easiest way to accomplish this procedure. After squaring up the corners with a chisel the spline needed to be cut to fit. That threw out another challenge. The spline is pretty small and tapered. That makes it kind of tricky to hold square as you cut the mitered ends. Again, necessity being the mother of invention I came up with this little jig that helped immensely. It's nothing more than the scrap of wood I used to set the router to its 5/16" depth. After cutting a 45 on each side to guide the cut it was simple to use.
 |
| Impromptu Spline Miter Jig |
By putting it against a bench stop it was quick to cut with a Japanese razor saw. Marking the inner and outer corners in the frame was easier than trying to measure and draw mitered lines on the rounded tops of the spline.
 |
| Marking Corners |
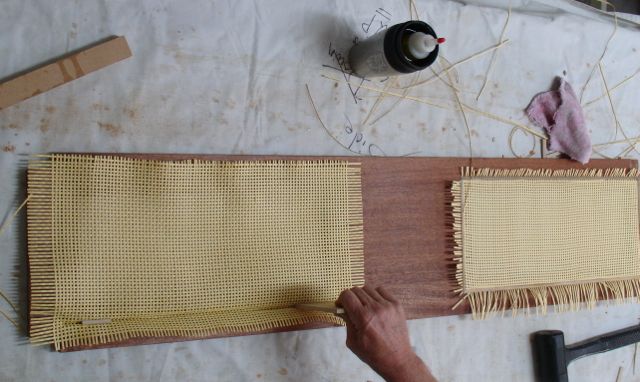
Finally ready to start the caning process. This being a paper based cane, all that was needed is about 5 minutes of soaking. The directions say to use wedges to secure the cane in the grooves as you install it but I've added another little trick. By taking a piece of MDF and planing a rounded taper on one side of it I'm able to push a wider section of cane into the groove at a time. I'll use a small piece of the actual spline to hold it in position as needed after forcing the wet cane material part way into the groove. When I used a small wedge I found it too easy to distort the weave.
 |
| MDF Installer Tool |
The MDF piece was a scrap about 5" long, you can see it in my hand. At the left of the cane you may notice a small piece of spline used to secure the cane. By the way, you should always use a water soluble glue for this process and I prefer using
Old Brown Glue which is a liquid hide product. That's what you see in my coffee mug! Liquid hide needs to be heated to around 120-140 degrees so filling the mug with hot tap water does the trick and the insulation keeps the temperature at the right level.
Next up is filling the groove with the glue and pounding in the spline:
 |
| Spline Installation |
Since I'm pretty much self taught I can only tell you what works for me. Once I've figured out where the spline will go I remove any excess cane beyond that. You can see it's done on the side and top. The longest sides are done first followed by the short ones. Seems like it's inevitable but sometimes you'll need to trim the spline in the corners. Don't know if that's because the moisture changes the length but if you undercut the miter it'll go together neater. As I said at the beginning of this blog, If I did this a lot I'd definitely get closer to that elusive perfection.


No comments:
Post a Comment